1. Úvod
This manual provides essential instructions for the safe and effective use of your PHIXTON PH2401 Rechargeable LED Flashlight. Please read this manual thoroughly before operating the device and retain it for future reference. The PHIXTON PH2401 is designed for various applications including camping, hiking, emergency situations, and general illumination, featuring high brightness, adjustable focus, and USB-C charging capabilities.
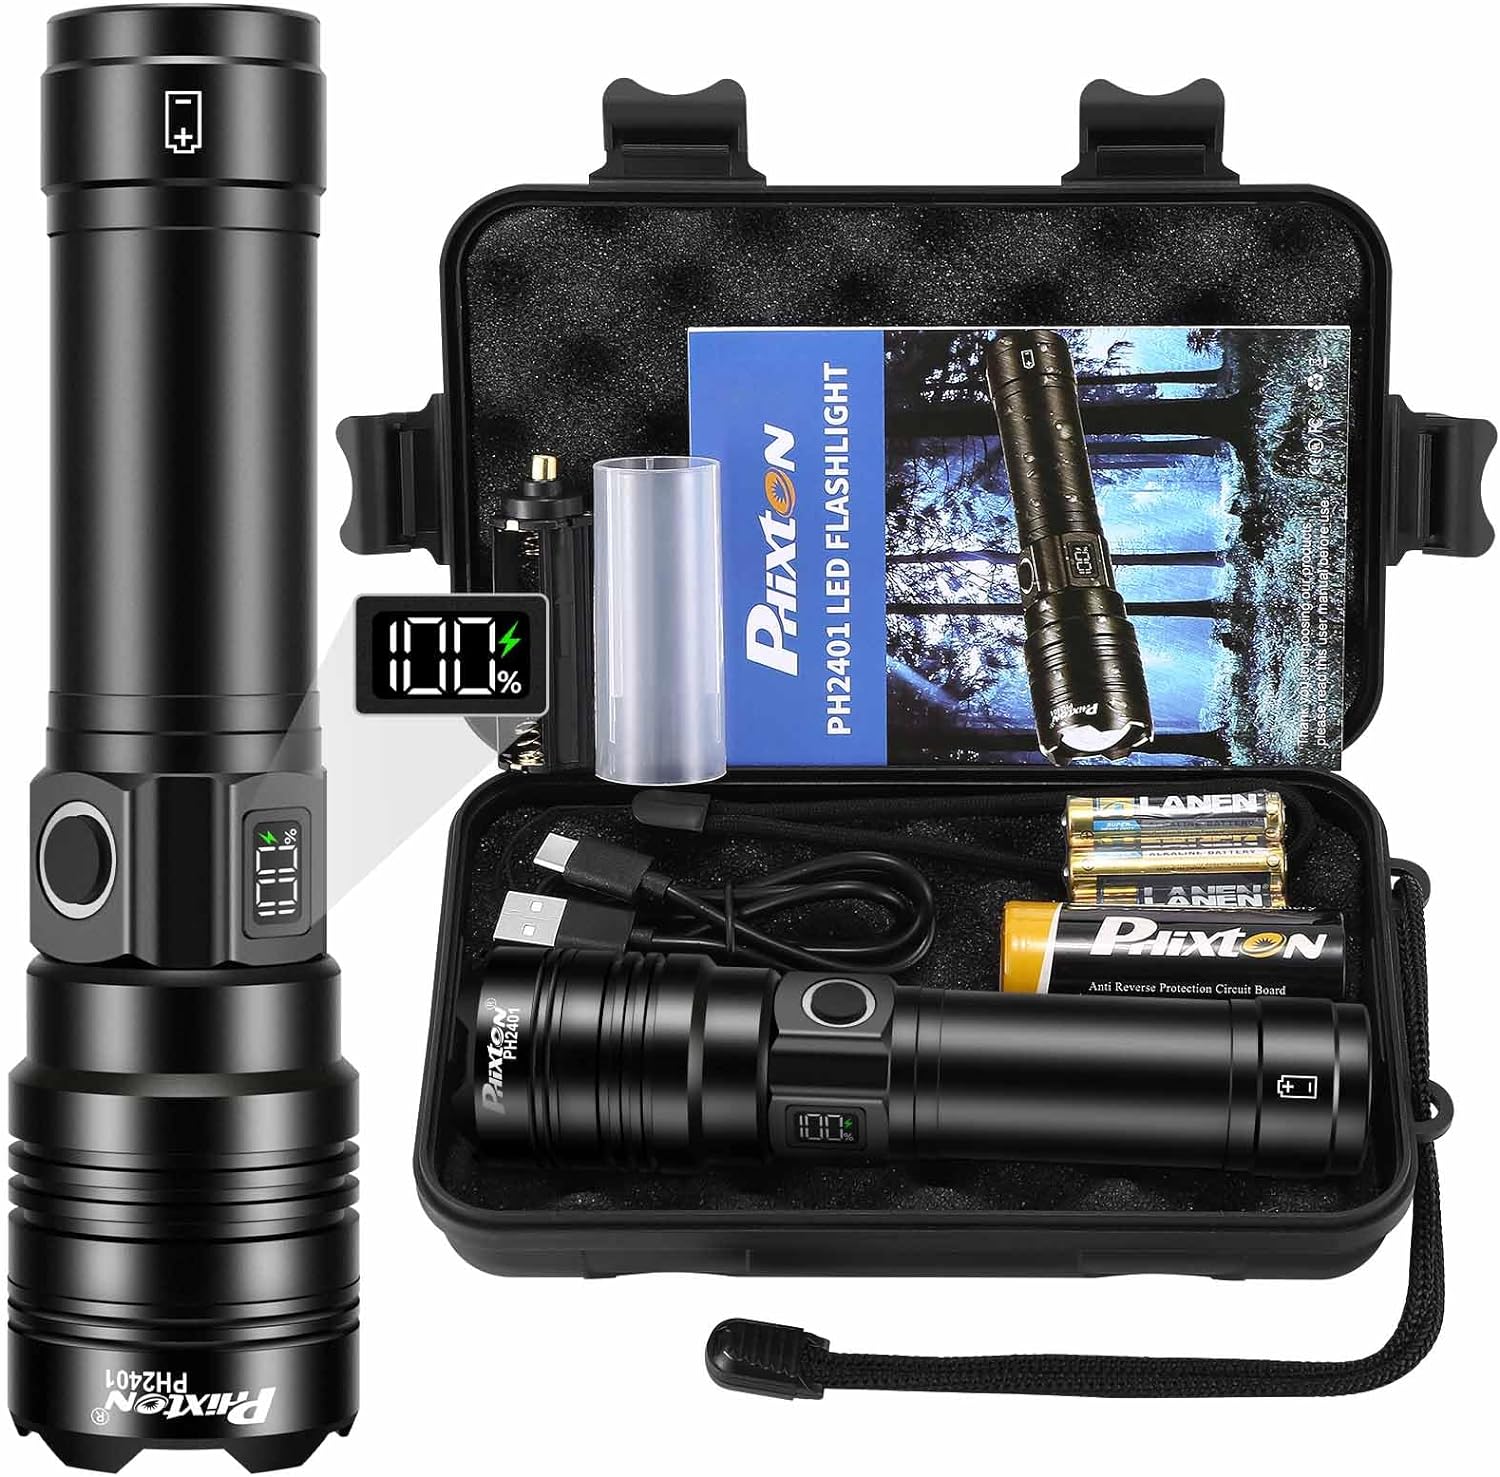
Image 1.1: PHIXTON PH2401 Flashlight and Included Accessories.
2. Bezpečnostní informace
- Do not look directly into the LED light when it is active, as it can cause temporary vision impairment or eye damage.
- Uchovávejte svítilnu mimo dosah dětí.
- Use only the specified rechargeable battery or AAA batteries with the provided adapter.
- Nepokoušejte se svítilnu rozebírat ani upravovat, mohlo by dojít ke ztrátě záruky a k ohrožení bezpečnosti.
- Nevystavujte svítilnu extrémním teplotám nebo přímému slunečnímu záření po delší dobu.
- Ensure the USB port cover is securely closed when not in use to maintain water resistance.
- Zlikvidujte baterie v souladu s místními předpisy.
3. Obsah balení
Ověřte, zda jsou v balení přítomny všechny položky:
- 1x PHIXTON PH2401 Rechargeable LED Flashlight
- 1x dobíjecí baterie 6000 mAh
- 3x AAA alkalické baterie
- 1x AAA Battery Holster
- 1x nabíjecí kabel USB-C
- 1x Gift Box / Protective Case
- 1x Řemínek na zápěstí

Obrázek 3.1: Obsah balení.
4. Komponenty produktu
Familiarize yourself with the different parts of your PHIXTON PH2401 flashlight:

Obrázek 4.1: Rozložený View of Flashlight Components.
- LED: Světelná dioda, primární zdroj světla.
- Skleněná čočka: Protects the LED and helps focus the beam.
- Zoomovatelný design: Allows adjustment between floodlight and spotlight.
- Hard Body: Durable aviation-grade aluminum alloy casing.
- Vypínač: Ovládá režimy napájení a osvětlení.
- LCD Power Indicator: Zobrazuje zbývající procenta baterietage.
- USB-C Charging Interface: Input port for charging the flashlight.
- USB-A Discharging Interface: Output port for using the flashlight as a power bank.
- Trubice baterie: Houses the rechargeable battery or AAA battery holster.
- AAA Battery Holster: Adapter for using AAA batteries.
- Dobíjecí baterie: Primary power source (6000mAh).
- Tail Cover: Zajišťuje přihrádku na baterii.
- Poutko na zápěstí: Pro bezpečnou manipulaci.
5. Nastavení
5.1 Instalace baterie
- Odšroubujte zadní kryt svítilny.
- For Rechargeable Battery: Insert the included 6000mAh rechargeable battery with the positive (+) end facing towards the flashlight head. Ensure any protective plastic film is removed from the battery before insertion.
- Pro AAA baterie: Place three AAA alkaline batteries into the provided AAA battery holster, observing correct polarity. Insert the holster into the flashlight with the positive (+) end facing towards the flashlight head.
- Screw the tail cover back on securely.
5.2 Počáteční nabíjení
Před prvním použitím se doporučuje dobíjecí baterii plně nabít.
- Locate the USB-C charging interface on the flashlight body.
- Otevřete ochranný gumový kryt.
- Connect the included USB-C cable to the flashlight's USB-C port and the other end to a USB power source (e.g., wall adapter, computer, power bank).
- The LCD power indicator will show the charging progress. It typically takes 2-3 hours for a full charge.
- Once fully charged (100% displayed), disconnect the cable and close the protective rubber cover to maintain water resistance.
6. Návod k obsluze
6.1 Zapnutí/vypnutí a výběr režimu

Image 6.1: Lighting Modes and Power Control.
- Zapnout: Press the power button once. The flashlight will turn on in High mode.
- Změna režimů: With the flashlight on, press the power button repeatedly to cycle through the 5 lighting modes: High → Middle → Low → Strobe → SOS.
- Vypnout: Press and hold the power button for approximately 2 seconds from any mode.
6.2 Nastavitelné zaostření
The flashlight features an adjustable focus mechanism to switch between a wide floodlight and a concentrated spotlight beam.

Image 6.2: Adjustable Focus (Floodlight vs. Spotlight).
- Gently push or pull the head of the flashlight forward or backward to adjust the beam.
- Pushing the head forward creates a narrow, concentrated spotlight beam for long-range illumination (up to 3280 feet).
- Pulling the head backward creates a wide floodlight beam for illuminating a larger area (up to 500 square meters).
6.3 LCD Power Indicator
The integrated LCD display shows the remaining battery percentage, allowing you to monitor power levels accurately.
- Displej se aktivuje při zapnutí svítilny nebo při nabíjení.
- A full charge is indicated by 100%.
- When the battery level is low, recharge the flashlight promptly to avoid unexpected power loss.
6.4 USB-C Charging Function (Input)
To recharge the flashlight's internal battery:
- Open the protective rubber cover over the USB ports.
- Insert the USB-C cable into the USB-C port (input).
- Připojte druhý konec kabelu ke kompatibilnímu zdroji napájení USB.
- The LCD display will show charging status.
- Close the rubber cover after charging.
6.5 USB Discharging Function (Output)
The flashlight can function as a power bank to charge other devices.

Image 6.3: USB Charging and Discharging Interfaces.
- Open the protective rubber cover over the USB ports.
- Connect your device's charging cable to the USB-A port (output) on the flashlight.
- Svítilna začne nabíjet vaše zařízení.
- Close the rubber cover after use.
7. Údržba
7.1 Čištění
- Otřete tělo svítilny měkkým hadříkemamp tkanina.
- Nepoužívejte abrazivní čisticí prostředky nebo rozpouštědla.
- Pro udržení optimálního světelného výkonu objektiv jemně čistěte hadříkem na objektivy.
7.2 Péče o baterii
- Pravidelně baterii dobíjejte, i když ji nepoužíváte často, abyste ji udrželi v dobrém stavu.
- The flashlight has built-in overcharging protection, but avoid leaving it connected to a charger indefinitely.
- Pokud baterii skladujete delší dobu, nabijte ji přibližně na 50–70 % a dobíjejte ji každé 3–6 měsíce.
7.3 Skladování
- Uchovávejte svítilnu na chladném a suchém místě mimo přímé sluneční světlo a extrémní teploty.
- Ensure the USB port cover is sealed to prevent dust and moisture ingress.
- The included protective case is ideal for safe storage and transport.
7.4 Voděodolnost
The PHIXTON PH2401 is designed with a high tenacity seal rubber waterproof ring, allowing it to be used in various weather conditions such as rain or snow. However, it is not intended for submersion in water.

Image 7.1: Water Resistance and Runtime Information.
8. Řešení problémů
| Problém | Možná příčina | Řešení |
|---|---|---|
| Svítilna se nezapne. | Battery is depleted or incorrectly installed. Protective film on battery not removed. | Charge the battery. Ensure battery is inserted with correct polarity and protective film is removed. |
| Světlo je tlumené nebo bliká. | Low battery level. Loose connections. | Recharge the battery. Ensure tail cap is tightened. |
| Svítilna se nenabíjí. | USB cable or power source faulty. USB-C port obstructed. | Try a different USB cable or power source. Check USB-C port for debris. |
| USB discharging (power bank) not working. | Flashlight battery too low. Device cable faulty. | Ensure flashlight battery is sufficiently charged. Try a different charging cable for your device. |
9. Specifikace
| Funkce | Detail |
|---|---|
| Číslo modelu | PH2401 |
| Typ světelného zdroje | LED (PH-L330 30W LED) |
| Jas | Až 10000 světla |
| Dlouhý dolet | Až 3280 stop (1000 metrů) |
| Režimy osvětlení | High, Middle, Low, Strobe, SOS |
| Zdroj napájení | Rechargeable Battery (6000mAh) or 3x AAA Alkaline Batteries |
| Nabíjecí rozhraní | Vstup USB-C |
| Discharging Interface | USB-A Output (Power Bank Function) |
| Materiál | Hliníková slitina letecké třídy |
| Úroveň odolnosti proti vodě | Odolný vůči vodě (není ponořitelný) |
| Rozměry produktu | 43 mm x 43 mm x 167 mm (hloubka x šířka x výška) |
| Hmotnost položky | 15.8 unce (přibližně 448 g) |
10. Záruka a podpora
10.1 Informace o záruce
The PHIXTON PH2401 Rechargeable LED Flashlight comes with a limited warranty. Please refer to the product packaging or contact customer service for specific warranty terms and conditions.
10.2 Zákaznická podpora
If you have any questions, concerns, or require assistance with your PHIXTON PH2401 flashlight, please do not hesitate to contact our customer service team. We aim to respond to all inquiries within 24 hours and provide a satisfactory solution.
For support, please message us through the platform where you purchased the product or visit the official PHIXTON store page.