1. Konec produktuview
The Cuifati ITX Computer Motherboard H6 ME is designed for compact computing systems, offering essential features for a reliable and efficient build. This motherboard supports LGA 1155 CPUs and DDR3 memory, providing a stable foundation for various applications.
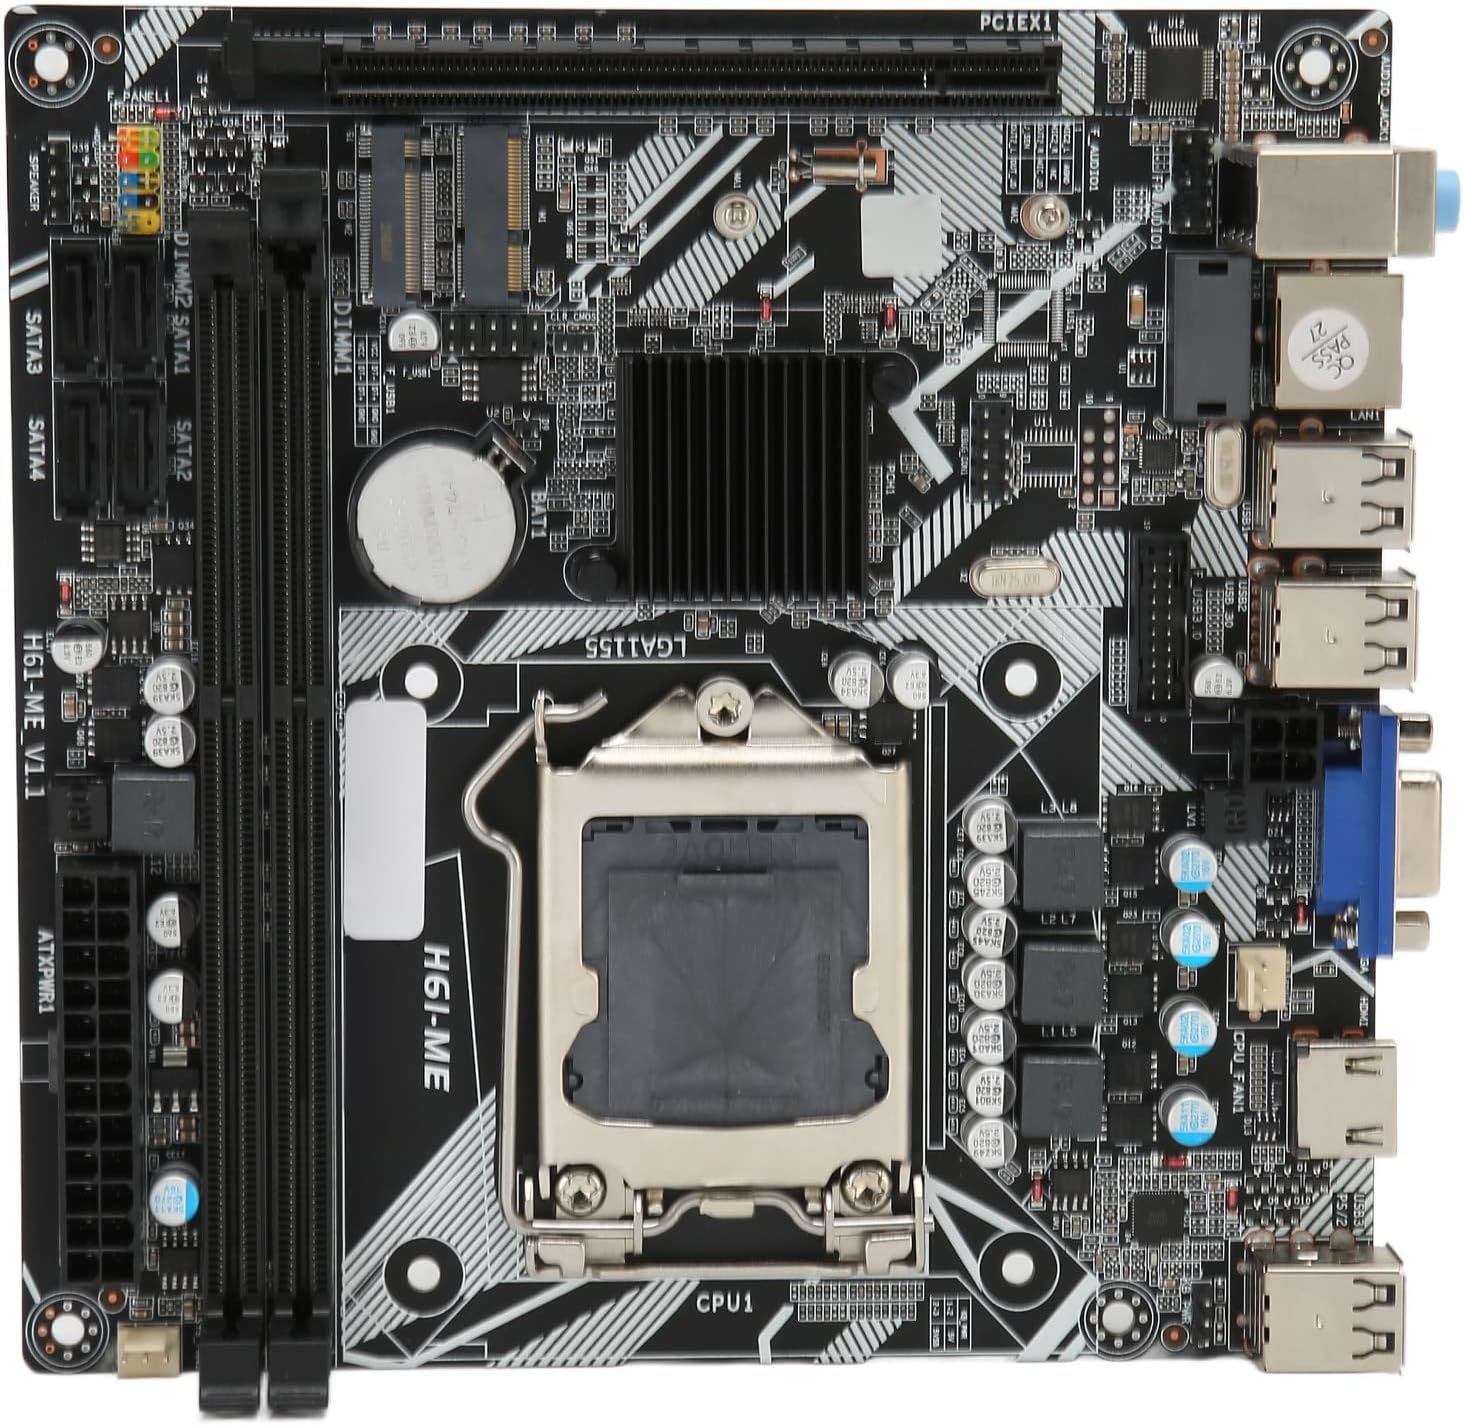
Figure 1: Cuifati ITX Computer Motherboard H6 ME (Top View)
2. Klíčové vlastnosti
- LGA 1155 CPU Slot: Supports LGA 1155 processors for stable performance.
- Multiphase Power Design: Features stable and accurate multiphase power delivery for improved CPU performance.
- HD Video Output: Equipped with VGA and HD Multimedia Interface (HDMI) for digital high-definition video output.
- Dvoukanálová paměť DDR3: Incorporates two DDR3 memory slots, supporting up to 16GB, enhancing overall system performance.
- Multiple USB2.0 Interfaces: Provides 10 USB2.0 interfaces (4 front, 6 rear) for extensive peripheral connectivity.
- Možnosti úložiště: Includes 4 SATA2.0 ports and M.2 NVME support for various storage solutions.
- PCIe 16X Slot: Features a PCIe 16X slot for dedicated graphics cards or other expansion cards.
3. Obsah balení
Před zahájením instalace ověřte, zda jsou v balení přítomny všechny položky.
- 1 x Cuifati LGA 1155 Motherboard (H6 ME)
- 1 x Metal I/O Plate
- 1 x SATA Connecting Cable

Figure 2: Motherboard and Included Accessories
4. Nastavení a instalace
This section provides instructions for installing the Cuifati H6 ME motherboard into your computer system. Ensure your system is powered off and unplugged before beginning any installation.
4.1. Identifikace součásti
Familiarize yourself with the layout of the motherboard and its various connectors.

Figure 3: Motherboard Component Diagram
- CPU Slot (LGA 1155): For installing your Intel LGA 1155 processor.
- DDR3 Slots: Dva sloty pro paměťové moduly DDR3.
- PCIe 16X Slot: For graphics cards or other expansion cards.
- Porty SATA2.0: Four ports for connecting SATA storage devices (HDDs/SSDs).
- NVME M.2 Slot: For high-speed NVME M.2 SSDs.
- Konektory na předním panelu: Pins for power switch, reset switch, HDD LED, and power LED.
- USB2.0 Headers: Pro USB porty na předním panelu.
- 24-Pin ATX Power Connector: Hlavní napájecí zdroj ze zdroje napájení.
- 4-Pin CPU Power Connector: Dodatečné napájení pro CPU.
- Zadní I/O porty: USB, VGA, HDMI, LAN, Audio ports.
4.2. Kroky instalace
- Připravte si případ: Ensure your computer case is ready for motherboard installation. Install standoffs if necessary.
- Instalace krytu I/O: Snap the metal I/O plate into the corresponding opening in your computer case.
- Nainstalujte procesor:
- Otevřete páčku patice procesoru a sejměte ochranný kryt.
- Carefully align your LGA 1155 CPU with the socket, ensuring the notches on the CPU match the keys on the socket.
- Opatrně vložte procesor do patice. Netlačte na něj silou.
- Zavřete páčku patice, abyste zajistili procesor.
- Instalace chladiče CPU: Apply thermal paste (if not pre-applied) and install your CPU cooler according to its manufacturer's instructions. Connect the CPU fan cable to the "CPU FAN" header on the motherboard.
- Instalace paměti (RAM):
- Otevřete klipy na obou koncích slotů pro paměti DDR3.
- Zarovnejte zářez na paměťovém modulu DDR3 s výstupkem ve slotu.
- Pevně zatlačte na oba konce paměťového modulu, dokud klipsy nezacvaknou na místo.
- Montáž základní desky: Opatrně vložte základní desku do skříně a zarovnejte otvory pro šrouby s distančními distančními otvory. Zajistěte základní desku šrouby.
- Připojení napájecích kabelů:
- Připojte 24pinový napájecí kabel ATX ze zdroje napájení k hlavnímu napájecímu konektoru na základní desce.
- Connect the 4-pin CPU power cable to the CPU power connector.
- Instalace úložných zařízení: Connect your SATA HDDs/SSDs to the SATA2.0 ports using the provided SATA cable. If using an NVME M.2 SSD, install it into the M.2 slot and secure it with the screw.
- Instalace grafické karty (volitelné): If using a dedicated graphics card, insert it into the PCIe 16X slot and secure it. Connect any necessary PCIe power cables from your power supply.
- Připojení kabelů předního panelu: Connect the power switch, reset switch, HDD LED, and power LED cables from your case to the corresponding pins on the motherboard's front panel header. Refer to the motherboard diagram (Figure 3) for pin assignments.
- Connect USB and Audio Cables: Connect front panel USB and audio cables to their respective headers on the motherboard.

Figure 4: PCIe 16X Slot for Expansion Cards
5. Návod k obsluze
Jakmile jsou všechny komponenty nainstalovány a připojeny, můžete systém zapnout.
5.1. Počáteční zapnutí
- Připojte monitor, klávesnici a myš k příslušným portům na zadním panelu I/O.
- Plug in the power cable to your power supply and turn on the power supply switch.
- Stiskněte tlačítko napájení na skříni počítače.
- Systém by se měl spustit a na monitoru byste měli vidět výstup.
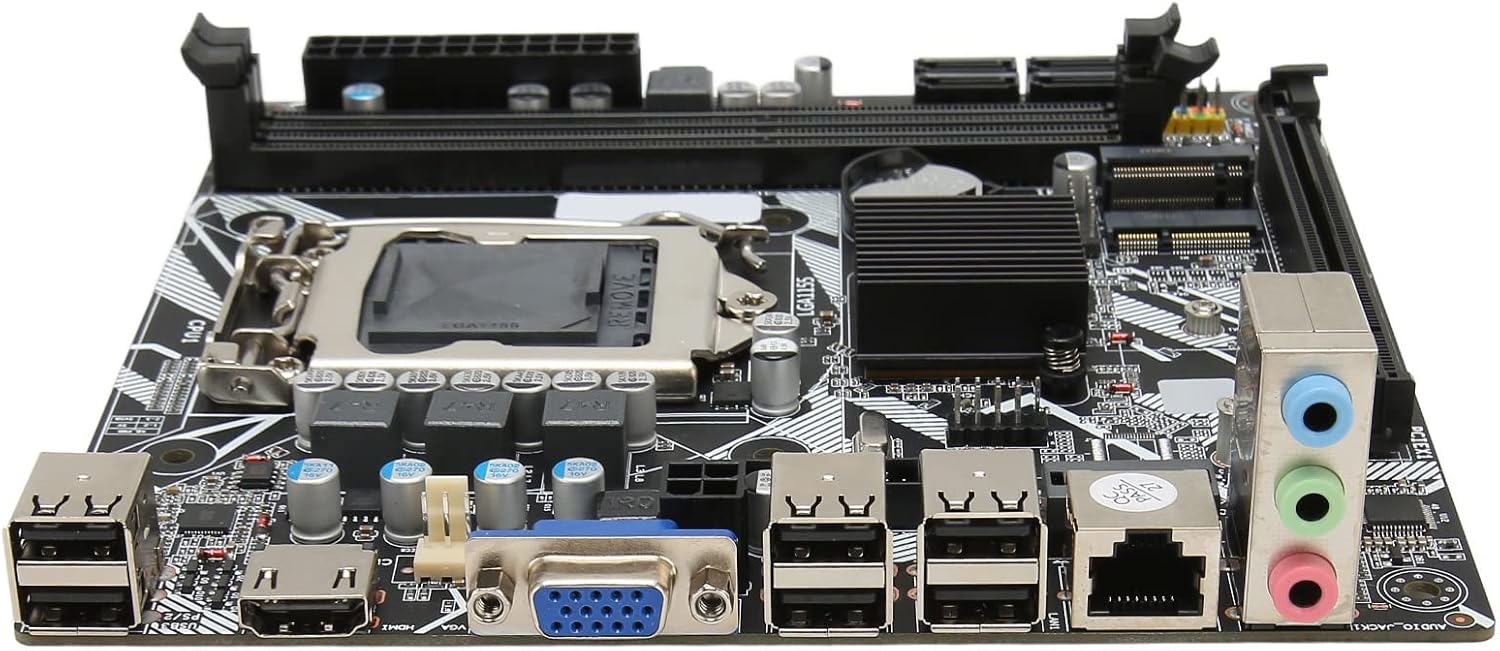
Obrázek 5: Zadní I/O porty
5.2. Nastavení BIOSu/UEFI
To access the BIOS/UEFI setup utility, press the designated key (usually DEL or F2) repeatedly during the initial boot sequence. From the BIOS, you can configure system settings, boot order, and monitor hardware status.
5.3. Instalace operačního systému
Once the system is stable, you can proceed with installing your preferred operating system (e.g., Windows, Linux) from a bootable USB drive or DVD.
6. Údržba
Proper maintenance can extend the lifespan of your motherboard and ensure optimal performance.
- Odstranění prachu: Pravidelně čistěte prach z vnitřku počítačové skříně, zejména z ventilátorů a chladičů, pomocí stlačeného vzduchu. Před čištěním se ujistěte, že je systém vypnutý a odpojený od sítě.
- Správa kabelů: Zajistěte úhledné vedení kabelů, aby se zlepšilo proudění vzduchu a zabránilo se rušení.
- Aktualizace BIOSu: Pravidelně kontrolujte informace od výrobce website for BIOS updates. Update the BIOS only if necessary and follow the instructions carefully to avoid system instability.
- Podmínky prostředí: Základní desku používejte v dobře větraném prostoru, mimo dosah přímého slunečního záření, nadměrného tepla a vlhkosti.
7. Řešení problémů
Tato část se zabývá běžnými problémy, se kterými se můžete setkat.
- Bez napájení:
- Check if the power supply is plugged in and switched on.
- Verify that the 24-pin and 4-pin power cables are securely connected to the motherboard.
- Ujistěte se, že je kabel vypínače na předním panelu správně připojen ke konektoru základní desky.
- Bez displeje:
- Confirm that the monitor is connected to the correct video output (VGA or HDMI) on the motherboard or graphics card.
- Znovu vložte moduly RAM. Zkuste spustit systém pouze s jedním nainstalovaným modulem RAM.
- Znovu vložte grafickou kartu (pokud je k dispozici).
- Ujistěte se, že je procesor správně usazen a chladič procesoru je správně nainstalován.
- Nestabilita/pády systému:
- Zkontrolujte, zda se zařízení nepřehřívá. Ujistěte se, že chladič procesoru a ventilátory skříně fungují.
- Test memory modules for errors using diagnostic tools.
- Ensure all drivers (chipset, graphics, etc.) are up to date.
- Periferní zařízení nebylo detekováno:
- Zkuste připojit periferní zařízení k jinému USB portu.
- Ensure necessary drivers are installed for the peripheral.
- Check BIOS settings to ensure USB ports are enabled.
8. Specifikace
| Funkce | Popis |
|---|---|
| Model základní desky | H6 ME |
| Typ základní desky | ITX |
| Typ slotu CPU | LGA 1155 |
| Paměťové sloty | DDR3 x 2 |
| Maximální kapacita paměti | Až 16 GB |
| SATA porty | SATA2.0 x 4 |
| Slot grafické karty | PCIe 16X |
| USB rozhraní | USB2.0 x 10 (4 Front, 6 Rear) |
| Rozhraní rozšíření | VGA x 1, HD Multimedia Interface (HDMI) x 1, M.2, NVME M.2, DEBUG Pin x 1 |
| Sound Audio Card | Realtek ALC662 Sound Chip |
| Síťová karta | 100M Network Card |
| Vestavěná baterie | 240mAh CR2032 x 1 |
| Hmotnost položky | 1.13 libry |
| Rozměry balení | 8.27 x 7.87 x 1.97 palce |
| Číslo modelu | CUIFATI6wgctin4bz |
9. Záruka a podpora
For warranty information or technical support, please refer to the retailer where the product was purchased or visit the official Cuifati webUschovejte si doklad o koupi pro případ reklamace.
Výrobce: CUIFATI
Datum první dostupnosti: 19. prosince 2023
For additional assistance, you may contact Cuifati customer service through their official channels.