1. Úvod a konecview
This manual provides essential information for the Starlink Replacement 2M High Performance PSU to WiFi Replacement Cable. This cable is designed as a direct replacement for the original 2-meter Power Supply Unit (PSU) to WiFi Router cable included with the Starlink High Performance Kit. It is intended for use when the original cable is damaged or malfunctioning, ensuring continued connectivity for your Starlink system.
The cable measures 2 meters (approximately 6.5 feet) in length and features custom Mini HDMI connectors on both ends, specifically designed for compatibility with Starlink High Performance and Flat High Performance Kits.
2. Co je v krabici
Upon opening the product packaging, you will find the following item:
- 1 x 2-meter Starlink Replacement PSU to WiFi Cable
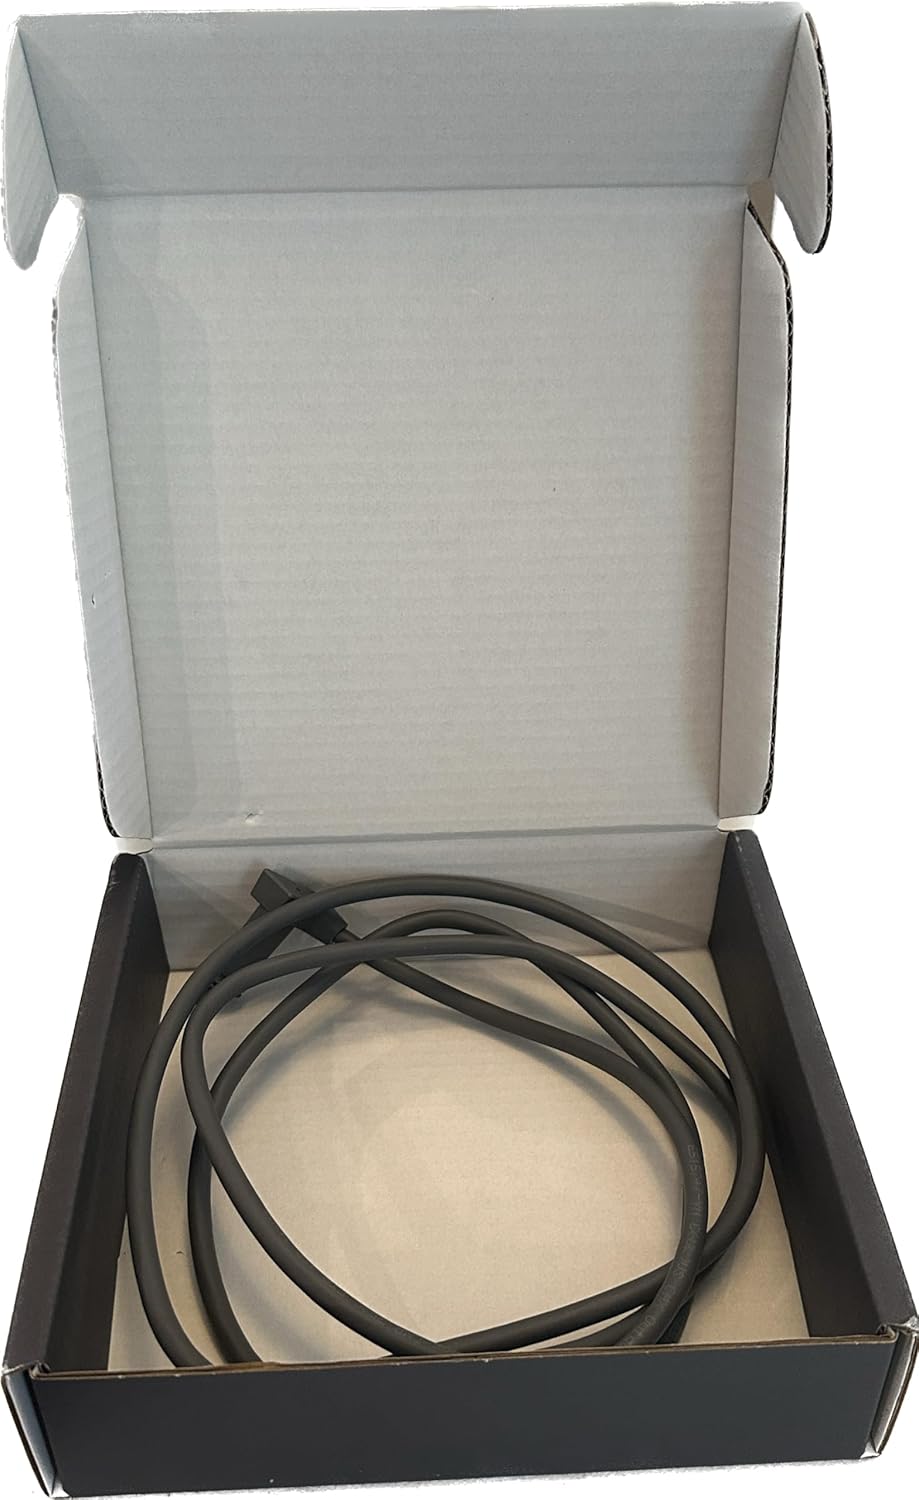
Figure 2.1: The 2-meter replacement cable as packaged in its box.

Figure 2.2: The exterior of the product packaging.
3. Nastavení a instalace
This replacement cable is designed for straightforward installation. Follow these steps to replace your existing Starlink PSU to WiFi Router cable:
- Bezpečnost především: Before beginning, ensure your Starlink system's Power Supply Unit (PSU) is disconnected from the main power outlet to prevent electrical hazards.
- Identifikujte připojení: Locate the existing cable connecting the Starlink PSU to the WiFi Router. Note which end connects to the PSU and which connects to the router.
- Odpojení starého kabelu: Carefully unplug the old or damaged cable from both the Starlink PSU and the WiFi Router. Avoid pulling on the cable itself; always grip the connector housing.
- Connect New Cable to PSU: Take the new 2-meter replacement cable. Insert one end of the cable into the designated port on the Starlink Power Supply Unit. Ensure it is fully seated and secure.
- Connect New Cable to WiFi Router: Insert the other end of the new cable into the corresponding port on the Starlink WiFi Router. Again, ensure a firm and secure connection.
- Ověřte připojení: Double-check that both ends of the new cable are properly and securely connected to their respective devices.
- Obnovit napájení: Once the cable is securely installed, reconnect the Starlink PSU to the main power outlet. The system should power on and resume normal operation.
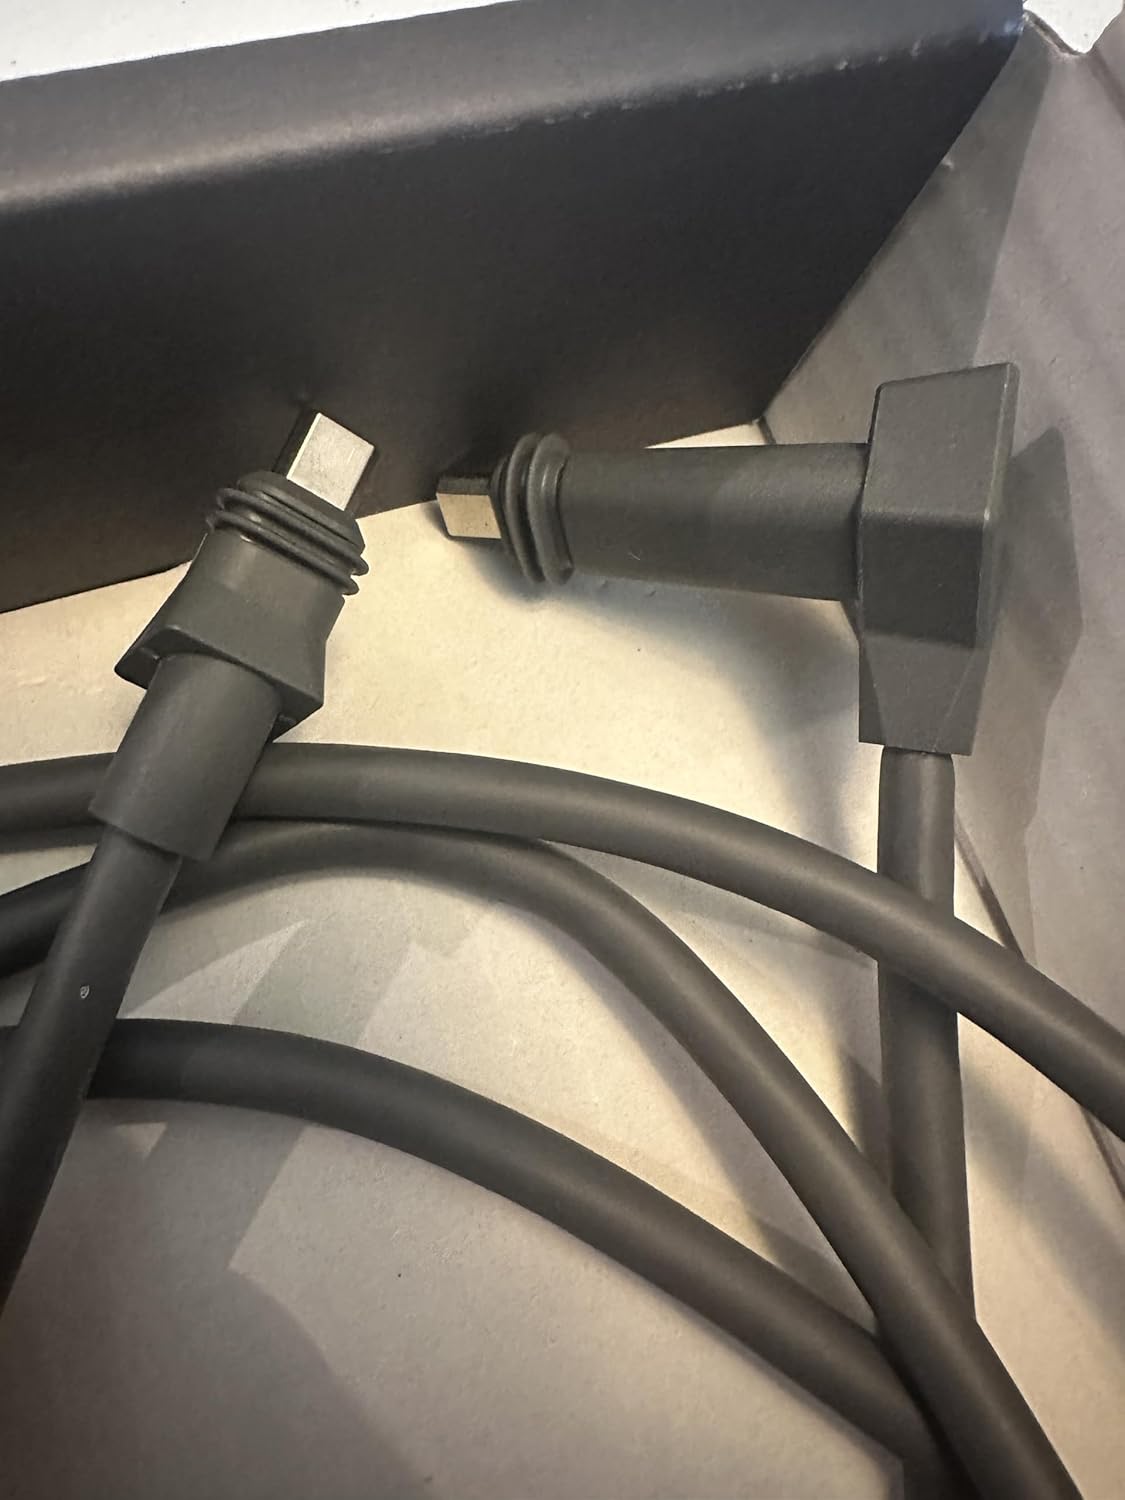
Figure 3.1: Detail of the custom Mini HDMI connectors.
4. Návod k obsluze
As a passive component, the replacement cable does not require active operation. Once properly connected between the Starlink Power Supply Unit and the WiFi Router, it facilitates the necessary power and data transfer for your Starlink system to function. No user interaction is required beyond initial installation.
5. Údržba
To ensure the longevity and optimal performance of your replacement cable, consider the following maintenance tips:
- Udržujte v čistotě: Periodically wipe the cable and connectors with a dry, soft cloth to remove dust or debris. Avoid using liquid cleaners directly on the connectors.
- Vyvarujte se ohýbání: Do not excessively bend, kink, or crimp the cable, especially near the connectors. Sharp bends can damage the internal wiring.
- Správné skladování: If the cable needs to be disconnected and stored, coil it loosely. Avoid tight coiling or wrapping around sharp objects.
- Chraňte před poškozením: Keep the cable away from heavy objects that could crush it, and avoid placing it in high-traffic areas where it could be tripped over or snagged.
6. Řešení problémů
If you experience issues after installing the replacement cable, consider the following troubleshooting steps:
- Bez napájení/připojení:
- Ensure the Starlink PSU is properly plugged into a working power outlet.
- Verify that both ends of the replacement cable are fully and securely seated in their respective ports on the PSU and WiFi Router. A loose connection is a common cause of issues.
- Inspect the cable for any visible signs of damage, such as cuts, kinks, or frayed insulation. If damage is present, the cable may need to be replaced.
- Přerušované připojení:
- Check for any slight movement or looseness in the cable connections.
- Ensure the cable is not being stressed or pulled taut, which can lead to intermittent contact.
- Incorrect Port:
- Confirm that the cable is connected to the correct ports on both the PSU and the WiFi Router. Refer to your Starlink system's original documentation if unsure.
If issues persist after performing these steps, please contact the seller or Starlink support for further assistance.
7. Specifikace
| Název produktu | Starlink Replacement 2M High Performance PSU to WiFi Replacement Cable |
| Číslo modelu | 01685767-501 |
| Značka | Obecný |
| Délka kabelu | 2 metrů (6.5 stop) |
| Typ kabelu | Custom Mini HDMI |
| Typ konektoru | Custom Mini HDMI |
| Kompatibilní zařízení | Starlink High Performance Kit, Starlink Flat High Performance Kit |
| Speciální funkce | Vysoký výkon |
| Rozměry balení | 9 x 8 x 3 palce; 9 unce |
| Země původu | USA |

Figure 7.1: Product label displaying model number and specifications.
8. Záruka a podpora
Specific warranty information for this product is not provided in this manual. For details regarding warranty coverage, returns, or technical support, please refer to the product listing on the retailer's webwebu nebo kontaktujte přímo prodejce. Uschovejte si účtenku jako doklad o koupi.
For general information about your Starlink system, please refer to the official Starlink documentation or visit the Starlink support webmísto.