Prolux QX90
Prolux QX90 Bagged Canister HEPA Vacuum Instruction Manual
Model: QX90
1. Úvod
Thank you for choosing the Prolux QX90 Bagged Canister HEPA Vacuum. This manual provides essential information for the safe and efficient operation, maintenance, and troubleshooting of your new vacuum cleaner. Please read all instructions carefully before use and retain this manual for future reference.
2. Bezpečnostní pokyny
Při používání elektrických spotřebičů vždy dodržujte základní bezpečnostní opatření, abyste snížili riziko požáru, úrazu elektrickým proudem nebo zranění.
- Před použitím vysavače si přečtěte všechny pokyny.
- Nenechávejte vysavač zapojený do zásuvky bez dozoru. Odpojte jej ze zásuvky, pokud jej nepoužíváte, a před prováděním servisu.
- Nepoužívejte venku nebo na mokrém povrchu.
- Nedovolte, aby byl používán jako hračka. Při používání dětmi nebo v jejich blízkosti je nutná zvýšená pozornost.
- Používejte pouze tak, jak je popsáno v tomto návodu. Používejte pouze příslušenství doporučené výrobcem.
- Do not use with damaged cord or plug. If vacuum cleaner is not working as it should, has been dropped, damaged, left outdoors, or dropped into water, return it to a service center.
- Netahejte ani nepřenášejte za kabel, nepoužívejte kabel jako rukojeť, nezavírejte na kabel dvířka ani netahejte za kabel kolem ostrých hran nebo rohů. Nepřejíždějte vysavačem přes kabel. Udržujte kabel mimo dosah horkých povrchů.
- Neodpojujte tahem za kabel. Při odpojování uchopte zástrčku, nikoli kabel.
- Nemanipulujte se zástrčkou nebo vysavačem mokrýma rukama.
- Do otvorů nevkládejte žádné předměty. Nepoužívejte se zablokovaným otvorem; chraňte před prachem, žmolky, vlasy a vším, co by mohlo omezit proudění vzduchu.
- Udržujte vlasy, volné oblečení, prsty a všechny části těla v dostatečné vzdálenosti od otvorů a pohyblivých částí.
- Nesbírejte nic, co hoří nebo kouří, jako jsou cigarety, zápalky nebo horký popel.
- Nepoužívejte k vysávání hořlavých nebo hořlavých kapalin, jako je benzín, ani je nepoužívejte v oblastech, kde se mohou vyskytovat.
- Nepoužívejte bez nasazeného sáčku na prach a/nebo filtrů.
- Před odpojením vypněte všechny ovládací prvky.
- Při čištění na schodech dbejte zvýšené opatrnosti.
3. Obsah balení
Your Prolux QX90 vacuum cleaner package includes the following items:
- QX90 Canister Unit
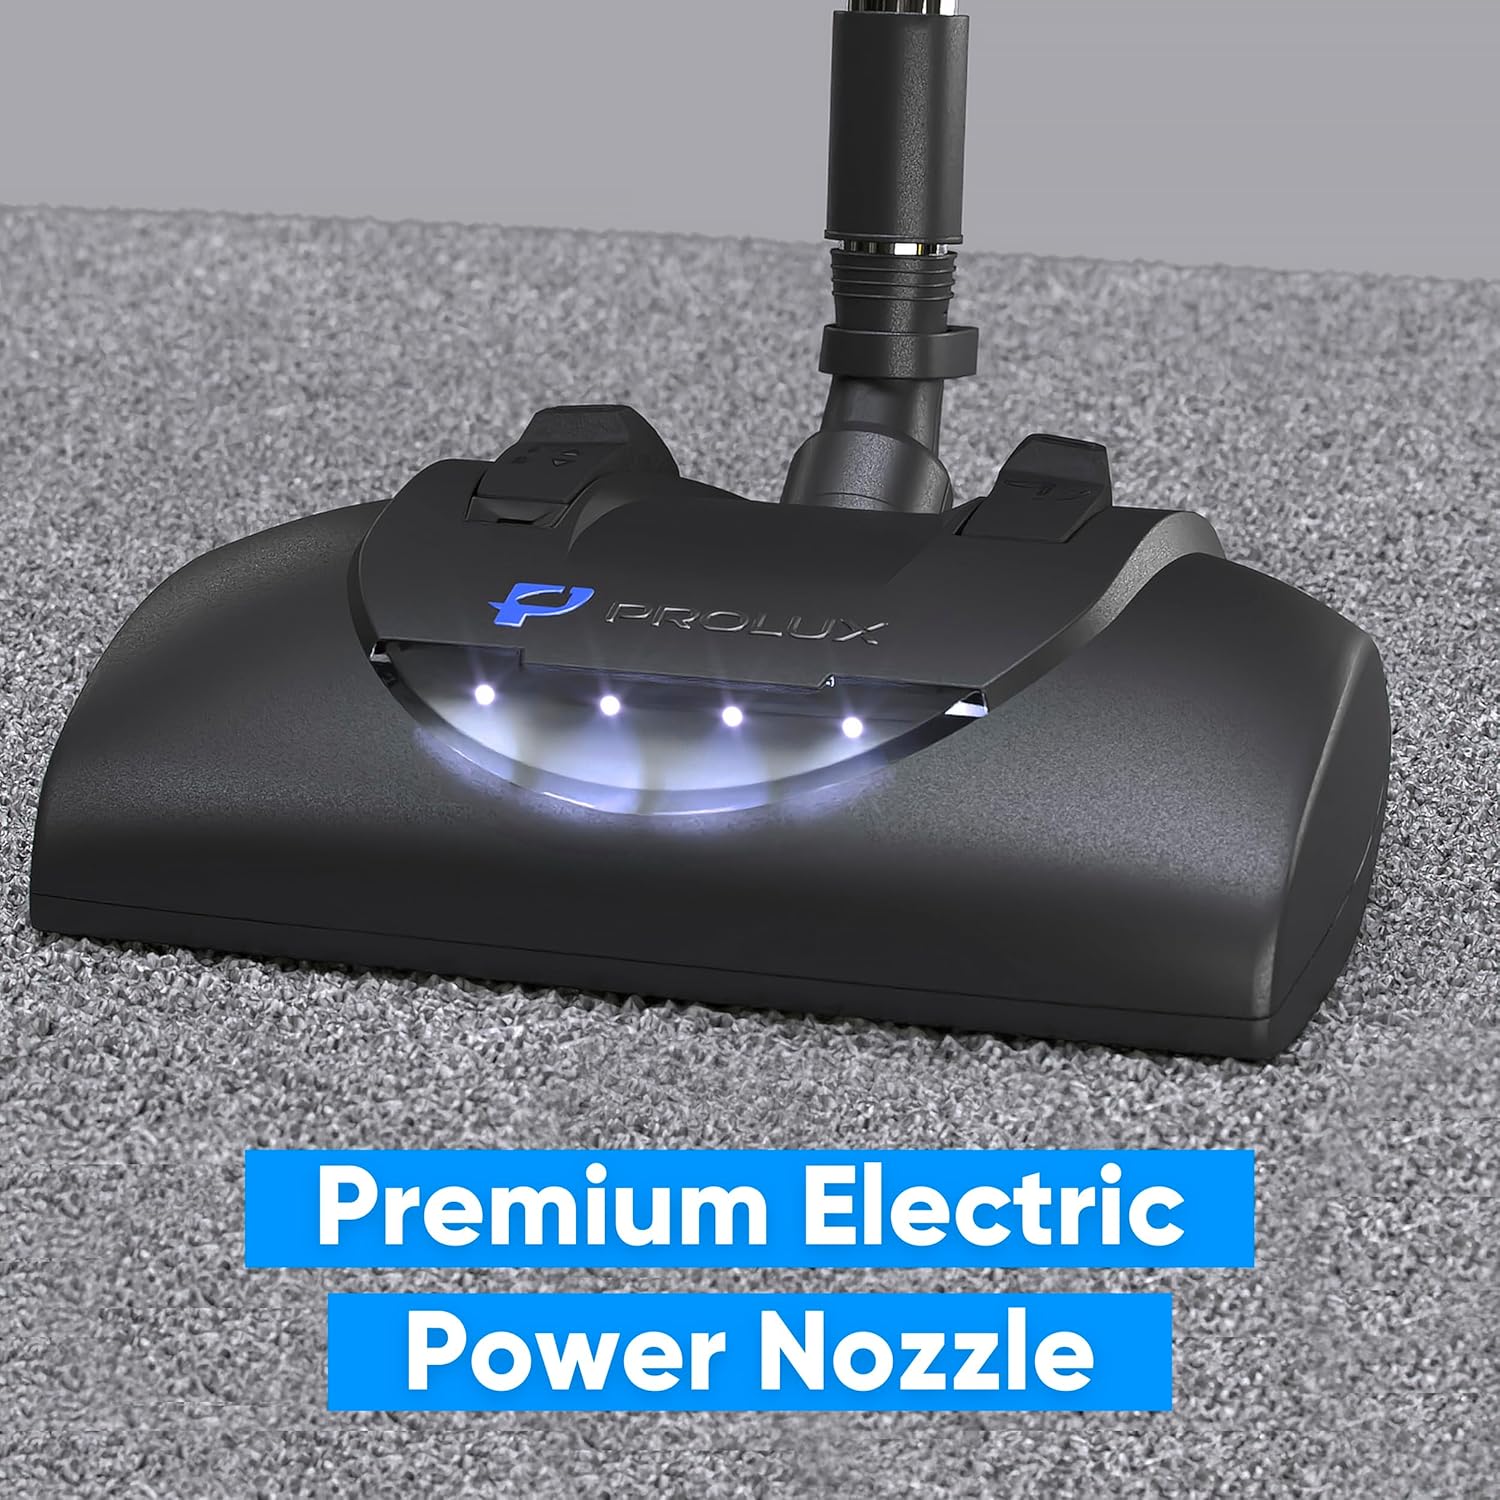
- Elektrická tryska
- 7 ft. Electric Hose
- Telescoping Electric Wand
- Deluxe HorseHair Floor Tool
- Štěrbinový nástroj
- Deluxe Duster Brush
- Upholstery Tool with Slider
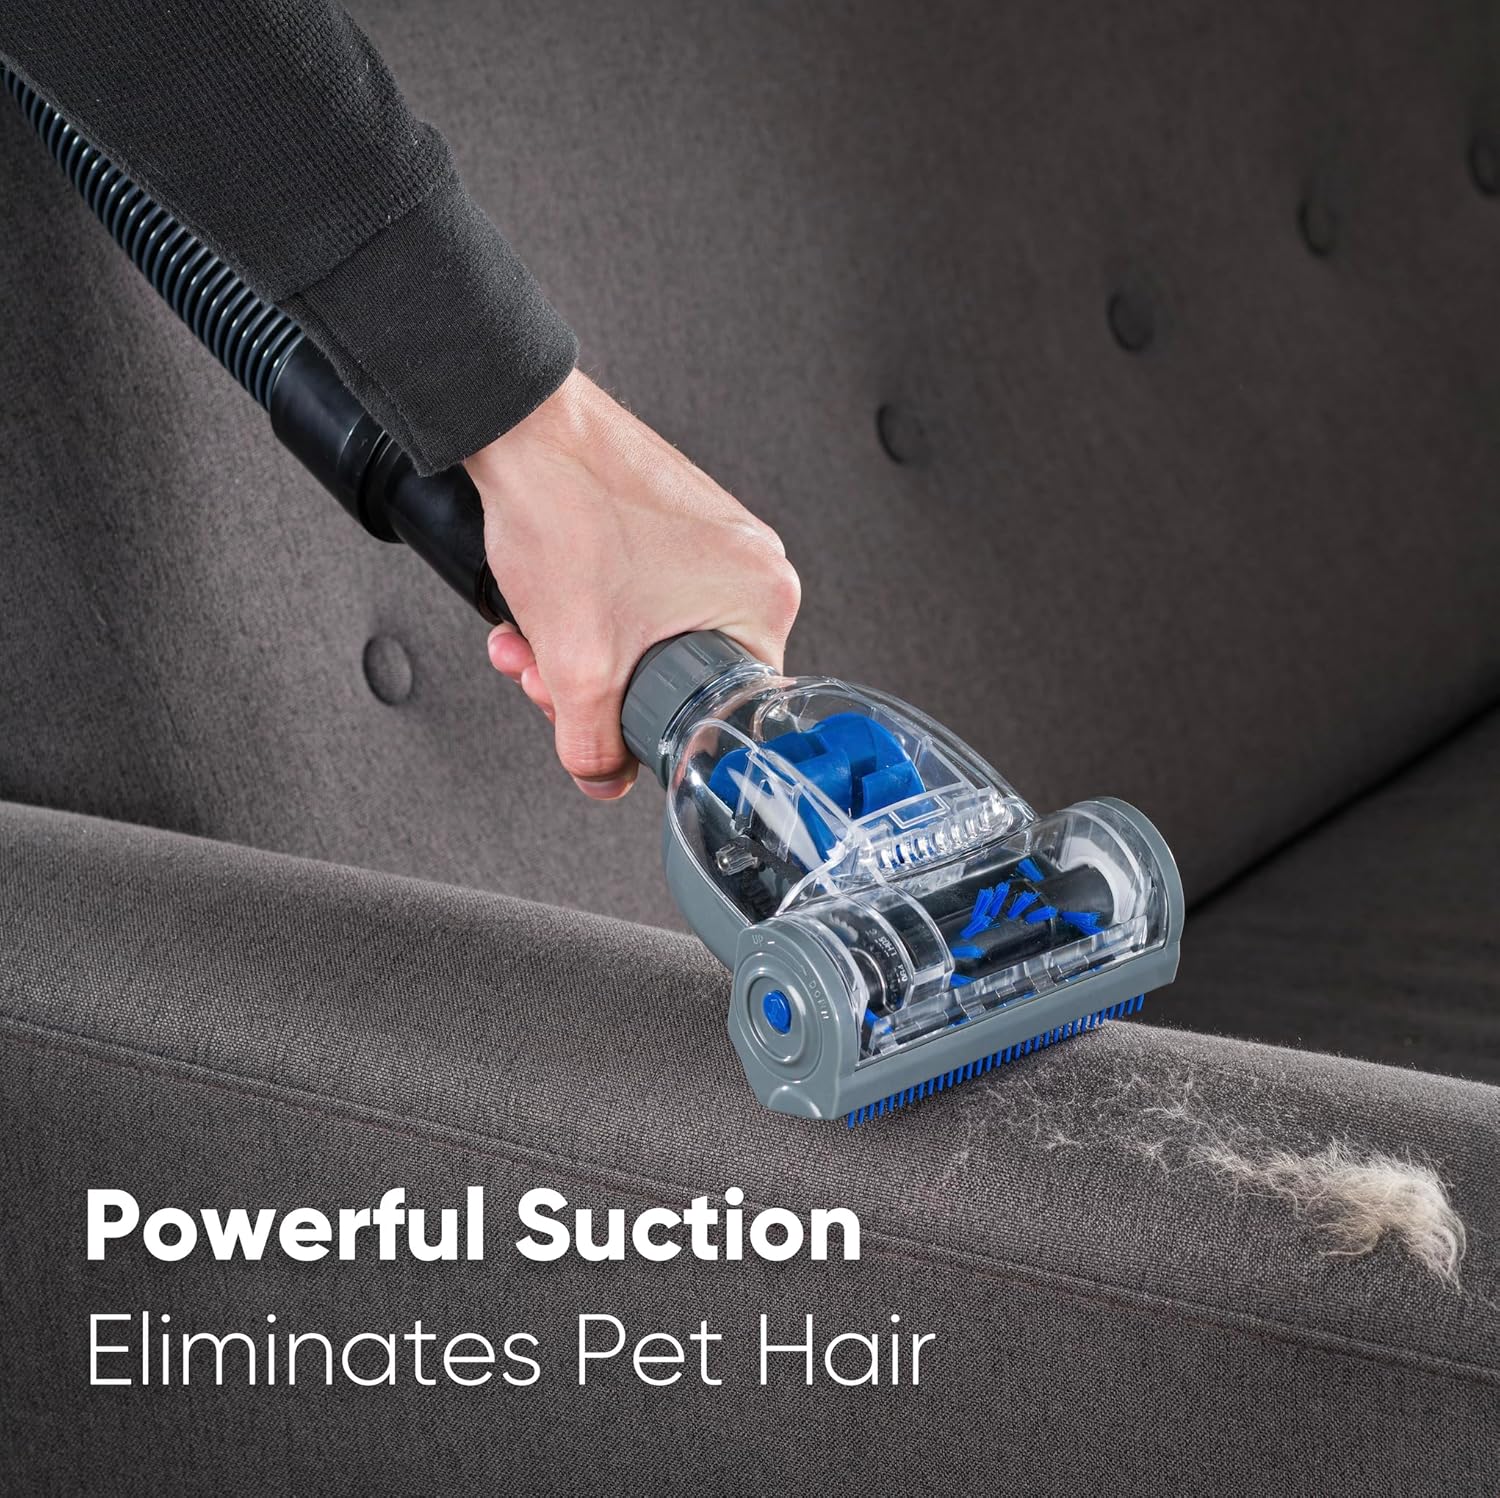
- Mini Head Pet & Stair Nozzle
- 2 HEPA Bags (extra)
- HEPA filtr (předinstalovaný)
- Tool Storage Caddie


4. Nastavení
Follow these steps to assemble your Prolux QX90 vacuum cleaner:
- Připojte hadici: Insert the electric hose into the suction inlet on the canister unit until it clicks securely into place.
- Sestavte hůlku: Connect the telescoping electric wand to the end of the electric hose. Ensure it is firmly attached.
- Připojení čisticí hlavy: Select your desired cleaning head (e.g., Electric Power Nozzle for carpets, HorseHair Floor Tool for hard floors) and attach it to the end of the telescoping wand.
- Připojení napájení: Extend the power cord from the canister unit and plug it into a suitable electrical outlet.
5. Návod k obsluze
The Prolux QX90 is designed for powerful and versatile cleaning. Familiarize yourself with its features for optimal performance.
5.1 Zapnutí/vypnutí
Press the power button located on the canister unit to turn the vacuum cleaner on or off.
5.2 Regulace rychlosti sání
The QX90 features a 5-speed motor to adjust suction power for various cleaning tasks:
- Speeds 1 & 2: Ideal for fine dusting and delicate surfaces.
- Rychlost 3: Suitable for throw rugs and general cleaning.
- Rychlost 4: Recommended for deep cleaning carpets.
- Rychlost 5: Maximum power for stubborn pet hair pickup and heavy-duty cleaning.

5.3 Using Cleaning Heads & Tools
- Electric Power Nozzle: Use for carpets and rugs. It features LED lights for improved visibility and a brush roll for deep cleaning.
- Deluxe HorseHair Floor Tool: Designed for delicate hard floors to prevent scratches.
- Mini Head Pet & Stair Nozzle: Excellent for removing pet hair from upholstery, stairs, and tight spaces.
- Štěrbinový nástroj: Pro čištění úzkých mezer, rohů a hran.
- Deluxe Duster Brush: For dusting furniture, blinds, and other delicate surfaces.
- Upholstery Tool with Slider: Ideal for cleaning curtains, sofas, and other fabric surfaces.
6. Údržba
Regular maintenance ensures the longevity and optimal performance of your Prolux QX90 vacuum cleaner.
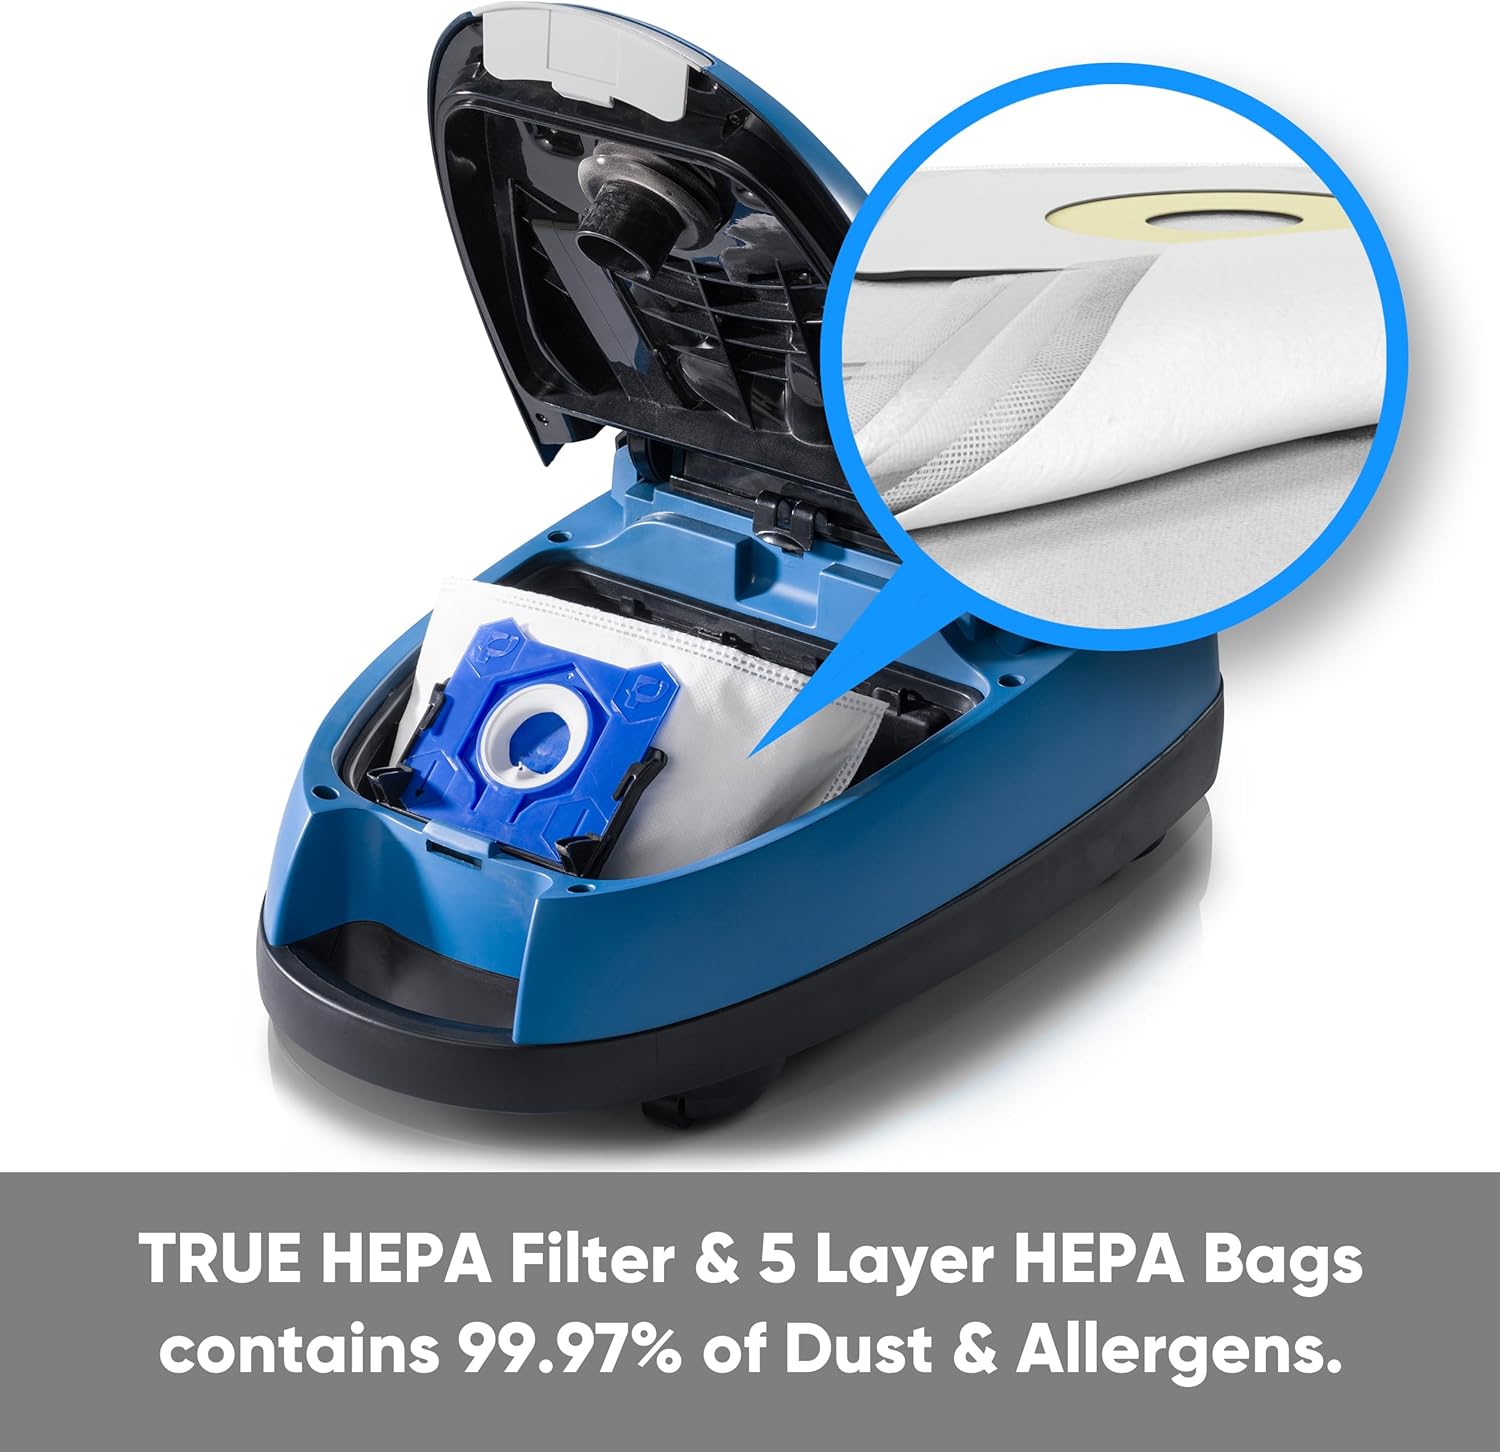
6.1 Changing the HEPA Bag
The QX90 uses 5-layer sealed HEPA bags designed to trap 99.97% of fine dust and allergens. Replace the bag when the indicator light on the canister illuminates or when suction power noticeably decreases.
- Ujistěte se, že je vysavač odpojen od elektrické zásuvky.
- Locate the bag compartment release latch on the canister unit and open the lid.
- Carefully remove the full HEPA bag, ensuring the bag opening is sealed to prevent dust escape.
- Insert a new Prolux 5-layer HEPA bag into the compartment, aligning it correctly.
- Close the bag compartment lid securely until it latches.
6.2 Čištění/výměna HEPA filtru
The sealed TRUE HEPA filter ensures 99.97% clean air exhaust. Check the HEPA filter periodically and replace it as needed, typically every 6-12 months depending on usage.
- Odpojte vysavač.
- Locate the HEPA filter compartment (refer to your unit's specific design, often near the exhaust).
- Vyjměte starý HEPA filtr.
- Vložte nový HEPA filtr a ujistěte se, že pevně dosedá.
- Zavřete přihrádku filtru.
7. Řešení problémů
If you encounter issues with your Prolux QX90, refer to the following common problems and solutions:
- Bez napájení:
- Zkontrolujte, zda je napájecí kabel bezpečně zapojený do funkční zásuvky.
- Ensure the power button on the canister is pressed.
- Ztráta sání:
- Check if the HEPA bag is full and needs replacement.
- Inspect the hose, wand, and cleaning head for blockages.
- Ensure all connections (hose to canister, wand to hose, head to wand) are secure.
- Check if the HEPA filter is clogged and needs cleaning or replacement.
- Neobvyklý hluk:
- Turn off and unplug the vacuum. Check the brush roll in the power nozzle for tangled hair or debris.
- Inspect the hose and wand for any obstructions.
- Power Nozzle Not Rotating:
- Ensure the power nozzle is correctly attached to the electric wand and the electrical connection is secure.
- Check for any obstructions in the brush roll.
8. Specifikace
- Značka: Prolux
- Název modelu: QX90
- Typ filtru: HEPA filtr (3-Stage True HEPA Filtration)
- Motor: 5-rychlostní motor
- Sací výkon: 107 CFM
- Kapacita: 4.5 Liters (5-layer bags)
- Délka hadice: 7 stop
- Šířka čisticí dráhy: 14 palce
- Cleaning Radius: 35 feet (including hose)
- Hladina hluku: 67 dB (on highest speed)
- Amperage: 12 Amps
- Hmotnost položky: 14.6 liber
- Rozměry produktu: 21 cm D x 8 cm Š x 12 cm V
- Šňůra: Automatic Rewinder
- Manévrovatelnost: 4-wheel design, 360-degree swivel hose
- Používání: Krytý
9. Záruka a podpora
The Prolux QX90 comes with a Lifetime Prolux Warranty. For warranty claims, technical support, or to purchase replacement parts and accessories, please contact Prolux customer service directly.
Refer to the official Prolux website or your purchase documentation for specific contact information and warranty terms.
Související dokumenty - QX90
 |
Prolux CTX Vacuum Cleaner Instruction Manual & Guide Comprehensive instruction manual for the Prolux CTX vacuum cleaner, covering specifications, safety, operation, troubleshooting, and lifetime warranty information. Learn how to use, maintain, and get the most out of your Prolux CTX. |
 |
Prolux 2.0 Bagless Backpack Vacuum Cleaner - Instruction Manual & Specifications Comprehensive instruction manual for the Prolux 2.0 Bagless Backpack Vacuum. Learn about specifications, safety, operation, maintenance, troubleshooting, and warranty. |
 |
Prolux Phantom Vacuum Instruction Manual Official instruction manual for the Prolux Phantom canister vacuum, covering assembly, operation, maintenance, troubleshooting, and warranty information. |
 |
Prolux X8 Lite Backpack Vacuum Cleaner: Instruction Manual, Features & Warranty Get the most out of your Prolux X8 Lite Backpack Vacuum Cleaner with this comprehensive instruction manual. Learn about its powerful features, efficient operation, maintenance tips, and warranty information for a cleaner home or light commercial space. |
 |
Návod k obsluze a záruka k vysavači s vodní filtrací Prolux CTX Tento dokument obsahuje komplexní pokyny, specifikace, bezpečnostní pokyny, tipy pro řešení problémů a informace o záruce pro vysavač s vodní filtrací Prolux CTX. |
 |
Prolux CTX Vacuum Cleaner Instruction Manual Official instruction manual for the Prolux CTX water filtration vacuum cleaner. Includes assembly, operation, safety, maintenance, and warranty information. |
Ask a question about this manual
Ask about setup, troubleshooting, compatibility, parts, safety, or missing instructions. Manuals+ will review the question and use this page’s manual context to help answer it.