1. Konec produktuview
The Prolux RS7 PRO is a versatile cordless handheld stick vacuum designed for efficient cleaning in both home and office environments. It features a powerful motor, advanced HEPA filtration, and a modular design for ease of use and maintenance. This manual provides essential information for the safe and effective operation of your vacuum cleaner.
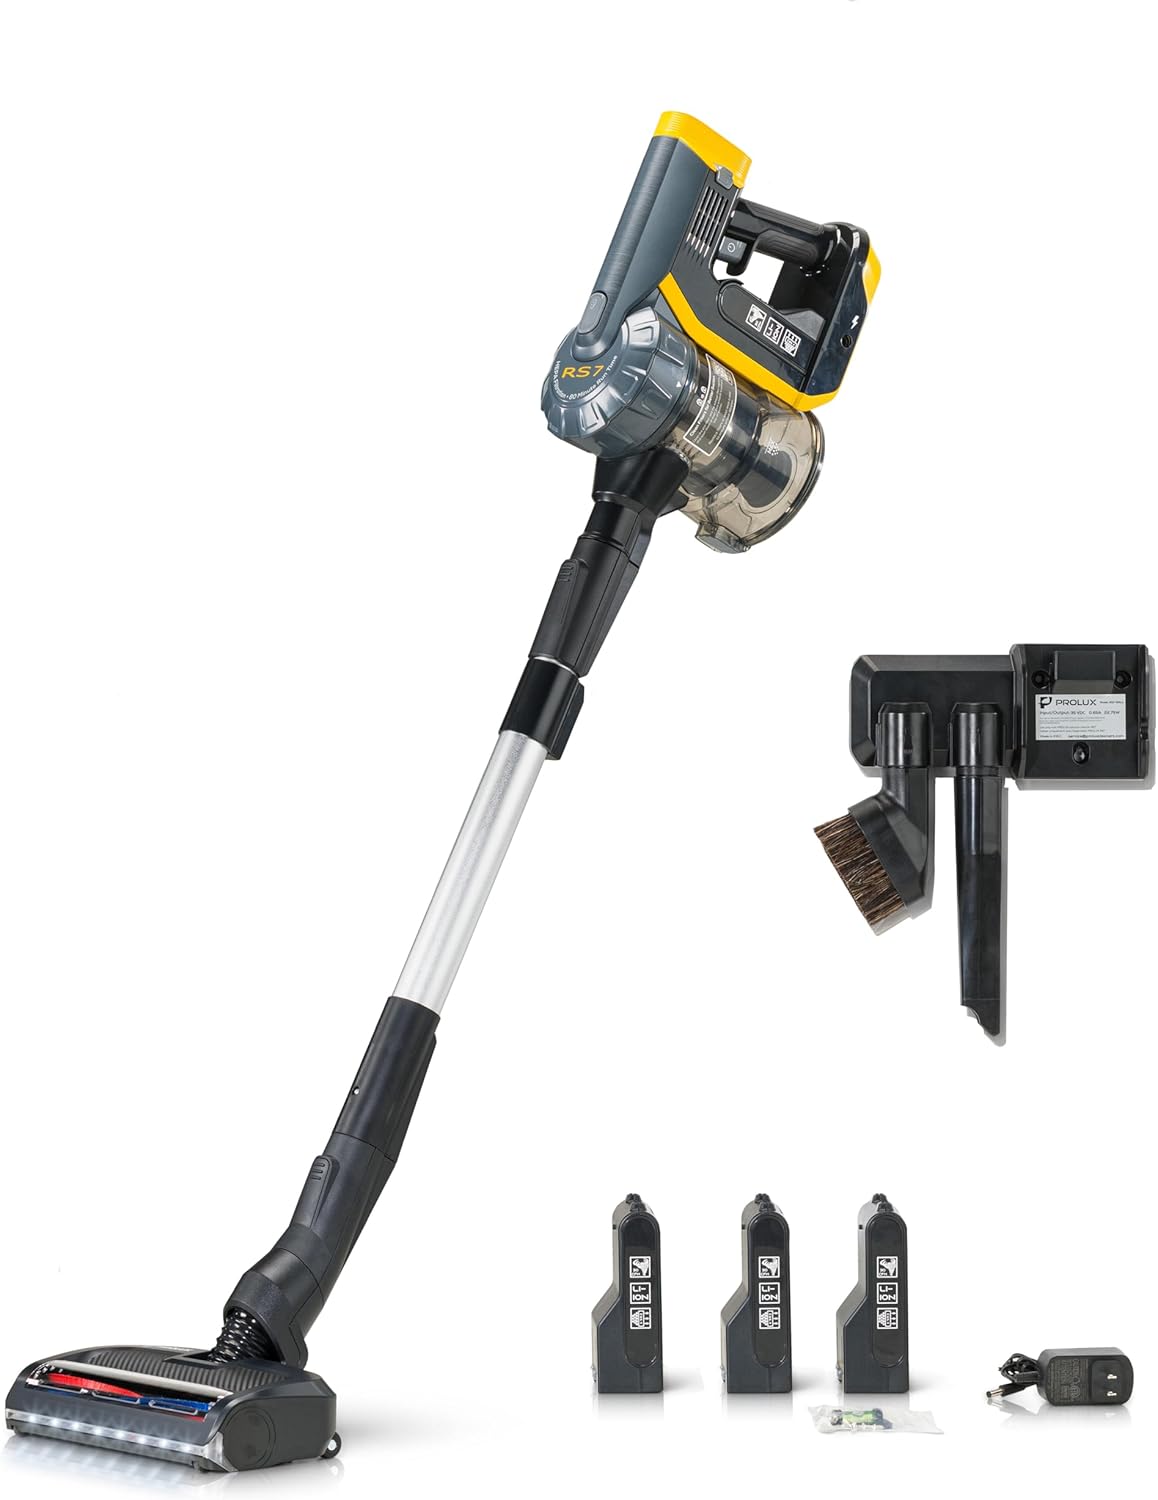
Image: The Prolux RS7 PRO Cordless Handheld Stick Vacuum shown fully assembled with its main body, extension wand, powerhead, three batteries, charger, wall mount, crevice tool, and dusting brush.
Zahrnuté komponenty
Your Prolux RS7 PRO package includes the following items:

Image: A detailed diagram labeling the main components: 1. RS7-vac (main unit), 2. Extendable Wand, 3. Wessel Werk EBK250 Electric Powerhead, 4. RS7-Crevice Tool, 5. RS7-Duster, 6. RS7-Wall Mount, 7. RS7-Charger, 8. RS7-Battery (3 included), 9. HEPA Filter Cartridge.
- RS7-vac (Main Handheld Unit)
- Extendable Wand
- Wessel Werk EBK250 Electric Powerhead
- Štěrbinový nástroj
- Štětec na prach
- Držák na zeď
- Nabíječka
- Three (3) Lithium-Ion Batteries
- HEPA Filter Cartridges (pre-installed and spares)
2. Nastavení
2.1 Počáteční nabití baterie
Before first use, fully charge all three batteries. Connect the charger to a power outlet and insert a battery. The charging indicator on the battery will show its status. A full charge typically takes approximately 4 hours per battery.
2.2 Sestavení vysavače
- Připevněte hůlku: Insert the extendable wand into the main handheld unit (RS7-vac) until it clicks securely into place.
- Attach the Powerhead: Connect the Wessel Werk EBK250 Electric Powerhead to the other end of the extendable wand until it locks. For handheld use, attachments can be connected directly to the main unit.
- Vložte baterii: Slide a fully charged battery into the battery slot on the main handheld unit until it clicks.
2.3 Montáž na stěnu
The included wall mount provides a convenient storage and charging solution. Select a suitable location near a power outlet. Use the provided screws to securely fasten the wall mount to a sturdy wall surface. The wall mount is designed to hold the vacuum and store accessories.

Image: The Prolux RS7 PRO wall mount, designed to hold the vacuum and its accessories like the crevice tool and dusting brush, shown mounted on a wall.
3. Návod k obsluze
3.1 Zapnutí a režimy sání
Press the power button on the main unit to turn the vacuum on. The RS7 PRO features three power levels for varying cleaning needs. Press the mode selection button to cycle through the suction settings: Low, Medium, and High. The current power level will be indicated on the display.

Obrázek: Detailní záběr view of the vacuum's control panel, displaying the battery charge percentage and the selected suction power level.
3.2 Používání příloh
- Electric Powerhead: Ideal for carpets and hard floors. The integrated LED lights illuminate the cleaning path.
- Štěrbinový nástroj: Use for narrow spaces, corners, and edges.
- Štětec na prach: Suitable for delicate surfaces, upholstery, and removing dust from blinds or shelves.
All attachments lock securely onto the wand or directly onto the main handheld unit.
3.3 Správa baterie
The RS7 PRO includes three 2500mAh Lithium-Ion batteries. Each battery provides up to 35 minutes of uninterrupted cleaning power, depending on the power mode and surface. By rotating the batteries, a total continuous runtime of up to 105 minutes can be achieved. Monitor the battery indicator on the display and swap batteries as needed.

Image: The Prolux RS7 PRO vacuum cleaner displayed alongside its three removable batteries and two HEPA filters, highlighting its extended runtime capability.
4. Údržba
Regular maintenance ensures optimal performance and extends the lifespan of your Prolux RS7 PRO vacuum.
4.1 Vyprázdnění nádoby na prach
When the dust bin is full, or suction power decreases, empty the contents. Detach the dust bin from the main unit, open the latch, and dispose of the debris. Close the latch securely before reattaching.
4.2 Čištění HEPA filtru
The HEPA filter traps 99.97% of dust and allergens. For best performance, clean the HEPA filter regularly. Remove the filter from the dust bin and gently tap it to dislodge dust. If necessary, rinse the filter under cool running water. Ensure the filter is completely dry before reinserting it into the vacuum. Do not use detergents or hot water.

Image: A close-up of the Prolux RS7 PRO's HEPA filter and smaller pre-filters, illustrating the multi-stage filtrační systém.
4.3 Čištění kartáčového válce
Hair and debris can become entangled in the powerhead's brushroll, affecting performance. The RS7 PRO features a quick-release brushroll for easy maintenance.
- Remove Powerhead: Detach the powerhead from the wand or main unit.
- Release Brushroll: Locate the quick-release dial or lever on the side of the powerhead. Turn or slide it to unlock and remove the brushroll.
- Čistý: Use the integrated cutting tool (if available on the powerhead) or scissors to remove tangled hair and fibers. Wipe the brushroll and its housing clean.
- Přeinstalovat: Insert the clean brushroll back into the powerhead and secure it by turning or sliding the quick-release mechanism until it locks.

Obrázek: Podrobný view of the Prolux RS7 PRO's powerhead, illustrating the quick-release mechanism for easy removal and cleaning of the brushroll.
5. Řešení problémů
If you encounter issues with your Prolux RS7 PRO, refer to the following common problems and solutions:
- No Power/Vacuum Not Turning On:
- Ujistěte se, že je baterie plně nabitá a správně vložená.
- Try a different charged battery.
- Snížený sací výkon:
- Check if the dust bin is full and empty it.
- Inspect and clean the HEPA filter.
- Check for blockages in the wand, powerhead, or attachments.
- Ensure all connections (wand to main unit, powerhead to wand) are secure.
- Kartáčový válec se netočí:
- Check for tangled hair or debris obstructing the brushroll. Clean as described in Section 4.3.
- Ensure the powerhead is correctly attached and locked.
- Baterie se nenabíjí:
- Verify the charger is properly connected to both the power outlet and the battery.
- Ujistěte se, že zásuvka je funkční.
- Zkontrolujte, zda nabíječka nebo baterie nejsou viditelně poškozené.
If the problem persists after attempting these solutions, please contact Prolux customer support.
6. Specifikace
| Funkce | Specifikace |
|---|---|
| Značka | Prolux |
| Název modelu | RS7 Pro |
| Speciální funkce | Bagless, Cordless, HEPA Filtration |
| Typ filtru | HEPA filtr |
| Zahrnuté komponenty | Accessory Kit (Wand, Powerhead, Crevice Tool, Duster, Wall Mount, Charger, 3 Batteries, HEPA Filters) |
| Zdroj napájení | Napájení baterií (Lithium-Ion) |
| Kapacita baterie | 3 x 2500mAh |
| Max Continuous Runtime | Až 105 minut (se 3 bateriemi) |
| Doba nabíjení | Approx. 4 hours per battery |
| Wattage | 360 wattů |
| Kapacita (nádoba na prach) | 1.2 litrů |
| Úroveň hluku | 82 dB |
| Počet úrovní výkonu | 3 |
| Šířka čisticí dráhy | 10 palce |
| Rozměry produktu | 12 cm D x 12 cm Š x 32 cm V |
| Hmotnost položky | 9 libry |
| Doporučená použití | Domov / Kancelář |
7. Záruka a podpora
7.1 Informace o záruce
For detailed warranty information regarding your Prolux RS7 PRO Cordless Handheld Stick Vacuum, please refer to the warranty card included with your purchase or visit the official Prolux webZáruční podmínky se mohou lišit.
7.2 Zákaznická podpora
If you have any questions, require technical assistance, or need to order replacement parts, please contact Prolux customer support:
- Webmísto: Visit the Prolux Store on Amazon (obecné dotazy a informace o produktech)
- Refer to your product packaging or the official Prolux website for direct contact information (phone number, email).
8. Důležité bezpečnostní informace
Always read and follow all safety instructions before using this appliance to reduce the risk of fire, electric shock, or injury.
- Nepoužívejte venku nebo na mokrém povrchu.
- Nedovolte, aby byl používán jako hračka. Při používání dětmi nebo v jejich blízkosti je nutná zvýšená pozornost.
- Používejte pouze tak, jak je popsáno v tomto návodu. Používejte pouze příslušenství doporučená výrobcem.
- Nepoužívejte s poškozeným kabelem nebo zástrčkou. Pokud spotřebič nefunguje, jak má, byl upuštěn, poškozen, ponechán venku nebo spadl do vody, vraťte jej do servisního střediska.
- Netahejte ani nepřenášejte za kabel, nepoužívejte kabel jako rukojeť, nezavírejte na kabel dvířka ani netahejte za kabel kolem ostrých hran nebo rohů. Nepřejíždějte spotřebičem přes kabel. Udržujte kabel mimo dosah horkých povrchů.
- Neodpojujte tahem za kabel. Při odpojování uchopte zástrčku, nikoli kabel.
- Nemanipulujte se zástrčkou nebo spotřebičem mokrýma rukama.
- Do otvorů nevkládejte žádné předměty. Nepoužívejte se zablokovaným otvorem; chraňte před prachem, žmolky, vlasy a vším, co by mohlo omezit proudění vzduchu.
- Udržujte vlasy, volné oblečení, prsty a všechny části těla v dostatečné vzdálenosti od otvorů a pohyblivých částí.
- Nesbírejte nic, co hoří nebo kouří, jako jsou cigarety, zápalky nebo horký popel.
- Nepoužívejte k vysávání hořlavých nebo hořlavých kapalin, jako je benzín, ani je nepoužívejte v oblastech, kde se mohou vyskytovat.
- Nevysávejte toxické materiály (např. chlórové bělidlo, amoniak, čistič odpadů).
- Nepoužívejte bez nasazeného sáčku na prach a/nebo filtrů.
- Před odpojením vypněte všechny ovládací prvky.
- Při čištění na schodech dbejte zvýšené opatrnosti.
- Nepoužívejte k nabírání velkých, tvrdých nebo ostrých předmětů, jako je sklo, hřebíky, šrouby, mince atd.