
1. Úvod
This manual provides comprehensive instructions for the setup, operation, and maintenance of your Keychron V1 75% Layout Custom QMK/VIA Wired Mechanical Keyboard. Please read this manual thoroughly before using the keyboard to ensure optimal performance and longevity.
2. Konec produktuview
The Keychron V1 is an 81-key, 75% layout mechanical keyboard designed for a premium typing experience. It features hot-swappable switches, south-facing RGB backlighting, and support for QMK/VIA customization. The keyboard is compatible with both macOS and Windows operating systems.

Obrázek 2.1: Shora dolů view of the Keychron V1 mechanical keyboard, showcasing its 75% layout with 81 keys, including function row, navigation cluster, and arrow keys. The keycaps are a mix of dark grey and blue-grey with red accent keys for Esc and Enter.

Obrázek 2.2: Úhlové view of the Keychron V1 keyboard, highlighting its compact design and the color scheme of the PBT keycaps. The keyboard rests on a white surface, emphasizing its form factor.
2.1 Obsah balení
Ujistěte se, že v balení jsou přítomny všechny položky:
- Keychron V1 Mechanical Keyboard
- Kabel USB-C na USB-C
- Adaptér USB-A na USB-C
- Stahovač klíčů
- Stahovák spínačů
- Extra Keycaps for Windows/macOS
- Šroubovák

Figure 2.3: Included accessories: a keycap puller, switch puller, and additional keycaps for Windows and macOS layouts, demonstrating the keyboard's adaptability.
3. Nastavení
3.1 Připojení klávesnice
The Keychron V1 is a wired keyboard and connects via a USB-C cable.
- Vyhledejte port USB-C na zadní straně klávesnice.
- Připojte jeden konec dodaného kabelu USB-C ke klávesnici.
- Connect the other end of the USB-C cable to an available USB-C port on your computer. If your computer only has USB-A ports, use the included USB-A to USB-C adapter.
- Klávesnice bude automaticky rozpoznána vaším operačním systémem.

Figure 3.1: Close-up of the USB-C port on the Keychron V1 keyboard, indicating the connection point for the provided cable.
3.2 Switching Operating System Layout
The Keychron V1 features a physical toggle switch to change between macOS and Windows layouts.
- Locate the toggle switch on the side of the keyboard, near the USB-C port.
- Slide the switch to the 'Mac' position for macOS or 'Win' position for Windows.
- For optimal experience, replace the default keycaps with the included macOS or Windows specific keycaps as needed (e.g., Command/Option for Mac, Alt/Windows for Win).

Obrázek 3.2: Strana view of the Keychron V1 keyboard showing the physical toggle switch for selecting between Windows and macOS operating system layouts, located next to the USB-C port.
4. Návod k obsluze
4.1 Základy psaní
The Keychron V1 functions as a standard 75% layout keyboard. All alphanumeric keys, modifiers, and function keys operate as expected for their respective operating systems.
4.2 Funkční klávesy (F1–F12)
The top row of keys serves as function keys (F1-F12). By default, these keys may have multimedia or system control functions. To access the standard F1-F12 functions, press the Fn současně s požadovanou funkční klávesou.
4.3 RGB podsvícení
The Keychron V1 features south-facing RGB LED lights with multiple lighting effects. You can cycle through different lighting modes and adjust brightness directly on the keyboard.
- Změnit režim osvětlení: Use the dedicated lighting effect key (often located near the navigation cluster or accessible via Fn combinations).
- Upravit jas: Use Fn + Light Brightness Up/Down keys (refer to keyboard layout for specific key assignments).

Obrázek 4.1: Detail view of the Keychron V1's south-facing RGB backlighting, showing various colors illuminating the mechanical switches beneath the keycaps.
5. Customization (QMK/VIA)
The Keychron V1 supports QMK firmware and VIA software, allowing for extensive customization of key assignments, macros, and lighting effects.
5.1 Using VIA Software
VIA is a powerful graphical user interface (GUI) that enables real-time key remapping and macro programming without needing to flash new firmware. To use VIA:
- Stáhněte si software VIA z oficiálního webu Keychron. website or the VIA GitHub repository.
- Připojte klávesnici Keychron V1 k počítači.
- Launch the VIA application. The software should automatically detect your keyboard.
- Use the intuitive interface to remap keys, create macros, and customize RGB lighting. Changes are applied instantly.

Figure 5.1: Screenshot of the VIA software interface, demonstrating its capabilities for remapping keys and programming macros on the Keychron V1 keyboard. The interface shows different layers and key assignments.
5.2 Přepínače vyměnitelné za provozu
The Keychron V1 features hot-swappable sockets, allowing you to change mechanical switches without soldering. This supports both 3-pin and 5-pin MX style mechanical switches.
- Demontáž přepínače: Use the included switch puller. Gently grip the switch from the top and bottom clips and pull straight up.
- Instalace přepínače: Align the pins of the new switch with the holes on the PCB. Ensure the pins are straight. Press the switch firmly until it clicks into place. Do not force the switch if it doesn't go in easily, as bent pins can damage the socket.

Obrázek 5.2: Detail view demonstrating the hot-swappable nature of the Keychron V1 keyboard, showing different colored switches inserted and one empty socket, indicating easy switch replacement.
5.3 Výměna krytky kláves
The Keychron V1 comes with double-shot PBT keycaps. You can replace them with other compatible keycaps using the included keycap puller.
- Sejmutí krytky kláves: Use the keycap puller to gently grip the keycap from two opposite sides and pull straight up.
- Instalace krytky kláves: Align the keycap stem with the switch stem and press down firmly until it is seated.
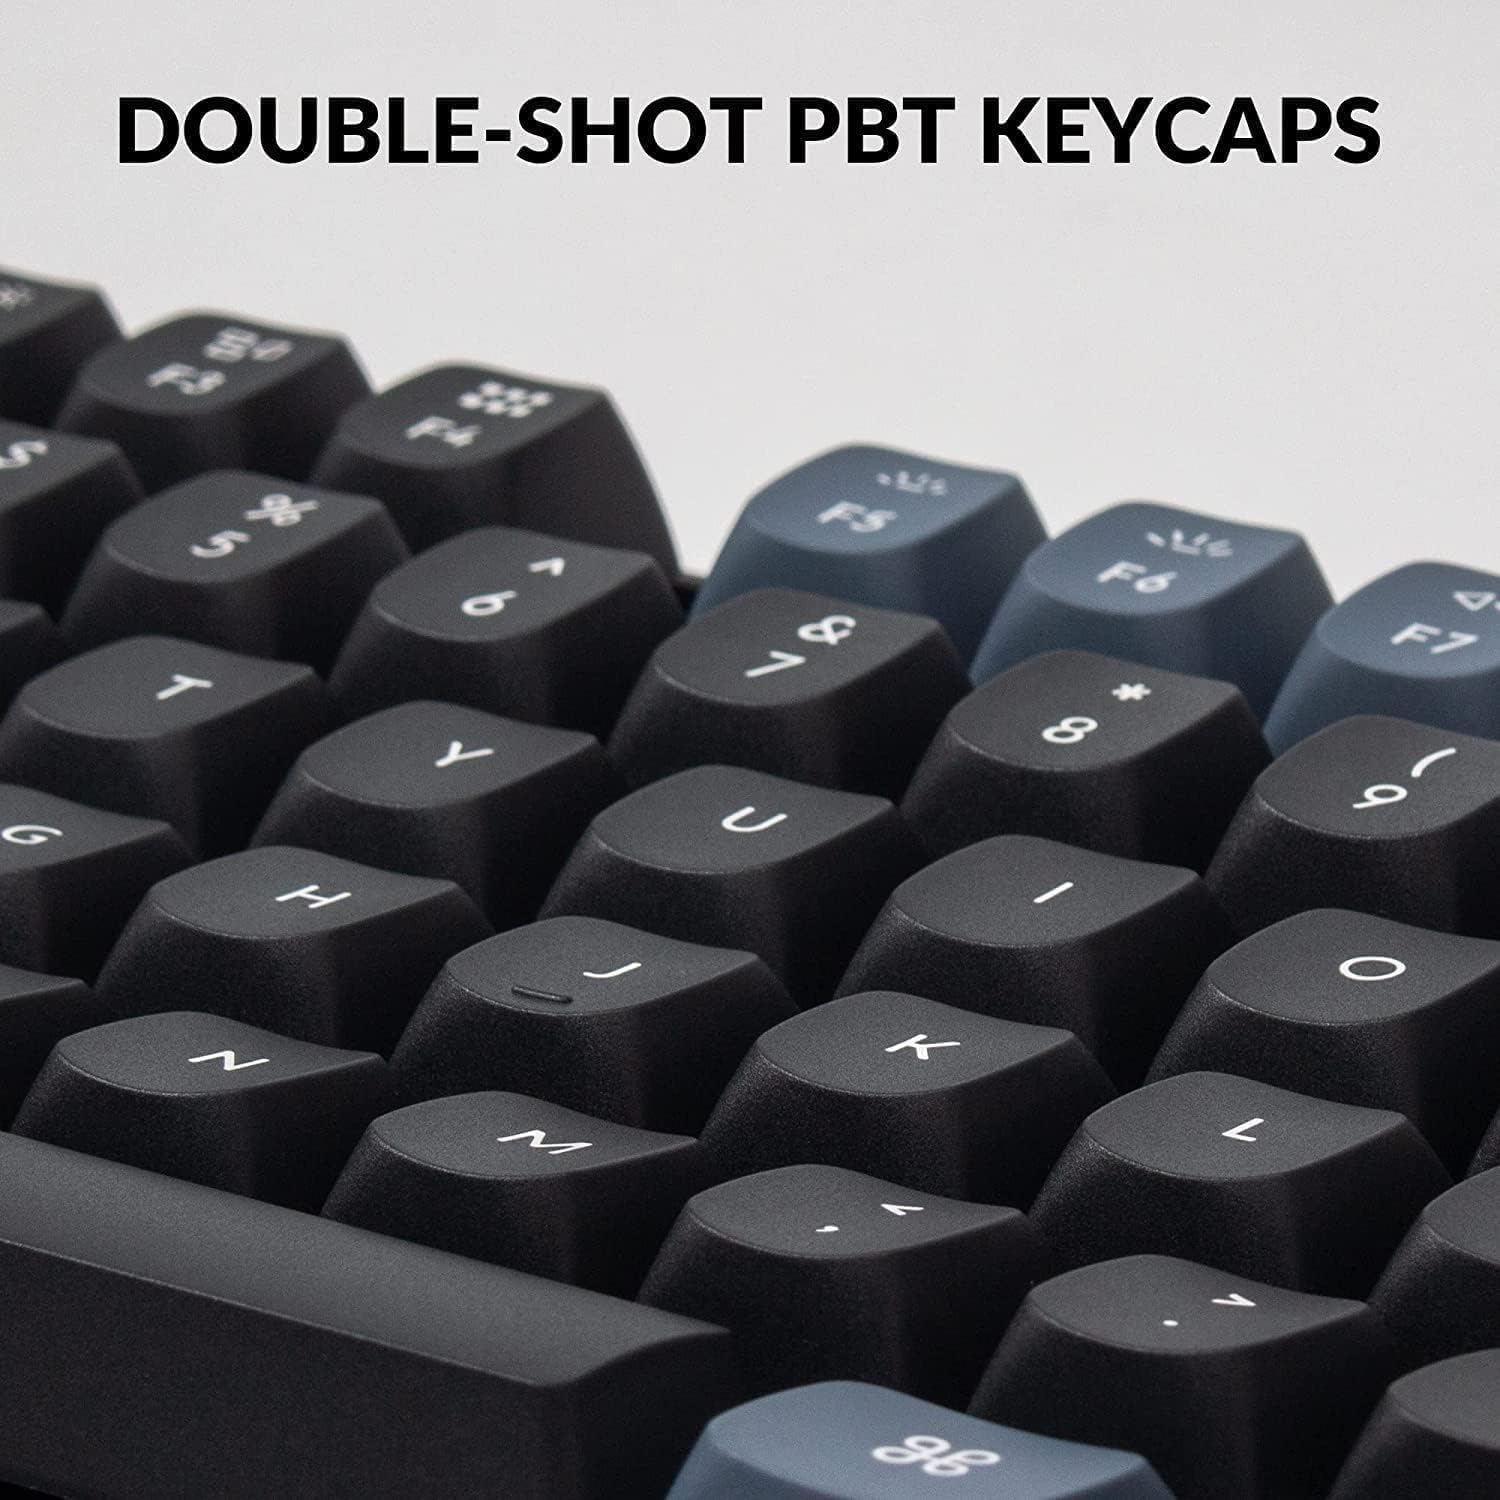
Figure 5.3: Close-up of the double-shot PBT keycaps on the Keychron V1 keyboard, highlighting their texture and legends, which are durable and resistant to shine.
6. Údržba
6.1 Čištění klávesnice
- Před čištěním odpojte klávesnici od počítače.
- K odstranění prachu a nečistot z prostoru mezi klávesami použijte nádobku se stlačeným vzduchem.
- For stubborn dirt, remove the keycaps using the keycap puller and clean the plate and switches with a soft brush or microfiber cloth.
- Wipe the keycaps and keyboard case with a slightly damp, hadřík, který nepouští vlákna. Nepoužívejte agresivní chemikálie nebo abrazivní materiály.
6.2 Switch Lubrication
The Keychron V1 comes with factory pre-lubricated Keychron K Pro switches for a smoother typing experience. If you replace switches or wish to re-lubricate them, use a specialized switch lubricant and follow proper lubrication techniques to avoid damaging the switches.
7. Řešení problémů
| Problém | Možná příčina | Řešení |
|---|---|---|
| Klávesnice nereaguje | Volné připojení kabelu, nesprávný USB port, problém s ovladačem. | Ensure USB-C cable is securely connected to both keyboard and computer. Try a different USB port. Restart your computer. |
| Klávesy se neregistrují nebo se píší dvakrát | Vadný spínač, nečistoty pod klávesou/spínačem. | Remove keycap and switch, clean the area with compressed air. Reinstall switch or replace with a new one if faulty. |
| RGB backlight not working or incorrect | Nastavení režimu osvětlení, konflikt softwaru. | Cycle through lighting modes using keyboard shortcuts. Check VIA software settings for lighting customization. |
| Incorrect key output (Mac/Windows) | Operating system toggle switch is in the wrong position. | Ensure the Mac/Win toggle switch on the side of the keyboard is set to your current operating system. |
8. Specifikace
| Funkce | Detail |
|---|---|
| Model | HS-V1-B2 |
| Rozložení | 75 % (81 kláves) |
| Konektivita | Kabelové USB-C |
| Spínače | Keychron K Pro Blue Switch (Hot-swappable, 3-pin & 5-pin compatible) |
| Klíčenky | Dvojitý vstřik PBT |
| Podsvícení | RGB LED směřující na jih |
| Kompatibilita | macOS, Windows, Linux |
| Přizpůsobení | Podpora QMK/VIA |
| Materiál | Polybutylentereftalát (klávesy) |
| Hmotnost položky | 2.1 libry |
| Rozměry balení | 15.7 x 5.9 x 2 palce |

Figure 8.1: Table detailing Keychron K Pro Switch features, including behavior (Linear, Clicky, Tactile), pre-lubrication status, sound level, and suitable applications (Office/gaming, Typist).

Figure 8.2: Exploded diagram illustrating the internal components of the Keychron V1 keyboard, including keycaps, switches, top case, sound absorbing foam, plate, PCB, silicone pad, and bottom case.
9. Záruka a podpora
Keychron products typically come with a limited warranty. For detailed warranty information, technical support, and frequently asked questions, please visit the official Keychron webnebo kontaktujte jejich zákaznický servis.
Oficiální Keychron Webmísto: www.keychron.com
For further assistance, refer to the product page on Amazon: Keychron V1 on Amazon