1. Úvod
This manual provides detailed instructions for the installation, operation, and maintenance of your Elprico H310 LGA 1151 Micro ATX DDR4 Motherboard. Please read this manual thoroughly before proceeding with installation to ensure proper setup and optimal performance.
2. Bezpečnostní informace
- Před instalací nebo demontáží jakýchkoli součástí vždy odpojte napájecí kabel ze zásuvky.
- Noste antistatický náramek, abyste zabránili poškození součástí elektrostatickým výbojem (ESD).
- Součásti manipulujte za hrany, abyste se nedotkli citlivých částí.
- Zajistěte dostatečné větrání v skříni počítače, abyste zabránili přehřátí.
- Chraňte základní desku před vlhkostí a extrémními teplotami.
3. Konec produktuview
The Elprico H310 LGA 1151 Micro ATX DDR4 Motherboard is designed for desktop computers, supporting Intel 8th and 9th Generation Core processors. It features a stable power supply, high-speed H310 chipset, and rich expansion ports for versatile computing tasks.
Klíčové vlastnosti:
- Wide CPU Compatibility: Supports LGA 1151 socket for Intel 8th and 9th Generation Core processors.
- Dual-Channel DDR4 Memory: Two DDR4 DIMM slots supporting up to 32GB of RAM with effective frequencies of 1066/1333/1600 MHz.
- Stabilní napájení: Features a three-phase power design with all solid-state capacitors and 24+8 pin power connectors for reliable operation.
- High-Speed Chipset: Utilizes the Intel H310 chipset for stable and reliable performance.
- Integrovaná grafika: Equipped with an integrated graphics processor and multiple display outputs (DVI, HDMI compatible, VGA).
- Rich Expansion Ports: Includes SATA 6Gb/s ports, NVME M.2 slot, PCIe X16 slot, PCIe X1 slot, USB 3.0/2.0, PS/2, RJ45 1000Mbps, and audio ports.
Rozložení základní desky:
Below are images illustrating the various components and ports on the motherboard.

Obrázek 3.1: Shora dolů view of the motherboard, showing the LGA 1151 CPU socket and the Intel H310 chipset area.
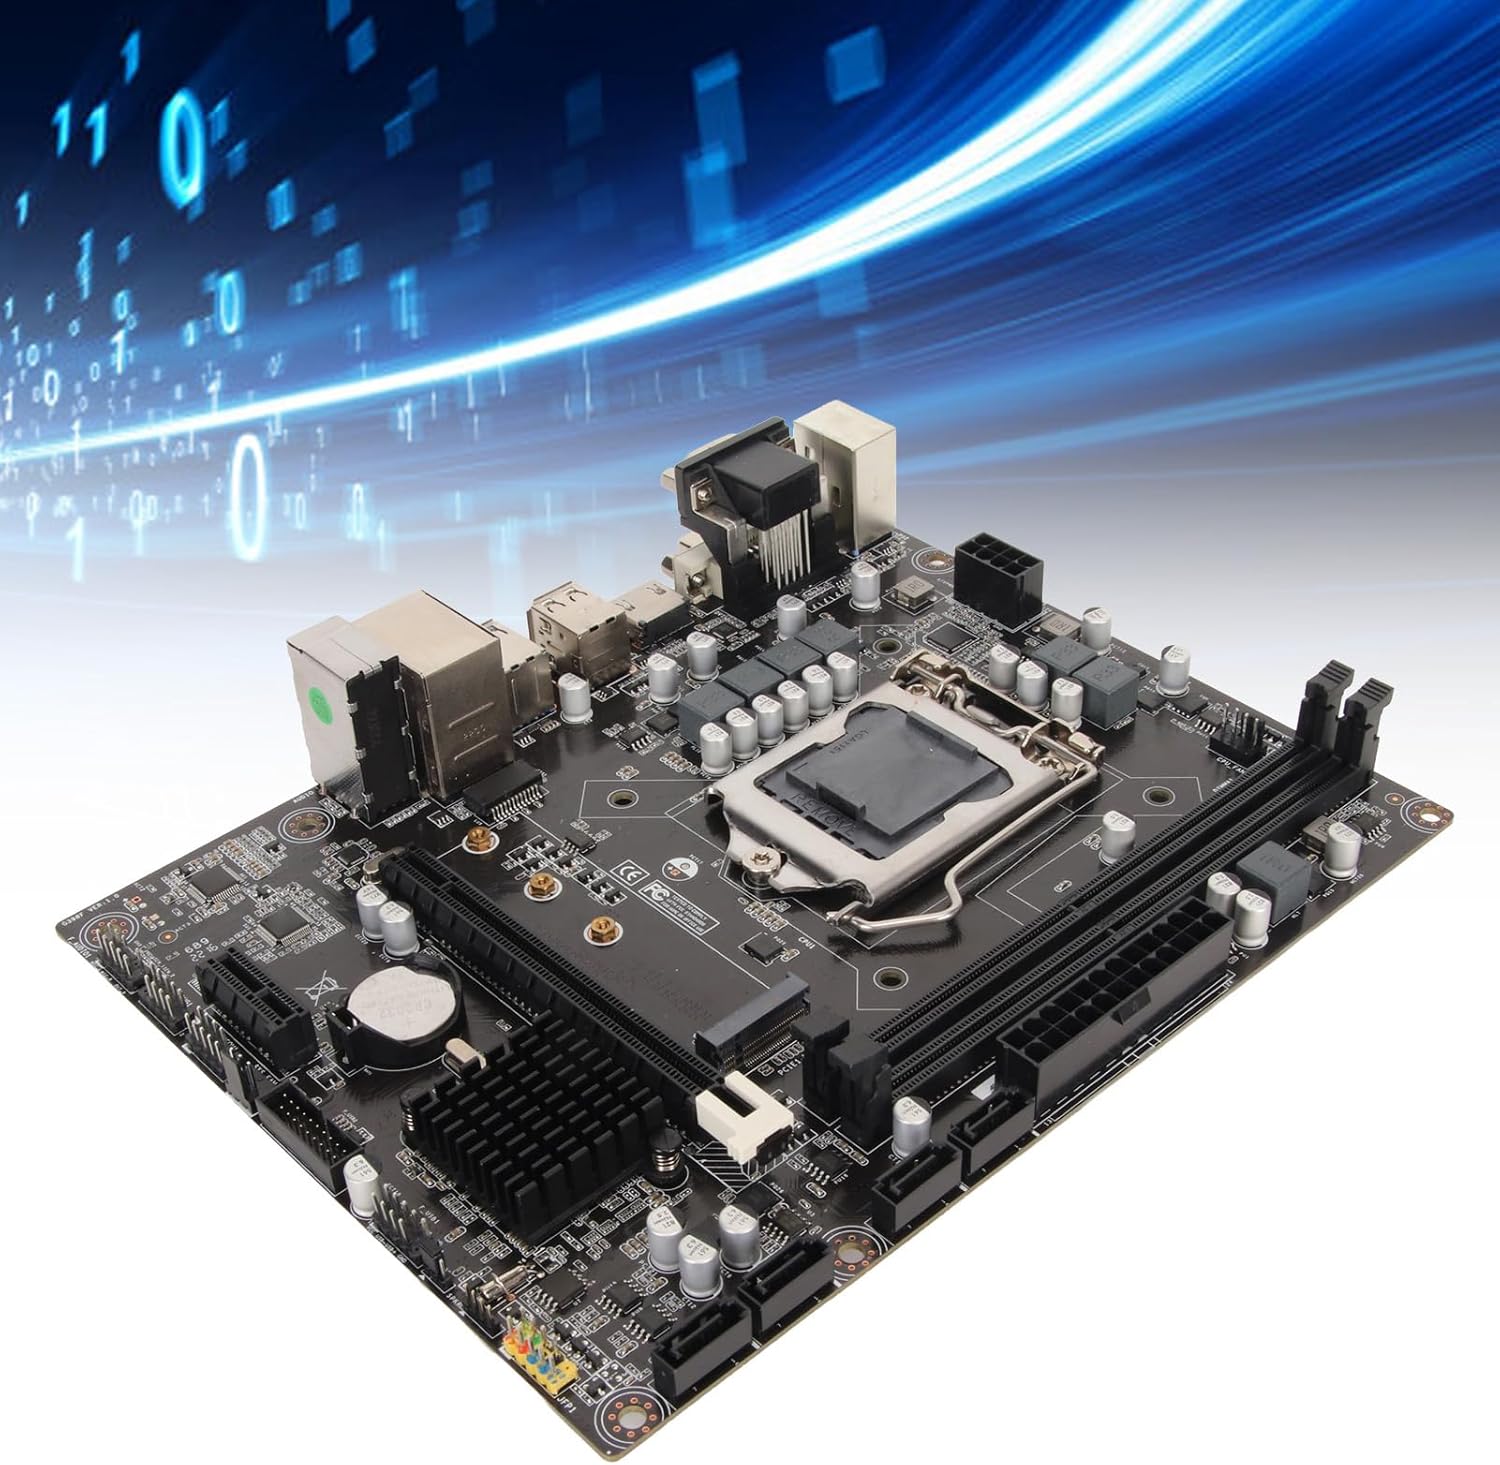
Figure 3.2: Component diagram highlighting the CPU socket, DDR4 memory slots, H310 chipset, and SATA 3.0 (6Gb/s) ports.
Obrázek 3.3: Detailní view of the rear I/O panel, featuring DVI, HDMI, VGA, USB 2.0/3.0, LAN, and audio jacks.
4. Instalační průvodce (Nastavení)
Při instalaci základní desky a jejích součástí pečlivě dodržujte tyto kroky.
4.1 Instalace CPU
- Najděte na základní desce patici procesoru LGA 1151.
- Gently push down the load lever and pull it sideways to open the CPU socket cover.
- Align the triangular mark on your Intel LGA 1151 processor with the corresponding mark on the socket.
- Opatrně vložte procesor do patice, aniž byste na něj tlačili.
- Close the socket cover and push the load lever back into place until it clicks.

Figure 4.1: CPU socket area, showing the mechanism for processor installation.
4.2 Instalace RAM
- Vyhledejte dva sloty pro DDR4 DIMM.
- Otevřete klipy na obou koncích paměťového slotu.
- Zarovnejte zářez na paměťovém modulu DDR4 s výstupkem ve slotu DIMM.
- Pevně zasuňte paměťový modul do slotu, dokud nezacvaknou klipy.
4.3 Instalace úložiště
The motherboard supports both SATA and NVMe M.2 storage devices.
SATA disky:
- Připojte jeden konec datového kabelu SATA k portu SATA 6 Gb/s na základní desce.
- Připojte druhý konec datového kabelu SATA k vašemu pevnému disku/SSD s rozhraním SATA.
- Připojte napájecí kabel SATA ze zdroje napájení k pevnému disku/SSD SATA.
SSD disk NVMe M.2:
- Najděte slot M.2 na základní desce.
- Odstraňte šroub distanční podložky M.2.
- Insert the NVMe M.2 SSD into the slot at a 30-degree angle.
- Gently push down the SSD and secure it with the M.2 standoff screw.
4.4 Instalace rozšiřující karty (PCIe)
- Locate the PCIe X16 or PCIe X1 slots.
- Sejměte příslušný kryt rozšiřujícího slotu z pouzdra počítače.
- Align your expansion card (e.g., graphics card) with the chosen PCIe slot.
- Pevně zatlačte dolů, dokud karta zcela nezapadne do slotu.
- Kartu připevněte k pouzdru šroubem.
4.5 Připojení napájení
- Připojte 24pinový napájecí konektor ATX ze zdroje do hlavní 24pinové napájecí zásuvky na základní desce.
- Připojte 8pinový napájecí konektor ATX 12V ze zdroje napájení k 8pinové zdířce poblíž procesoru.
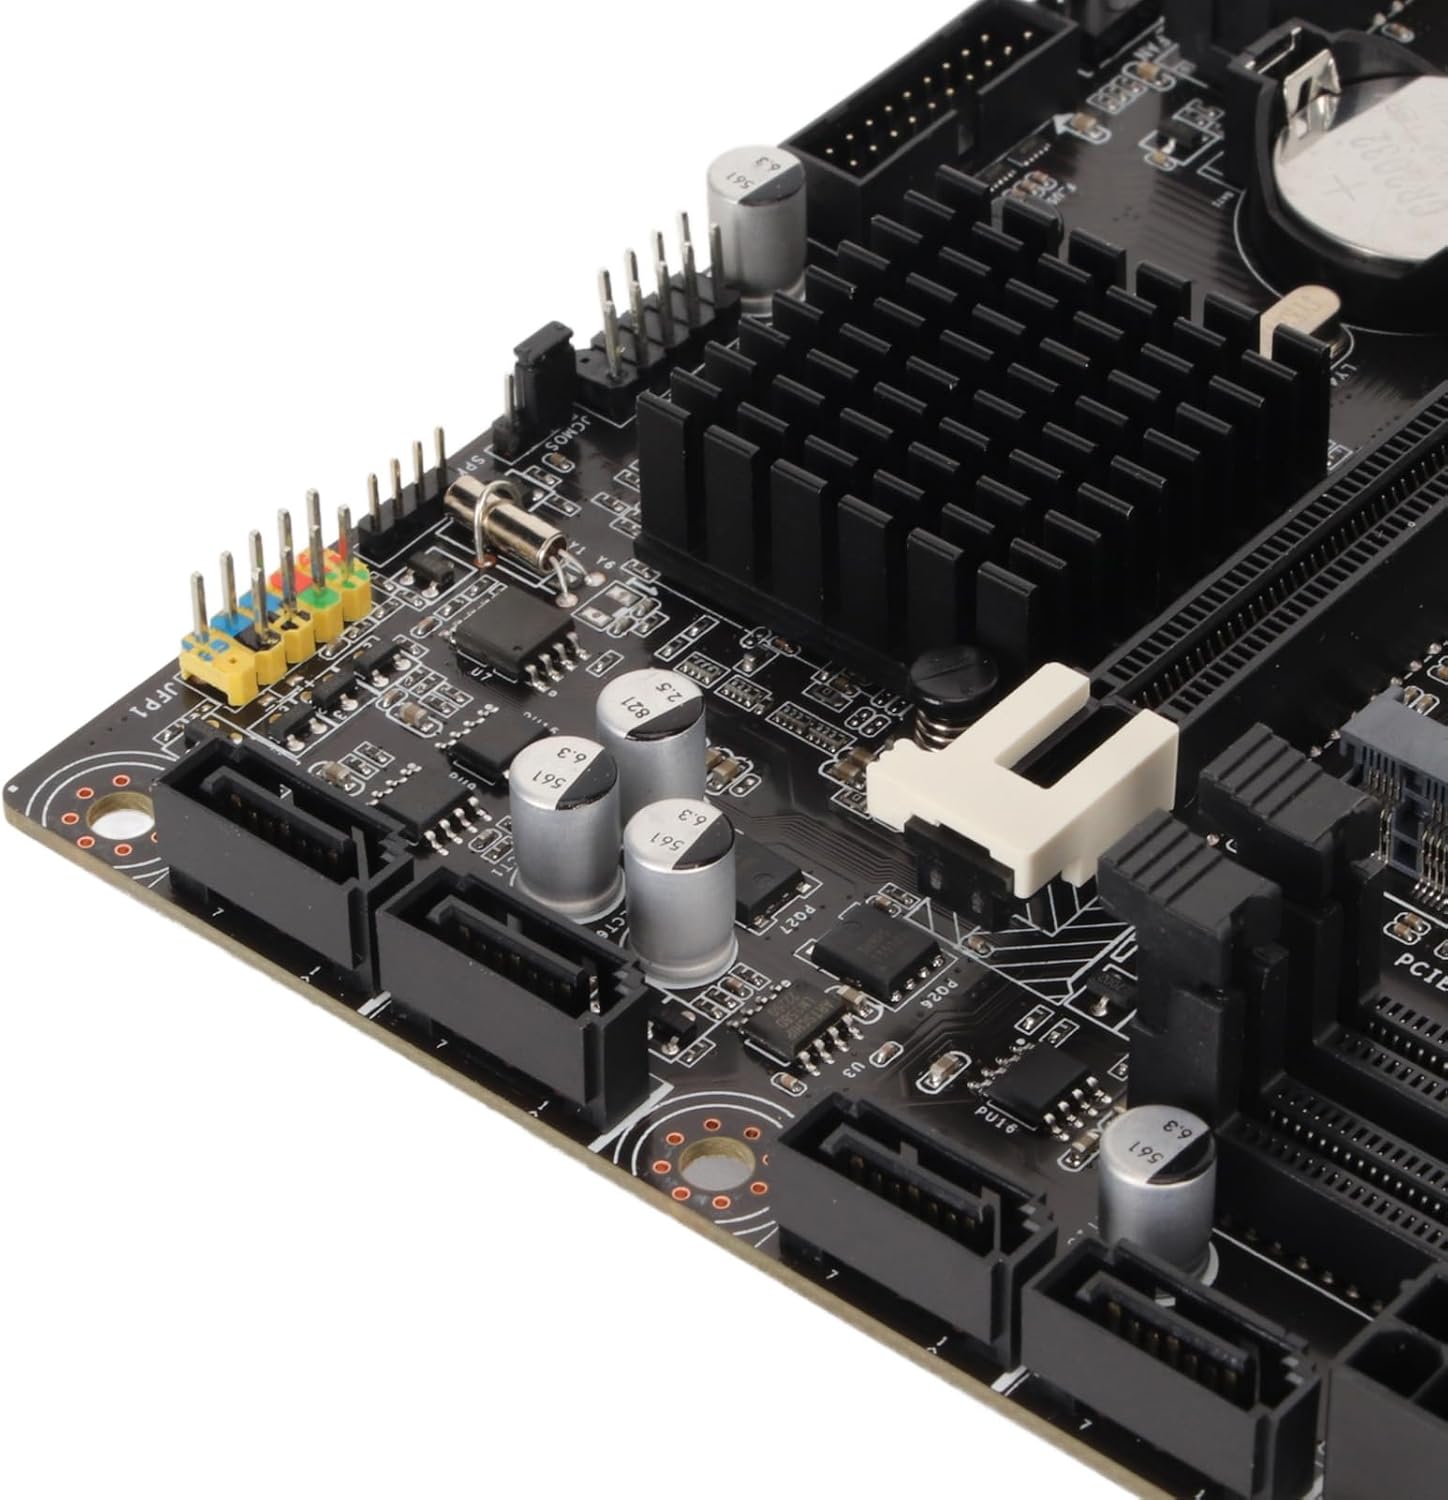
4.6 Připojení předního panelu
Connect the cables from your PC case's front panel (USB, audio, power button, reset button, LED indicators) to the corresponding headers on the motherboard. Refer to the motherboard diagram for exact header locations.
4.7 Montáž základní desky
- Install standoffs in your PC case according to the Micro ATX form factor.
- Carefully place the motherboard onto the standoffs, ensuring the rear I/O ports align with the case's I/O shield.
- Zajistěte základní desku šrouby.

Obrázek 4.2: Obecné informace view of the motherboard, illustrating its Micro ATX form factor and component placement.
5. Návod k obsluze
5.1 První spuštění
After completing all hardware installations, connect your monitor, keyboard, and mouse. Power on your system. The system should display the BIOS/UEFI splash screen.
5.2 Nastavení BIOSu/UEFI
Chcete-li vstoupit do nástroje pro nastavení BIOS/UEFI, stiskněte klávesu DEL or F2 key repeatedly during the initial boot sequence. Here you can configure boot order, system time, and other advanced settings.
5.3 Instalace ovladače
After installing your operating system, install the necessary drivers for the chipset, integrated graphics, LAN, and audio. These drivers are typically provided on a support CD or can be downloaded from the manufacturer's webmísto.
6. Údržba
6.1 Čištění
Regularly clean your PC case and motherboard to prevent dust buildup, which can lead to overheating. Use compressed air to remove dust from fans, heatsinks, and other components. Ensure the system is powered off and unplugged before cleaning.
6.2 Aktualizace systému BIOS
Pravidelně kontrolujte informace od výrobce website for BIOS/UEFI updates. Updates can improve system stability, add support for new hardware, or fix bugs. Follow the provided instructions carefully when updating the BIOS to avoid system damage.
7. Řešení problémů
7.1 Běžné problémy
- Bez napájení: Check all power connections (24-pin, 8-pin CPU, GPU, SATA) and ensure the power supply is switched on.
- Bez displeje: Verify monitor connection, ensure graphics card (if dedicated) is properly seated and powered, and try reseating RAM modules.
- Nestabilita/pády systému: Check CPU and GPU temperatures, ensure RAM is correctly installed, and verify driver versions.
- Spouštěcí zařízení nenalezeno: Check SATA/M.2 connections, verify boot order in BIOS/UEFI, and ensure the operating system is properly installed on the drive.
7.2 Chybové kódy
If your motherboard has a diagnostic LED display or emits beep codes, consult the motherboard's specific documentation (if available) for the meaning of these codes. Common beep codes often indicate issues with RAM, CPU, or graphics.
8. Specifikace
| Funkce | Specifikace |
|---|---|
| Značka | Elprico |
| Název modelu | Elpricop91byt60k7 |
| Zásuvka CPU | LGA 1151 |
| Kompatibilní procesory | Intel 8th Generation, 9th Generation Core Processors |
| Typ čipové sady | Intel H310 |
| Technologie paměti RAM | DDR4 |
| Paměťové sloty | 2 (Dual-Channel) |
| Maximum RAM Size | 32 GB |
| Rychlost paměti | 1600 MHz (efektivní) |
| Kompatibilní zařízení | Stolní počítač |
| Celkový počet portů USB | 14 (Various types, including USB 3.0/2.0) |
| Form Factor | Micro ATX (Approx. 21.5 x 17 cm / 8.5 x 6.7 inches) |
| Integrovaná baterie | CR2032 (240 mAh) |
9. Záruka a podpora
9.1 Záruka výrobce
Tento produkt je dodáván s a 1letá záruka na vady výrobce. Please retain your proof of purchase for warranty claims. For specific terms and conditions, refer to the warranty information provided at the time of purchase or contact the seller.
9.2 Technická podpora
For technical assistance, troubleshooting, or further inquiries, please contact your retailer or the manufacturer's support channels. Information regarding spare parts availability and software updates is currently unavailable.