
Beetronics 19VG7M
Uživatelská příručka k 19palcovému monitoru Beetronics 19VG7M s rozlišením Full HD a IPS
Professional Industrial-Grade Display
Zavedení
This manual provides comprehensive instructions for the installation, operation, and maintenance of your Beetronics 19VG7M 19-Inch Full HD IPS Monitor. Designed for professional and continuous use, this industrial-grade display offers exceptional visual clarity, versatile connectivity, and robust construction. Please read this manual thoroughly before using the monitor to ensure proper setup and optimal performance.

Obrázek 1: Přední strana view of the Beetronics 19VG7M Monitor.
Obsah balení
Než budete pokračovat v instalaci, ověřte si prosím, zda jsou v balení přítomny všechny komponenty:
- Beetronics 19VG7M Monitor
- Napájecí zdroj a kabel
- Dálkové ovládání
- Flush Mounting Brackets (if applicable)
- Desktop & Surface Mounting Stand
- Uživatelská příručka (tento dokument)
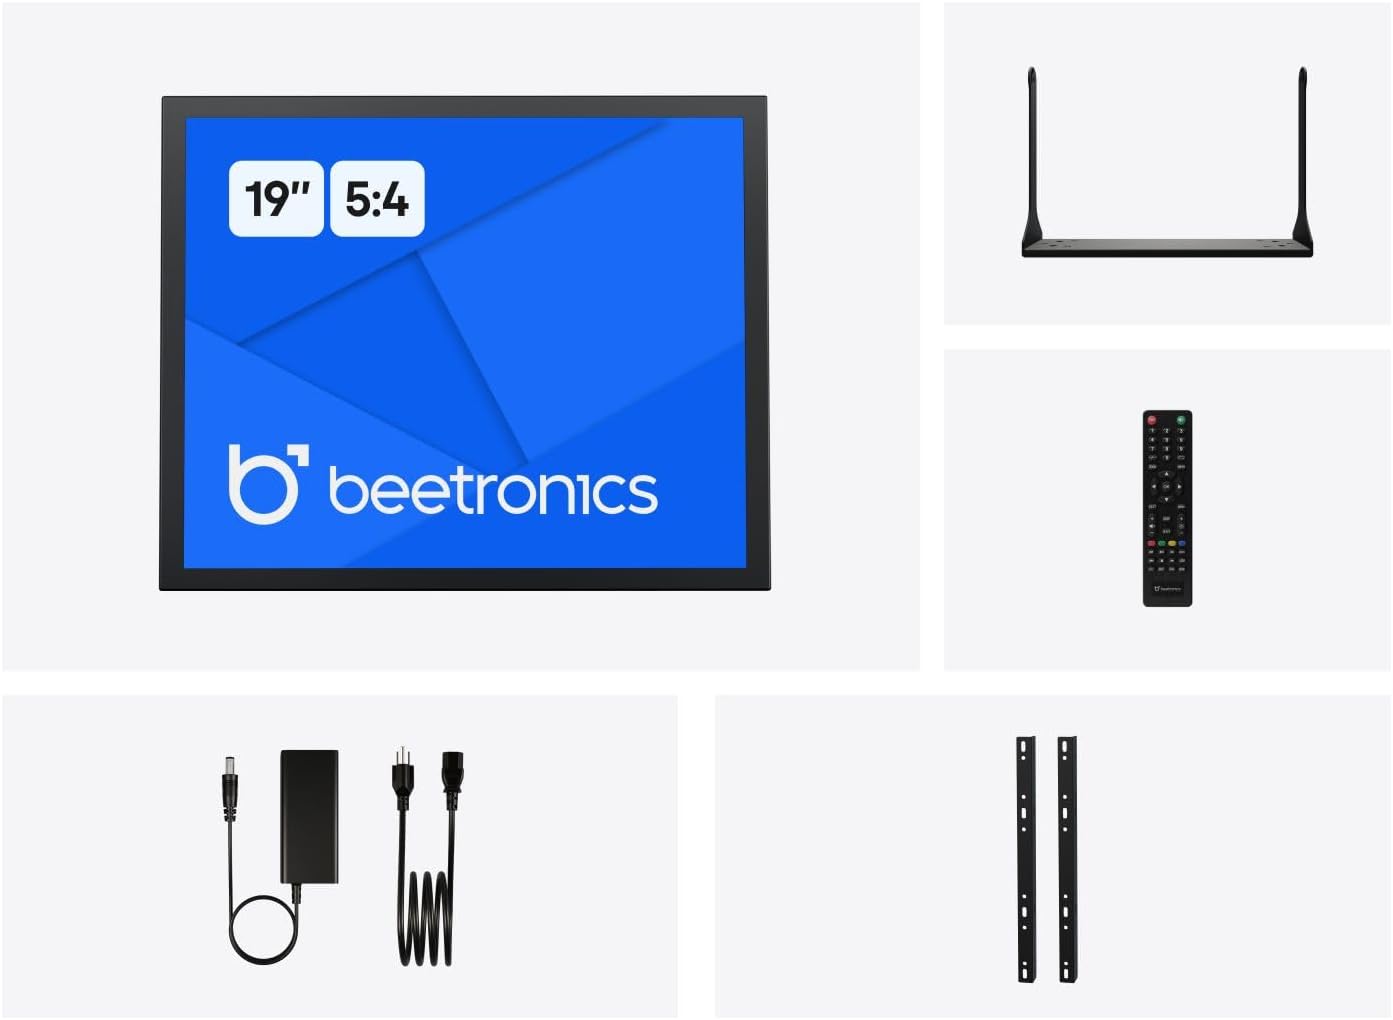
Figure 2: Included accessories with the Beetronics 19VG7M Monitor.
Nastavení
1. Možnosti montáže
The 19VG7M monitor offers flexible mounting solutions, including a collapsible desktop stand and VESA 100mm compatibility for wall or arm mounting.
Instalace stolního stojanu:
- Monitor opatrně položte displejem dolů na měkký, čistý povrch, abyste zabránili poškrábání.
- Attach the desktop stand to the designated mounting points on the rear of the monitor using the provided screws. Ensure it is securely fastened.
- Umístěte monitor na stabilní rovný povrch.
VESA Wall/Arm Mounting:
- If the desktop stand is attached, remove it.
- Align the VESA 100mm mounting holes on the back of the monitor with your VESA-compatible wall mount or arm.
- Secure the monitor to the mount using appropriate VESA screws (M4 x 10mm recommended, not always included with monitor).

Figure 3: Monitor dimensions with desktop stand.
2. Propojovací kabely
The 19VG7M monitor features a variety of input ports located on the rear, facing downwards for neat cable management. Ensure the monitor and all connected devices are powered off before making connections.

Figure 4: Downward-facing input ports.
- HDMI: Connect an HDMI cable from your source device (e.g., computer, media player) to the HDMI port on the monitor.
- VGA: Connect a VGA cable from your source device to the VGA port on the monitor.
- BNC: For professional video applications, connect a BNC cable to the BNC input.
- RCA (AV): Use RCA cables for composite video and stereo audio input. Connect the yellow plug for video, and red/white for audio.
- USB: (If applicable for touch functionality or specific peripherals, consult product specifications for exact USB function).
- Moc: Connect the provided power supply to the DC input port on the monitor, then plug the power cord into a wall outlet. The monitor supports a wide input voltage range of 9-36 Volts.

Obrázek 5: Zadní panelview with control buttons and ports.
Návod k obsluze
1. Zapnutí/vypnutí
Stiskněte tlačítko ON/OFF button located on the rear panel or on the remote control to power the monitor on or off. The power indicator light will illuminate when the monitor is on.
2. Výběr vstupu
To switch between different video inputs (HDMI, VGA, BNC, RCA):
- Stiskněte tlačítko AUTO button on the rear panel or the VSTUP tlačítko na dálkovém ovladači.
- Použijte + or - buttons to navigate through the available inputs.
- Stiskněte tlačítko MENU button or wait a few seconds to confirm your selection.
3. Nabídka na obrazovce (OSD).
The OSD menu allows you to adjust various display settings. To access and navigate the OSD menu:
- Stiskněte tlačítko MENU button on the rear panel or remote control to open the OSD menu.
- Použijte + or - tlačítka pro navigaci v možnostech nabídky.
- Stiskněte tlačítko MENU button again to enter a sub-menu or confirm a setting.
- To exit the OSD menu, navigate to the "Exit" option or press the MENU button repeatedly until the menu disappears.
Běžná nastavení OSD:
- Obrázek: Adjust brightness, contrast, color temperature, and aspect ratio (e.g., 5:4).
- Zvuk: Control volume and mute settings.
- Nastavení OSD: Upravte jazyk, průhlednost a časový limit OSD.
- Resetovat: Obnovte výchozí tovární nastavení.
The monitor also supports a fully dimmable backlight, which can be adjusted via the OSD menu or dedicated dimmer controls if available.
Údržba
Proper maintenance ensures the longevity and optimal performance of your Beetronics monitor.
Čištění monitoru:
- Před čištěním vždy vypněte monitor a odpojte jej ze zásuvky.
- Obrazovka: Použijte měkký hadřík, který nepouští vlákna dampened with water or a non-abrasive, monitor-specific cleaning solution. Do not spray liquid directly onto the screen.
- Casing: Wipe the metal housing with a soft, dry cloth. Avoid using harsh chemicals, abrasives, or solvents, as they may damage the finish.
Obecná péče:
- Nepokládejte na monitor ani na jeho kabely těžké předměty.
- Neblokujte větrací otvory na monitoru.
- Keep the monitor away from direct sunlight, excessive heat, and high humidity.
- If the monitor will not be used for an extended period, it is recommended to unplug it from the power source.
Odstraňování problémů
Pokud se s monitorem setkáte s problémy, podívejte se na následující běžné problémy a jejich řešení:
| Problém | Možná příčina | Řešení |
|---|---|---|
| Na obrazovce není žádný obraz |
|
|
| Obrázek je příliš tmavý/světlý nebo barvy jsou nesprávné |
|
|
| Žádný zvuk |
|
|
| Monitor flickering or unstable image |
|
|
If the problem persists after trying these solutions, please contact Beetronics customer support.
Specifikace
Key technical specifications for the Beetronics 19VG7M 19-Inch Full HD IPS Monitor:
| Číslo modelu | 19VG7M |
| Velikost obrazovky | 19 palce |
| Poměr stran | 5:4 |
| Rezoluce | 1280 x 1024 (Full HD) |
| Typ panelu | IPS |
| Viewúhel | 178° (horizontálně/vertikálně) |
| Jas | 470 XNUMX Candela |
| Vstupní objemtage | 9–36 voltů (DC) |
| Vstupní porty | HDMI, VGA, BNC, RCA (AV), USB |
| Rozměry produktu (D x Š x V) | 1.6 x 16.1 x 15.2 palce (bez stojanu) |
| Hmotnost položky | 3.3 libry |
| Výrobce | Beetronics |
| Povrch obrazovky | Matný |

Figure 6: Internal components and key features.
Záruka a podpora
Informace o záruce
The Beetronics 19VG7M monitor comes with a solid 2-letá záruka, ensuring reliability and peace of mind. This warranty covers defects in materials and workmanship under normal use. Please retain your proof of purchase for warranty claims.
For detailed warranty terms and conditions, please refer to the official Beetronics webwebu nebo kontaktujte zákaznickou podporu.
Zákaznická podpora
If you require technical assistance, have questions about your product, or need to initiate a warranty claim, please contact Beetronics customer support:
- Webmísto: Visit the official Beetronics webweb s nejčastějšími dotazy, zdroji podpory a kontaktními formuláři. www.beetronics.com
- E-mail: Refer to the Beetronics webwebu, kde najdete nejaktuálnější e-mailovou adresu podpory.
- Telefon: Refer to the Beetronics webweb s regionálními telefonními čísly podpory.
When contacting support, please have your monitor's model number (19VG7M) and purchase information readily available.
Ask a question about this manual
Ask about setup, troubleshooting, compatibility, parts, safety, or missing instructions. Manuals+ will review the question and use this page’s manual context to help answer it.