
1. Úvod
This manual provides essential information for the proper installation, operation, and maintenance of your Beetronics 12-Inch Full HD IPS Monitor, model 12HD7M. Please read this manual thoroughly before using the product to ensure optimal performance and safety.
Klíčové vlastnosti:
- Full HD 1920 x 1080 resolution IPS panel with 178° viewing úhly.
- Multiple video inputs: HDMI, VGA, BNC, and RCA.
- Durable metal housing designed for continuous 24/7 operation.
- Široký vstupní objemtage range (9-36 Volts) and dimmable backlight.
- Flexible mounting options: Collapsible stand and 75mm VESA mount.
2. Obsah balení
Verify that all items listed below are included in your product package. If any items are missing or damaged, please contact Beetronics support.
- Beetronics 12-Inch Full HD IPS Monitor (12HD7M)
- Napájecí zdroj a kabel
- Dálkové ovládání
- Flush Mounting Brackets
- Skládací stojan
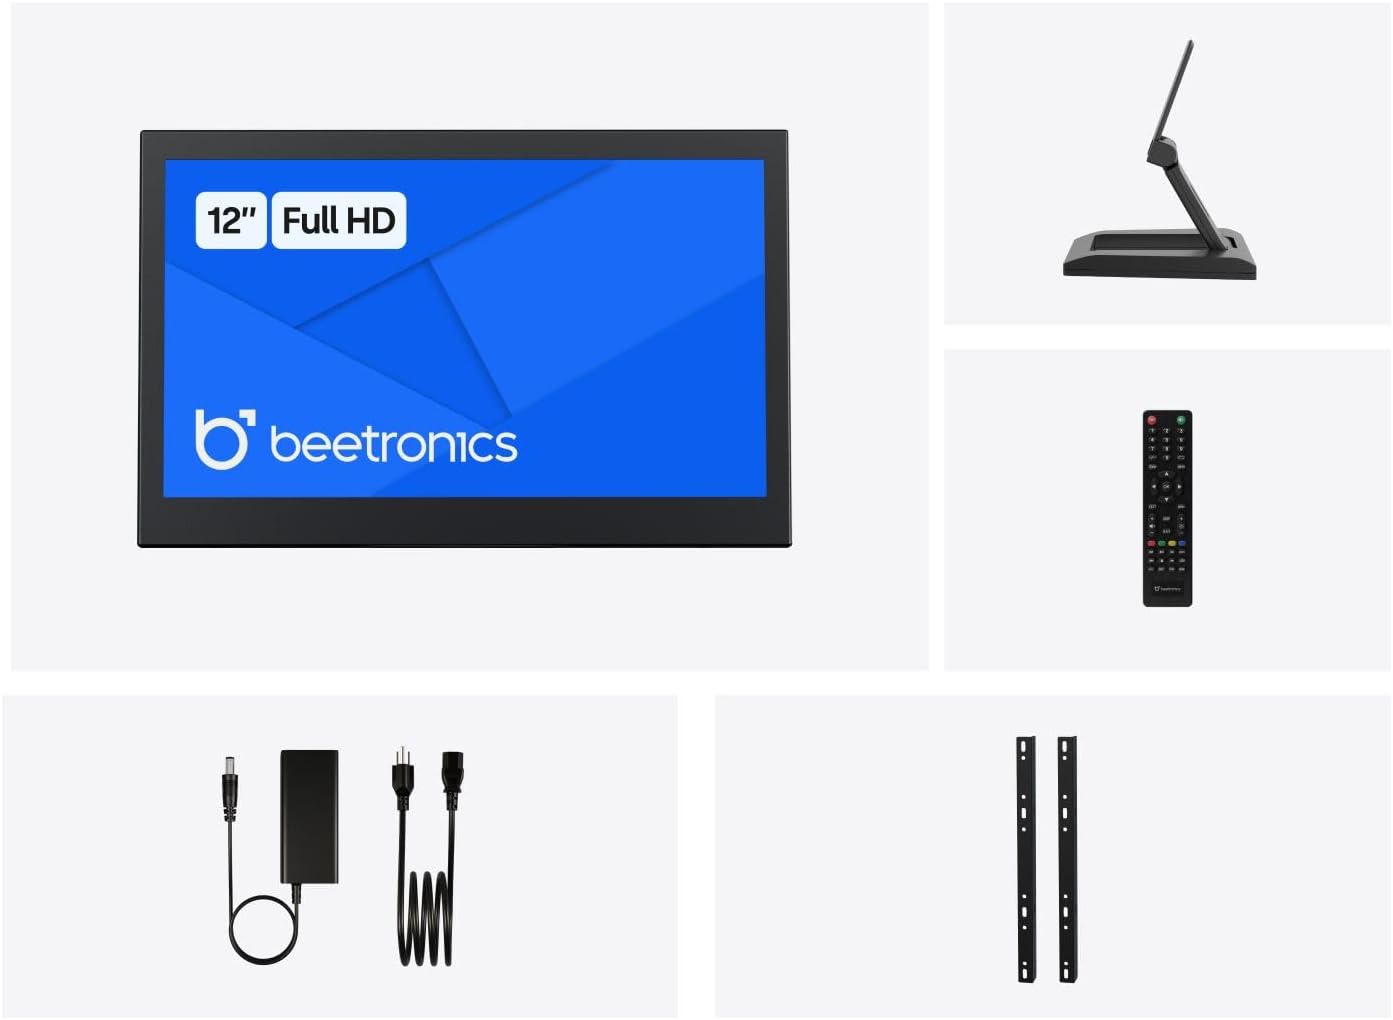
Obrázek 2.1: Package Contents. This image displays the Beetronics 12HD7M monitor along with its standard accessories, including the power adapter, remote, mounting brackets, and desktop stand.
3. Konec produktuview
Monitor Dimensions and Design:
The Beetronics 12HD7M monitor features a robust metal housing, designed for industrial environments. Its compact form factor allows for versatile integration.

Obrázek 3.1: Monitor Dimensions. This image illustrates the physical dimensions of the 12HD7M monitor, including width (279 mm), height (179 mm), and stand height adjustment (50-64 mm).
Vstupní/výstupní porty:
The monitor is equipped with a comprehensive set of rear-facing, downward-oriented input ports for easy cable management and installation.

Obrázek 3.2: Rear I/O Ports. This image provides a clear view of the monitor's rear panel, detailing the DC power input, HDMI, VGA, USB, AV, BNC, and audio input/output ports. Control buttons for power, menu, and volume are also visible.
- Vstup DC napájení: Pro připojení dodaného napájecího adaptéru.
- HDMI: High-Definition Multimedia Interface for digital video and audio.
- VGA: Video Graphics Array for analog video input.
- BNC: Bayonet Neill-Concelman connector, commonly used for professional video applications.
- RCA (AV): Composite video and stereo audio inputs.
- USB: For service or specific peripheral connections.
- Zvukový vstup/výstup: 3.5mm jacks for audio connectivity.
4. Nastavení
4.1 Možnosti montáže
The 12HD7M monitor offers flexible mounting solutions to suit various environments.
Instalace stolního stojanu:
The included collapsible stand allows for desktop placement and angle adjustment. Ensure the stand is securely attached to the monitor and placed on a stable, flat surface.
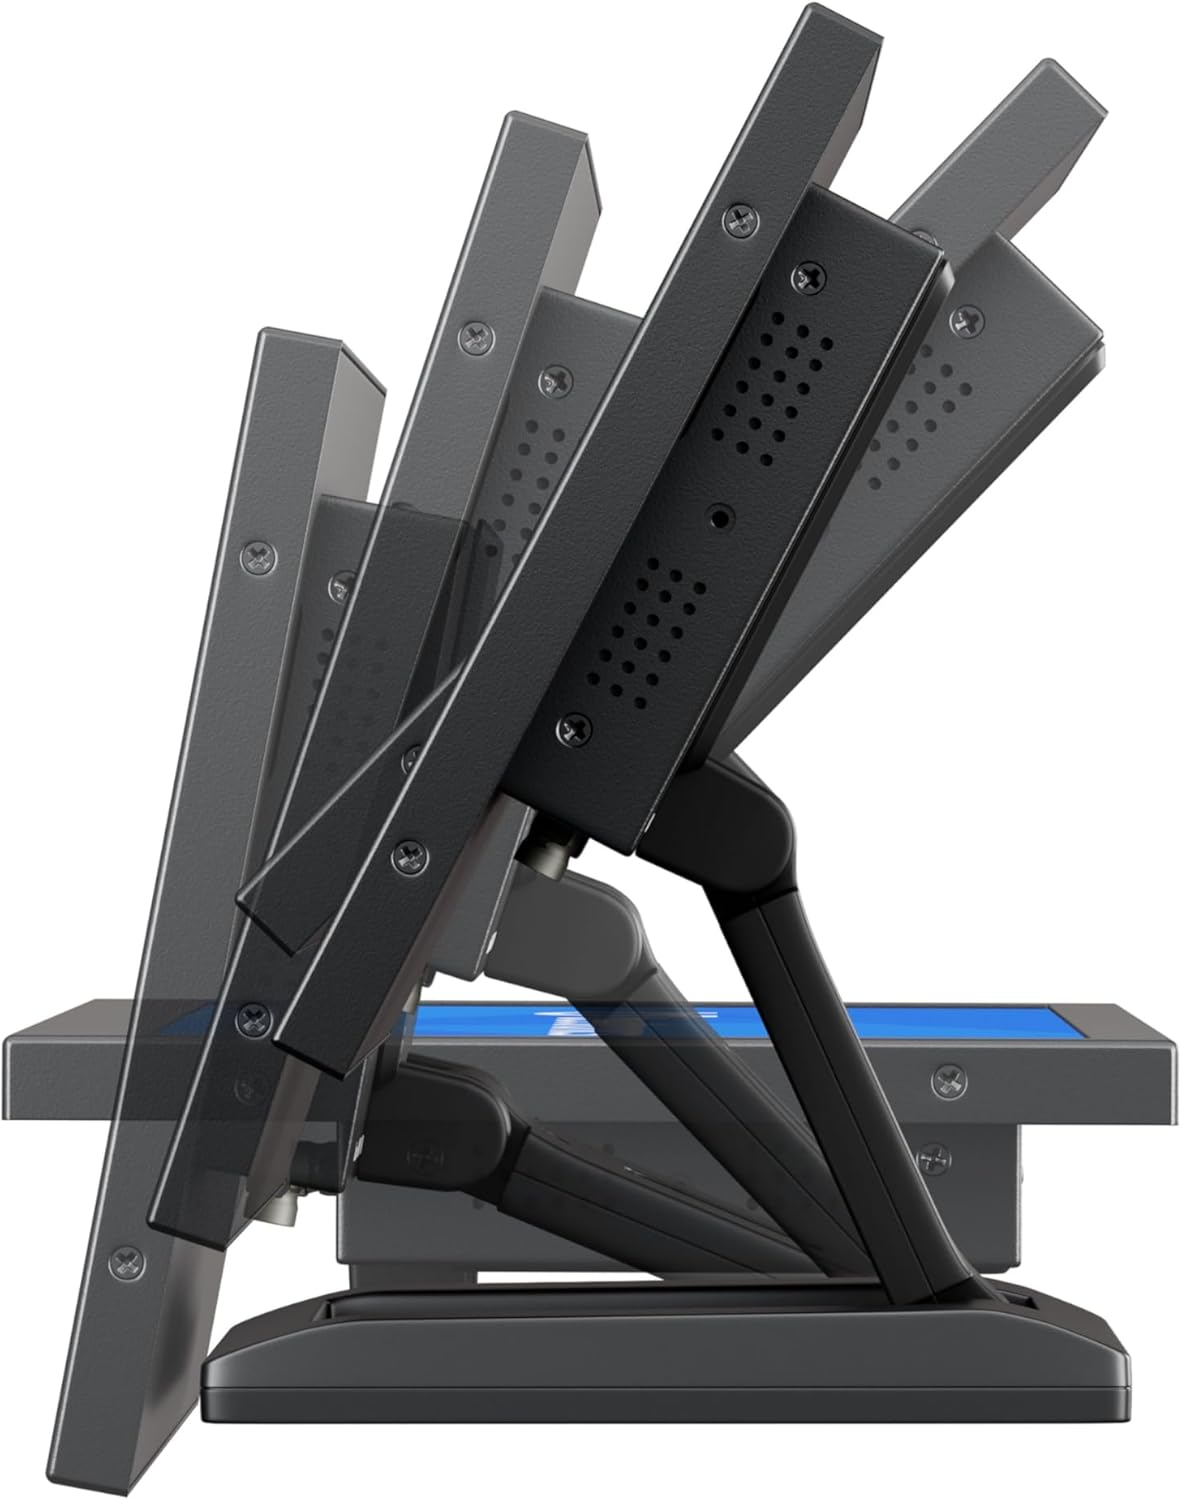
Obrázek 4.1: Adjustable Stand. This image shows the monitor's side profile, highlighting the flexibility of the collapsible stand to adjust the screen's tilt angle for optimal viewIng.
VESA Wall/Panel Mounting:
The monitor features a 75mm VESA mount pattern on the rear, allowing it to be mounted on compatible VESA arms, wall mounts, or integrated into panels using the flush mounting brackets. Ensure appropriate screws (M4) are used and tightened securely.

Obrázek 4.2: VESA Mount Points. This image displays the back of the monitor, indicating the standard VESA mounting points for secure attachment to compatible brackets or arms.
4.2 Připojení napájení
- Connect the power adapter cable to the DC input port on the rear of the monitor.
- Plug the power adapter into a suitable electrical outlet. The monitor supports a wide input voltage rozsah 9-36V DC.
4.3 Připojení zdrojů videa
Connect your video source (e.g., computer, camera, media player) to the desired input port on the monitor using appropriate cables.
- HDMI: For high-quality digital video and audio.
- VGA: For analog video connections.
- BNC: For professional video equipment.
- RCA (AV): For composite video and analog audio.
5. Návod k obsluze
5.1 Zapnutí/vypnutí
Press the 'ON/OFF' button located on the rear panel or on the remote control to power the monitor on or off.
5.2 Navigace v menu (OSD)
The On-Screen Display (OSD) menu allows you to adjust various monitor settings. Use the 'MENU' button to access the OSD, and the '+', '-', 'AUTO' buttons to navigate and adjust settings. The remote control can also be used for easier navigation.
5.3 Výběr vstupu
To switch between different video input sources, press the 'AUTO' button on the rear panel or the 'Input' button on the remote control. Cycle through HDMI, VGA, BNC, and AV inputs until the desired source is displayed.
5.4 Nastavení obrazu
Access the OSD menu to adjust picture quality settings:
- Jas: Upravuje celkový jas obrazovky.
- Kontrast: Řídí rozdíl mezi světlými a tmavými oblastmi.
- Teplota barev: Selects preset color modes (e.g., Warm, Cool, User).
- Poměr stran: Adjusts the display ratio (e.g., 16:9, 4:3).
- Ostrost: Enhances edge definition.
5.5 Nastavení zvuku
If an audio source is connected, adjust the volume using the '+' and '-' buttons on the rear panel or remote control. Further audio settings may be available in the OSD menu.
6. Údržba
6.1 Čištění monitoru
- Před čištěním vždy monitor vypněte a odpojte ze zásuvky.
- Použijte měkký hadřík, který nepouští vlákna dampvodou nebo jemným, neabrazivním čističem obrazovek.
- Nestříkejte tekutinu přímo na obrazovku ani do žádných otvorů.
- Vyhněte se používání agresivních chemikálií, rozpouštědel nebo abrazivních materiálů.
6.2 Obecná péče
- Nepokládejte na monitor těžké předměty.
- Nevystavujte monitor extrémním teplotám, vlhkosti ani přímému slunečnímu záření.
- Zajistěte dostatečné větrání kolem monitoru, aby nedošlo k jeho přehřátí.
7. Řešení problémů
Pokud se s monitorem setkáte s problémy, podívejte se na následující běžné problémy a jejich řešení.
| Problém | Možná příčina | Řešení |
|---|---|---|
| Žádná síla | Power cable not connected; Power adapter faulty; Power outlet not working. | Check power cable connections; Test power adapter with another device; Try a different power outlet. |
| Žádný signál | Video cable not connected; Incorrect input source selected; Video source not active. | Ensure video cable is securely connected; Select the correct input source using the 'Input' button; Verify video source is powered on and outputting a signal. |
| Obraz je zkreslený nebo rozmazaný | Incorrect resolution; Loose video cable; Monitor settings. | Set the video source to the monitor's native resolution (1920x1080); Reconnect video cable; Adjust 'Sharpness' or 'Auto' settings in the OSD. |
| Žádný zvuk | Audio cable not connected (for VGA/BNC/RCA); Volume too low; Audio source not active. | Ensure audio cable is connected (if not using HDMI); Increase monitor volume; Check audio output from the source device. |
8. Specifikace
Detailed technical specifications for the Beetronics 12HD7M monitor.
| Funkce | Specifikace |
|---|---|
| Číslo modelu | 12HD7M |
| Velikost obrazovky | 11.6 palce (úhlopříčka) |
| Rezoluce | 1920 x 1080 (Full HD) |
| Typ panelu | IPS |
| Poměr stran | 16:9 |
| Viewúhel | 178° (horizontálně/vertikálně) |
| Jas obrázku | 500 XNUMX Candela |
| Povrch obrazovky | Matný |
| Video vstupy | HDMI, VGA, BNC, RCA (AV) |
| Audio vstupy / výstupy | 3.5mm Audio In, 3.5mm Audio Out |
| Vstup napájení | 9–36 voltů (DC) |
| Rozměry produktu | 1.4 x 11 x 9.6 palce (35.6 x 279.4 x 243.8 mm) |
| Hmotnost položky | 3.7 libry (1.68 kg) |
| Montáž | 75mm VESA, Collapsible Stand |
9. Záruka a podpora
9.1 Informace o záruce
The Beetronics 12HD7M monitor comes with a solid 2-letá záruka, reflecting our commitment to quality and reliability. This warranty covers defects in materials and workmanship under normal use. Please retain your proof of purchase for warranty claims.
9.2 Technická podpora
For technical assistance, troubleshooting beyond this manual, or warranty inquiries, please contact Beetronics customer support. Refer to the official Beetronics webweb s nejaktuálnějšími kontaktními informacemi a zdroji podpory.
Webmísto: www.beetronics.com