1. Úvod
This manual provides comprehensive instructions for the installation, operation, and maintenance of the Walfront TY-2105 Temperature Humidity Controller. This device is designed to precisely control both temperature and humidity, making it suitable for various applications such as fermenters, greenhouses, control cabinets, and breeding environments. Please read this manual thoroughly before using the product to ensure safe and efficient operation.
2. Bezpečnostní informace
- Zajistěte napájení objtage matches the controller's specifications (AC 110-220V).
- Do not expose the device or its sensor to water or excessive moisture.
- Avoid disassembling or modifying the controller, as this may void the warranty and pose safety risks.
- Ensure that connected appliances do not exceed the maximum output capacity of 10A per relay.
- Udržujte zařízení mimo dosah dětí.
- Always unplug the controller from the power source before cleaning or performing any maintenance.
3. Konec produktuview
The Walfront TY-2105 is a digital temperature and humidity controller featuring an LCD display and dual relay outputs. It is designed for ease of use with a plug-and-play setup.

Obrázek 3.1: Přední strana view of the Walfront TY-2105 controller, showing the LCD display, control buttons, temperature and humidity output sockets, integrated sensor, and power plug.

Obrázek 3.2: Zpět view of the Walfront TY-2105 controller, illustrating the mounting holes for secure installation.
3.1 Komponenty
- Hlavní řídicí jednotka: Houses the LCD display, control buttons, and output sockets.
- LCD displej: Shows current temperature, humidity, and output status.
- Ovládací tlačítka: Four buttons for setting temperature and humidity parameters.
- Integrovaný senzor: Detects ambient temperature and humidity.
- Napájecí zástrčka: For connecting the controller to an AC 110-220V power source.
- Temperature Output Socket (OUT1): For connecting a heating or cooling device.
- Humidity Output Socket (OUT2): For connecting a humidifying or dehumidifying device.
4. Nastavení
The Walfront TY-2105 is designed for simple plug-and-play installation.
- Rozbalte ovladač: Carefully remove the controller and all its components from the packaging.
- Umístěte senzor: Place the integrated sensor in the area where temperature and humidity are to be monitored and controlled. Ensure it is not obstructed and has good airflow.
- Připojení k napájení: Plug the controller's power cord into a standard AC 110-220V electrical outlet. The LCD display should illuminate.
- Connect Controlled Devices:
- Plug your temperature-controlling device (e.g., heater, fan) into the socket labeled 'Temp' (OUT1).
- Plug your humidity-controlling device (e.g., humidifier, dehumidifier) into the socket labeled 'Humidity' (OUT2).
The controller is now ready for operation. Proceed to the Operating Instructions section to configure your desired temperature and humidity settings.
5. Návod k obsluze
The controller features an intuitive LCD display and four control buttons for easy parameter adjustment.
Obrázek 5.1: Detail view of the LCD display showing current temperature (left) and humidity (right) readings, along with the four control buttons.
5.1 Zobrazení nadview
- The left digital display shows the current temperature in Celsius (°C).
- The right digital display shows the current relative humidity (%RH).
- Indicators (OUT1, OUT2) will illuminate when the respective output is active.
5.2 Setting Temperature Parameters
- Enter Temperature Setting Mode: Press and hold the 'Up' or 'Down' button located below the temperature display for approximately 3 seconds. The temperature display will start flashing.
- Upravit teplotu: Use the 'Up' and 'Down' buttons to set your desired target temperature.
- Potvrdit nastavení: Release the button. The display will stop flashing after a few seconds, saving your setting.
5.3 Setting Humidity Parameters
- Enter Humidity Setting Mode: Press and hold the 'Up' or 'Down' button located below the humidity display for approximately 3 seconds. The humidity display will start flashing.
- Adjust Humidity: Use the 'Up' and 'Down' buttons to set your desired target relative humidity.
- Potvrdit nastavení: Release the button. The display will stop flashing after a few seconds, saving your setting.
5.4 Operation Logic
- Temperature Control (OUT1): The controller will activate or deactivate the device plugged into the 'Temp' socket to maintain the set temperature.
- Humidity Control (OUT2): The controller will activate or deactivate the device plugged into the 'Humidity' socket to maintain the set humidity.
The controller operates independently for temperature and humidity, allowing precise environmental management.
6. Údržba
Regular maintenance ensures the longevity and accuracy of your Walfront TY-2105 controller.
- Čištění: Disconnect the power before cleaning. Wipe the controller's surface with a soft, dry cloth. Do not use abrasive cleaners or solvents.
- Péče o senzor: Keep the integrated sensor clean and free from dust or debris. Avoid physical damage to the sensor.
- Skladování: If storing the device for an extended period, ensure it is clean, dry, and stored in a stable environment away from extreme temperatures or humidity.
7. Řešení problémů
Běžné problémy a jejich řešení naleznete v následující tabulce.
| Problém | Možná příčina | Řešení |
|---|---|---|
| Ovladač se nezapne. | Chybí napájení; uvolněné připojení. | Check if the power plug is securely inserted. Verify the power outlet is functional. |
| Nesprávné údaje o teplotě/vlhkosti. | Sensor obstructed or damaged; sensor dirty. | Ensure the sensor is clean and has clear airflow. Avoid placing the sensor near heat sources or direct moisture. |
| Connected device not turning on/off. | Settings incorrect; device malfunction; output overload. | Verify temperature/humidity settings. Test the connected device independently. Ensure the device's power consumption does not exceed 10A. |
| Displej zobrazuje chybu. | Interní chyba. | Unplug the controller, wait 30 seconds, then plug it back in. If the error persists, contact customer support. |
If you encounter issues not listed here or if the suggested solutions do not resolve the problem, please contact Walfront customer support for assistance.
8. Specifikace
Detailed technical specifications for the Walfront TY-2105 Temperature Humidity Controller.
| Funkce | Specifikace |
|---|---|
| Model | TY-2105 |
| Vstupní objemtage | AC 110-220V |
| Rozsah měření teploty | -20 ℃ až 60 ℃ |
| rozsah vlhkosti | 0% až 100.0% relativní vlhkost |
| Přesnost ovládání | 0.1℃, 0.1% Relative Humidity |
| Detekční sonda | Integrovaný senzor |
| Typ výstupu | Reléový výstup |
| Výstupní kapacita | Up to 10A (per relay) |
| Styl zobrazení | LCD |
| Hmotnost položky | 8.8 unce |
| Rozměry balení | 8.19 x 6.18 x 2.05 palce |
| Značka | Walfront |
| Výrobce | WALFRONT |
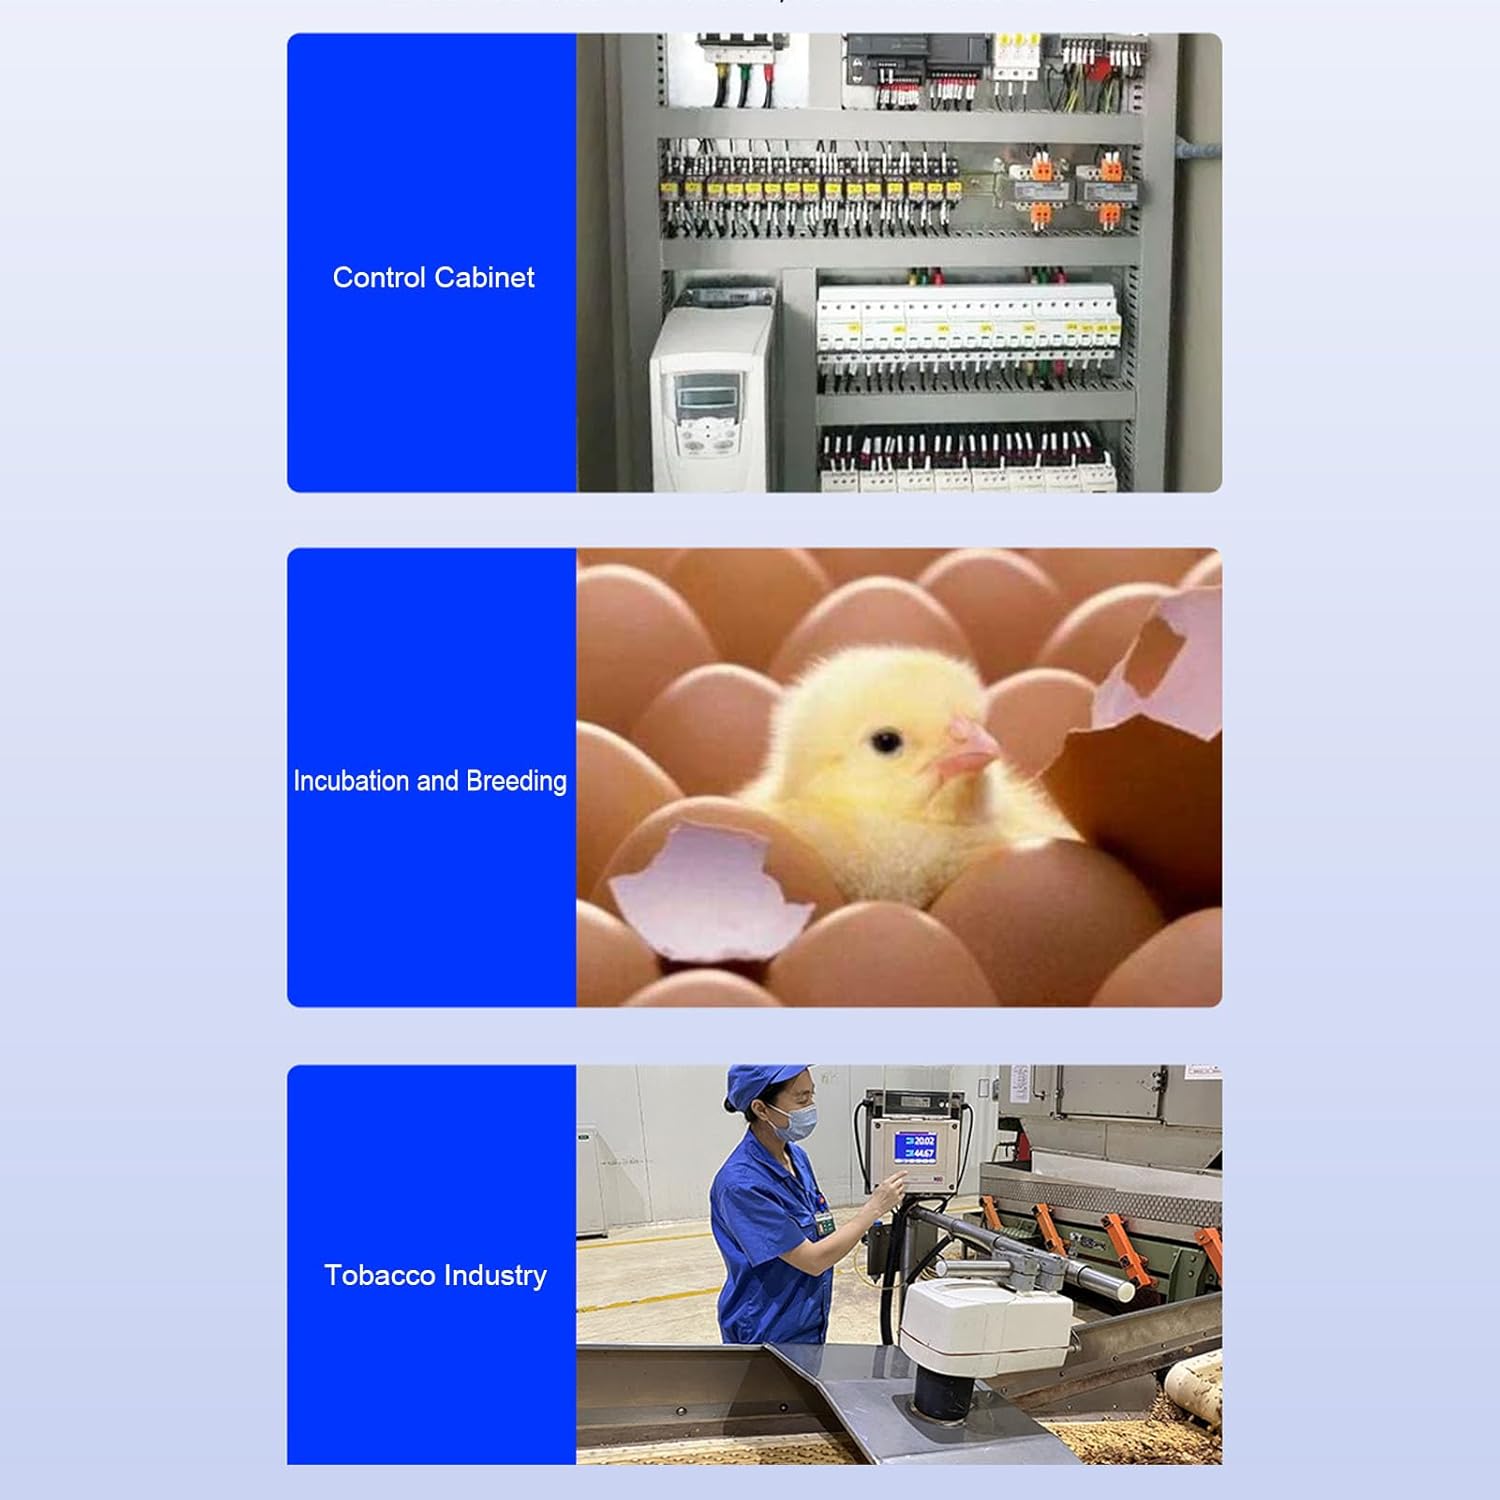
9. Aplikace
The Walfront TY-2105 controller is versatile and can be used in various settings requiring precise temperature and humidity control.

Figure 9.1: Illustrative examples of the controller's applications in control cabinets, incubation and breeding, and industrial settings like the tobacco industry.
- Fermenters: Maintain optimal conditions for fermentation processes.
- skleníky: Regulate climate for plant growth.
- Incubation and Breeding: Provide stable environments for eggs or young animals.
- Control Cabinets: Manage internal temperature and humidity to protect sensitive electronics.
- Průmyslová nastavení: Suitable for various factory and production environments requiring environmental control.
10. Záruka a podpora
For warranty information, please refer to the documentation provided with your purchase or contact Walfront customer service. For technical support or further inquiries, please reach out to your retailer or the manufacturer directly.