
DUMBORC B0C8TGK16R
Uživatelská příručka k RC autokameře DUMBORC
Model: B0C8TGK16R
Zavedení
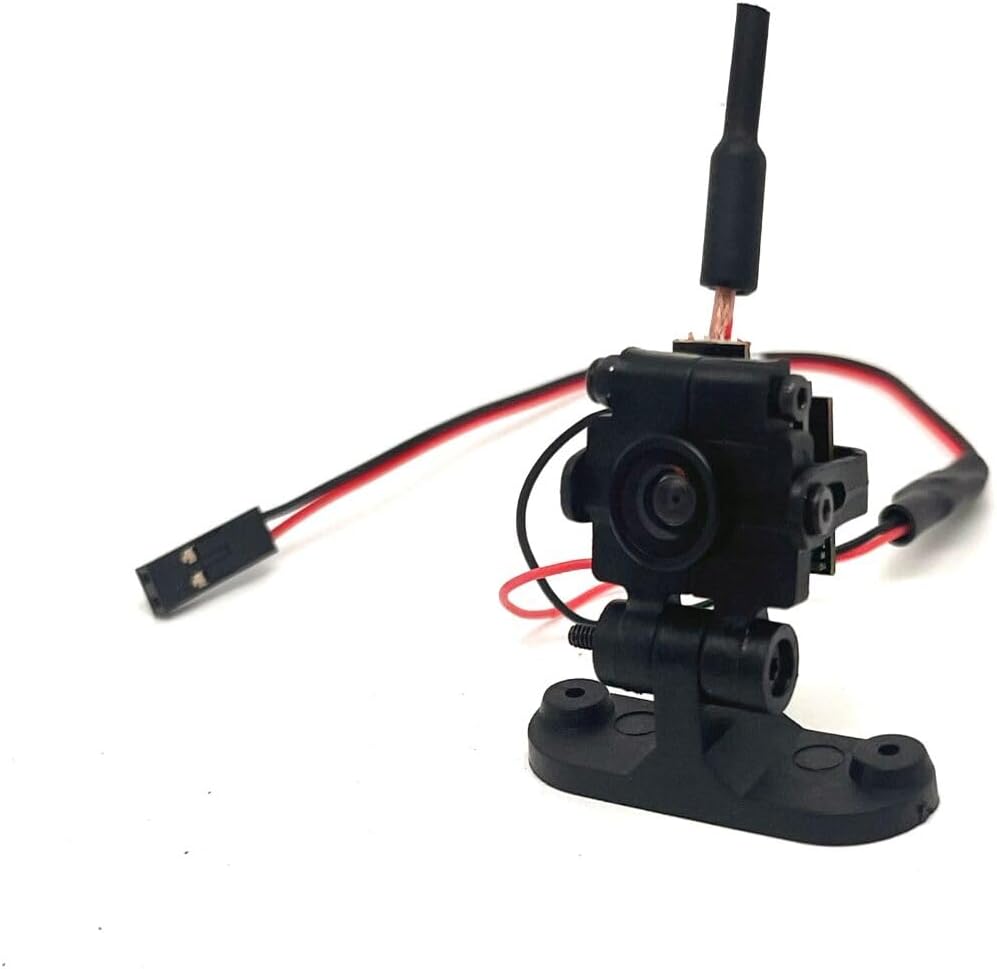
The DUMBORC RC Car Camera is a compact 5.8Ghz 48CH 25mW Mini FPV Camera designed for use with FPV drones, RC cars, trucks, and various DIY projects. It provides an 800TVL video feed, allowing for first-person view operation. This manual provides essential information for the proper setup, operation, and maintenance of your camera.

Co je v krabici
Po otevření balení zkontrolujte, zda jsou přítomny všechny komponenty:
- 1 x RC Car Camera (integrated with VTX)
- 1 x držák fotoaparátu
Vlastnosti
- Integrated FPV Camera with Video Transmitter (VTX)
- Includes Camera Bracket for easy attachment to RC vehicles
- Wide compatibility with RC Cars, Tanks, Trucks, Crawlers, Aircraft, and Drones
- 5.8Ghz Frequency Band with 48 Channels
- 25mW Transmitting Power
- Power Input: DC 2.5-5.5V (compatible with 1S 3.7V battery)
- TV systém: PAL
- Horizontální rozlišení: 800TVL
- Image Sensor: 1/4" CMOS sensor
- Compact Dimensions: 18mm x 14.5mm
- Lightweight: Approximately 4.5g
Specifikace
| Specifikace | Hodnota |
|---|---|
| Obrazový snímač | 1/4" CMOS snímač |
| Horizontální rozlišení | 800TVL |
| TV systém | KAMARÁD |
| Vstup napájení | DC 2.5-5.5V (1S 3.7V battery compatible) |
| Frekvenční pásmo | 5.8G |
| Vysílající výkon | 25 mW |
| Spotřeba energie | 300 mA |
| Kanály | 48CH |
| Rozměry | Rozměr 18 mm x 14.5 mm |
| Čistá hmotnost | 4.5 g (cca) |
| Barva | Černý |
| Hmotnost položky | 0.16 unce |

Nastavení
1. Připojení napájení
The camera operates on a DC 2.5-5.5V power input. It is compatible with a single-cell (1S) 3.7V LiPo battery. Connect the camera's power wires (red for positive, black for negative) to a suitable power source on your RC vehicle or drone. Ensure correct polarity to prevent damage.

2. Montáž
The camera comes with a dedicated mounting bracket. Attach the camera to the bracket using the provided screws. Then, secure the bracket to your RC car, truck, or drone in a position that provides an unobstructed view. The bracket allows for angle adjustment to optimize your field of view.
3. Channel and Band Selection
The camera features a single button for channel and band selection. This button is typically located on the camera's circuit board.
- Dlouhé stisknutí: A long press of the button will cycle through the frequency bands (A-F).
- Krátký tisk: A short press of the button will cycle through the channels (1-8) within the currently selected band.
Ensure that your FPV receiver (monitor or goggles) is set to the same frequency band and channel as the camera for proper video reception.
Návod k obsluze
1. Zapnutí
Once the camera is securely mounted and wired, connect the power source. The camera will power on automatically and begin transmitting video on its last-used frequency.
2. Pairing with FPV Receiver
Turn on your FPV monitor or goggles. Adjust the receiver's frequency band and channel to match the camera's settings. Refer to the 'Channel and Band Selection' section for how to change the camera's frequency. Once matched, you should receive a clear video feed from the camera.
3. FPV Driving/Flying
With the video feed established, you can now operate your RC vehicle or drone from a first-person perspective. Be mindful of obstacles and signal range, especially in environments with many obstructions.
Údržba
- Čištění: Gently clean the camera lens with a soft, lint-free cloth. Avoid abrasive materials or harsh chemicals.
- Skladování: Fotoaparát skladujte na suchém a chladném místě mimo dosah přímého slunečního záření a extrémních teplot.
- Zacházení: S fotoaparátem zacházejte opatrně. Nevystavujte jej pádu ani silným nárazům, mohlo by dojít k poškození vnitřních součástí.
- Zapojení: Periodically inspect the power wires for any signs of wear, fraying, or damage. Repair or replace as necessary to ensure safe operation.
Odstraňování problémů
- Žádný video signál:
- Ujistěte se, že je kamera správně napájena.
- Verify that your FPV receiver (monitor/goggles) is set to the exact same frequency band and channel as the camera. Cycle through channels on both devices if unsure.
- Check for loose or damaged wiring connections.
- Poor Image Quality / Static:
- Interference is a common cause. Try changing the channel on both the camera and receiver to find a clearer frequency.
- Ensure there are no large metallic objects or other strong radio signals between the camera and receiver.
- Check the camera lens for dirt or smudges.
- Ověřte, zda je napájení stabilní a v rámci specifikovaného objemu.tage range. Low voltage can affect image quality.
- Kamera se nezapíná:
- Confirm the power source is active and providing the correct voltage (DC 2.5–5.5 V).
- Check for correct polarity of the power connection.
- Inspect the power wires for breaks or shorts.
Záruka a podpora
Specific warranty details for this product are not provided within this manual. For warranty claims, technical support, or further assistance, please refer to the product listing page on Amazon or contact DUMBORC customer service directly through their official channels. Keep your proof of purchase for any warranty-related inquiries.
You can visit the DUMBORC Store for more information: DUMBORC Amazon Store
Ask a question about this manual
Ask about setup, troubleshooting, compatibility, parts, safety, or missing instructions. Manuals+ will review the question and use this page’s manual context to help answer it.