
1. Úvod
The Wallbox Pulsar Max 7.4kW is an advanced electric vehicle (EV) charger designed for efficient and convenient home charging. This manual provides essential information for safe installation, operation, and maintenance of your charger. It is compatible with all electric and plug-in hybrid vehicles equipped with a Type 2 connector.
The Pulsar Max offers fast charging capabilities, up to 8 times faster than a standard outlet, and includes smart features like scheduled charging to optimize energy costs and usage.
2. Bezpečnostní informace
Before installing or using the Wallbox Pulsar Max, please read and understand all safety instructions. Failure to follow these instructions may result in electric shock, fire, or serious injury.
- Installation must be performed by a qualified electrician in accordance with local regulations and standards.
- Nepokoušejte se nabíječku otevírat, rozebírat ani upravovat.
- Ensure the charging cable is not damaged before each use. Do not use if the cable or connector is frayed, broken, or exposed.
- Během provozu držte děti a domácí zvířata mimo dosah nabíjecí oblasti.
- Avoid exposing the charger to extreme temperatures or direct water spray beyond its IP55 rating.
3. Obsah balení
Ověřte, zda jsou v krabici přítomny všechny položky:
- Wallbox Pulsar Max Charger Unit
- Držák objímky
- Charging Cable (5 meters, Type 2)
- Opening Card (for activation/access)
- Montážní materiál (šrouby, hmoždinky)
- Průvodce instalací

Image: Contents of the Wallbox Pulsar Max package.
4. Konec produktuview a funkce
4.1 Klíčové vlastnosti
- Fast and Powerful Charging: Up to 7.4kW (32A) for quick charging of EVs and PHEVs.
- Inteligentní řízení energie: Schedule charging sessions via the myWallbox app to utilize off-peak electricity rates and integrate with solar power.
- Snadná instalace: Simple wall-mount design with integrated PEN fault protection, eliminating the need for an additional earthing rod.
- Odolný design: Weather and dust resistant (IP55 and IK10 rated) for indoor or outdoor installation, featuring a scratch-resistant matte finish.
- Konektivita: Built-in WiFi and Bluetooth for seamless app control and updates.
4.2 Rozměry
The Wallbox Pulsar Max has compact dimensions suitable for various installation locations.

Image: Wallbox Pulsar Max dimensions (198mm W x 201mm H x 99mm D) and 5m cable length.
4.3 Stavy LED indikátorů
The LED indicator on the charger provides visual feedback on its operational status.
| Barva LED | Postavení |
|---|---|
| Zelený | Připraveno k nabíjení |
| Modrý | Připojeno k vozidlu |
| Světle modrá | Probíhá nabíjení |
| Žluť | Locked (charger or cable) |
| Červený | Chyba |
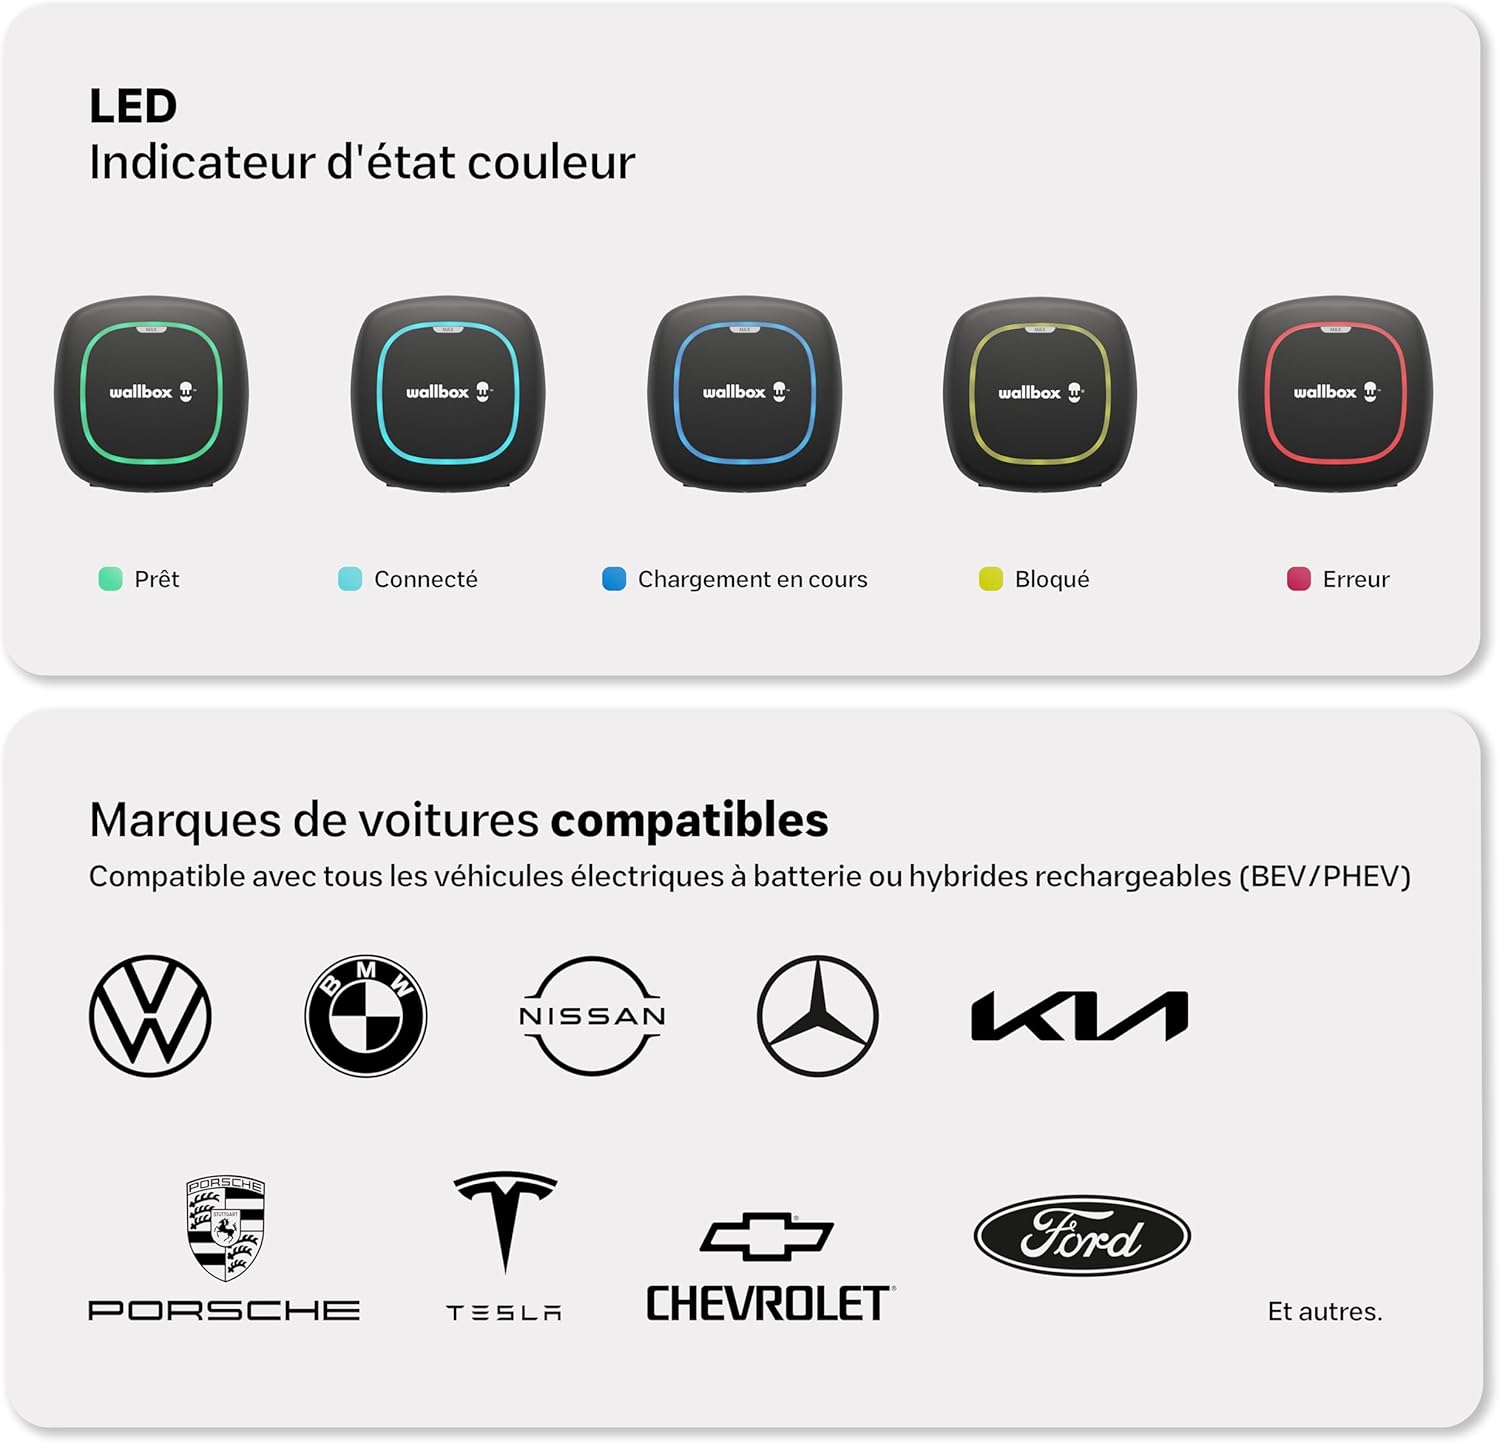
Image: Visual representation of LED indicator states and compatible vehicle brands.
5. Nastavení a instalace
The Wallbox Pulsar Max is designed for straightforward installation. It features a simple wall-mounting process and integrated PEN fault protection, which simplifies electrical requirements by eliminating the need for a separate earthing rod.
Důležité: Installation must be carried out by a certified electrician to ensure compliance with all local electrical codes and safety standards. Refer to the detailed Průvodce instalací included in your package for step-by-step instructions.

Image: A technician performing the installation of the Wallbox Pulsar Max.
6. Návod k obsluze
Once installed and configured, operating your Wallbox Pulsar Max is simple:
- Ensure your vehicle is parked within reach of the 5-meter charging cable.
- Take the Type 2 connector from the socket holder.
- Plug the Type 2 connector into your vehicle's charging port. The charger's LED will change to blue, indicating a successful connection.
- Charging will begin automatically if no schedule is set, or according to your programmed schedule. The LED will turn light blue during active charging.
- To stop charging, unlock your vehicle (if necessary) and disconnect the cable from the car, then from the charger. Return the connector to its holder.

Image: Wallbox Pulsar Max in operation, charging an electric vehicle.
7. Wallbox App Integration
The myWallbox app allows you to fully control and monitor your charging experience. Connect your charger via WiFi or Bluetooth to access a range of smart features:
- Informace v reálném čase: View live charging status and energy consumption.
- Dálkové ovládání: Start, pause, or stop charging sessions from anywhere.
- Session Management: Set charging schedules to take advantage mimošpičkových sazeb za elektřinu.
- Charging Statistics: Track your charging history and energy usage.
- Financial and Energy Savings: Optimize charging times to reduce costs.
- Nastavení intenzity: Control the charging current to manage power consumption.

Image: The myWallbox application interface on a smartphone.
8. Údržba
Regular maintenance ensures the longevity and optimal performance of your Wallbox Pulsar Max charger.
- Čištění: Pravidelně otírejte vnější povrch nabíječky měkkým hadříkemamp tkanina. Nepoužívejte abrazivní čisticí prostředky nebo rozpouštědla.
- Kontrola kabelů: Regularly inspect the charging cable and connector for any signs of wear, damage, or corrosion. If any damage is found, discontinue use and contact support.
- Aktualizace firmwaru: Ensure your charger's firmware is up to date via the myWallbox app to benefit from the latest features and improvements.
9. Řešení problémů
If you encounter issues with your Wallbox Pulsar Max, refer to the LED indicator states (Section 4.3) for initial diagnosis. Here are some common troubleshooting steps:
- Charger Not Responding (No LED): Check the circuit breaker for the charger. Ensure power is supplied to the unit.
- Red LED (Error): This indicates a fault. Try disconnecting and reconnecting the charger from the power supply. If the error persists, consult the myWallbox app for specific error codes or contact Wallbox support.
- Yellow LED (Locked): The charger or cable might be locked. Ensure the charging session is not paused or scheduled for a later time in the app.
- Nabíjení se nezačíná: Verify the cable is securely connected to both the charger and the vehicle. Check the myWallbox app for any active schedules or paused sessions. Ensure your vehicle is ready to accept a charge.
- Problémy s připojením aplikace: Ensure your charger is within WiFi or Bluetooth range. Restart the app and try reconnecting.
10. Specifikace
| Specifikace | Hodnota |
|---|---|
| Značka | Wallbox |
| Číslo modelu | PLP2-0-2-2-9-002 |
| Barva | Černý |
| Výstupní objemtage | 230 voltů |
| Vstupní objemtage | 230 voltů |
| Aktuální hodnocení | 32 A |
| Typ konektoru | Typ 2 |
| Délka kabelu | 5 metrů |
| Kompatibilní zařízení | All electric and hybrid vehicles with Type 2 connector |
| Počet portů | 1 |
| Hodnocení ochrany | IP55, IK10 |
| Provozní teplota | -25 až 50 °C |
| Konektivita | WiFi, Bluetooth |

Image: Wallbox Pulsar Max highlighting its durability and warranty.
11. Záruka a podpora
The Wallbox Pulsar Max charger comes with a 3-letá záruka, covering manufacturing defects and malfunctions under normal use. Please retain your proof of purchase for warranty claims.
For technical support, warranty claims, or further assistance, please contact Wallbox customer service through their official website or the contact information provided in your product documentation. Ensure you have your model number (PLP2-0-2-2-9-002) and purchase details ready.
You can also find additional resources, FAQs, and community support on the official Wallbox webmísto: wallbox.com