
1. Úvod
The Yoidesu HDMI Transmitter and Receiver system provides a reliable solution for extending HDMI signals over long distances using a single Cat5e/6/7 Ethernet cable. This adapter supports high-definition video up to 1080p at 60Hz, including 3D signals, and ensures synchronous audio and video output. It is designed for various applications, including home theaters, conference rooms, data control centers, and security monitoring.
The system features an automatic adjustment system for clear and stable image transmission and includes ESD protection for enhanced security. Its plug-and-play design simplifies installation, requiring only an Ethernet cable and USB power for operation.
2. Obsah balení
Prosím, ověřte, zda jsou v balení přítomny všechny položky:
- 1 x HDMI Transmitter Unit (TX)
- 1 x HDMI Receiver Unit (RX)
- 1 x USB Power Cable (USB-A to Micro USB)

Image: The Yoidesu HDMI Transmitter (TX) and Receiver (RX) units, along with the included USB power cable.
3. Specifikace
| Funkce | Detail |
|---|---|
| Číslo modelu | Yoidesudyntggcesm6619 |
| Značka | Yoidesu |
| Typ konektoru | HDMI, USB, RJ45 |
| Kompatibilní zařízení | Personal Computer, TV Box, Gaming Consoles (e.g., PS3/4), Displays, Projectors, HDTVs |
| Rozlišení videa | Up to 1920x1080 @ 60Hz (Full HD) |
| 3D podpora | Ano |
| Extension Distance (Cat6/7) | Až 50 metrů (165 stop) |
| Extension Distance (Cat5e) | Až 40 metrů |
| Napájení | Micro USB (5V, cable included, adapter not included) |
| Vlastnosti | Audio/Video Sync, ESD System, Automatic Adjustment, Plug and Play |
4. Pokyny k nastavení
Follow these steps to set up your Yoidesu HDMI Extender:
- Identifikujte jednotky: Locate the Transmitter (TX) unit and the Receiver (RX) unit. The TX unit connects to your source device, and the RX unit connects to your display device.
- Connect Transmitter (TX): Plug the HDMI male connector of the TX unit directly into the HDMI output port of your source device (e.g., PC, TV Box, gaming console).
- Connect Receiver (RX): Plug the HDMI male connector of the RX unit directly into the HDMI input port of your display device (e.g., Monitor, Projector, HDTV).
- Připojení ethernetového kabelu: Connect a single Cat5e, Cat6, or Cat7 Ethernet cable between the RJ45 port on the TX unit and the RJ45 port on the RX unit. Ensure the cable is securely seated in both ports. For optimal performance, use a Cat6 or Cat7 cable.
- Zajistěte napájení: Connect the included USB power cable to the Micro USB port on obě the TX unit and the RX unit. Plug the USB-A end of the cable into a 5V USB power source (e.g., a USB port on your TV, computer, or a USB wall adapter). Both units require power to function correctly.
- Zapnutí zařízení: Ensure your source device and display device are powered on. The extender system is plug-and-play and should automatically detect and transmit the signal.
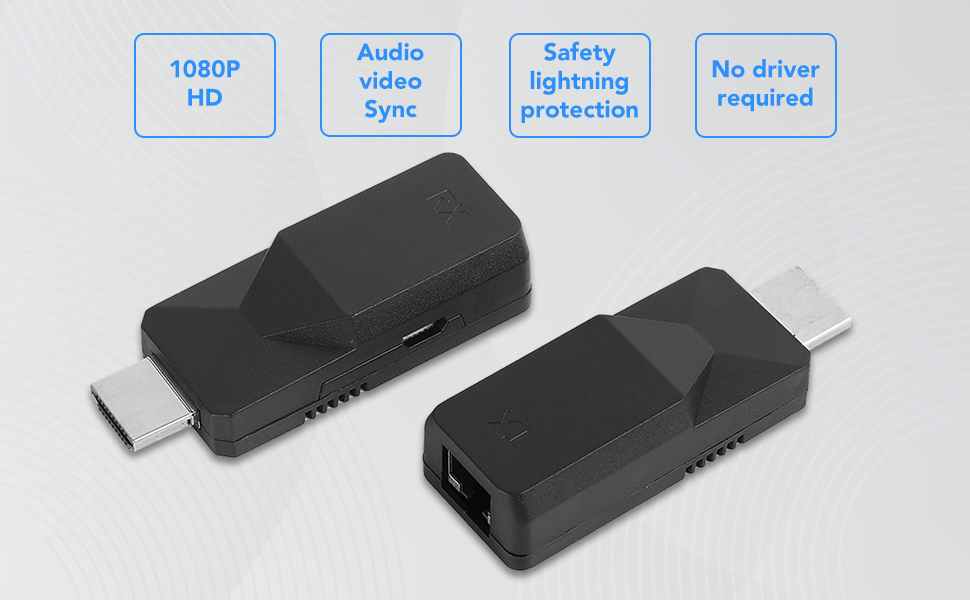
Image: A diagram illustrating the connection flow: Input devices (Laptop, TV Box, PS3/4) connect to the TX unit, which connects via a Cat6 cable to the RX unit, which then connects to output devices (Display, Projector, HDTV).
5. Provoz
Once properly set up, the Yoidesu HDMI Extender operates automatically:
- Automatic Signal Detection: The extender will automatically detect the HDMI signal from your source device and transmit it to the display.
- Výstup ve vysokém rozlišení: Enjoy full HD video resolution of 1920x1080 at 60Hz. The system also supports 3D video signals.
- Synchronous Audio and Video: Audio and video signals are transmitted synchronously, ensuring a consistent multimedia experience.
- Automatické nastavení: The built-in automatic adjustment system optimizes the image quality for a glossy, clear, and stable display.

Image: Visual representation of key features including 1080P HD resolution, audio-video synchronization, safety lightning protection, and no driver requirement.
6. Údržba
To ensure the longevity and optimal performance of your HDMI Extender, follow these maintenance guidelines:
- Skladování: Jednotky skladujte na chladném a suchém místě mimo dosah přímého slunečního záření a extrémních teplot.
- Čištění: Use a soft, dry cloth to clean the exterior of the units. Do not use liquid cleaners or abrasive materials.
- Zacházení: Zabraňte pádu nebo vystavování jednotek silným nárazům, mohlo by dojít k poškození vnitřních součástí.
- Správa kabelů: Ensure all cables are routed neatly and are not bent sharply or under excessive tension.
7. Řešení problémů
If you encounter issues with your Yoidesu HDMI Extender, refer to the following common problems and solutions:
- Žádný signál na displeji:
- Zkontrolujte napájení: Ensure both the TX and RX units are receiving power via their Micro USB ports. Both units must be powered.
- Ověřte připojení: Confirm that all HDMI cables are securely connected to the source and display, and the Ethernet cable is firmly connected to both TX and RX units.
- Cable Quality/Length: Ensure the Ethernet cable is Cat5e, Cat6, or Cat7 and within the specified maximum length (50m for Cat6/7, 40m for Cat5e). A damaged or excessively long cable can cause signal loss.
- Komponenty testu: Try connecting the source directly to the display with a short HDMI cable to confirm both devices are working independently.
- Restartujte zařízení: Power cycle the source device, display, and the extender units.
- Flickering or Unstable Image:
- Ethernetový kabel: Replace the Ethernet cable with a higher quality Cat6 or Cat7 cable, especially if using a longer run.
- Rušení: Ensure the Ethernet cable is not running parallel to power cables or other sources of electromagnetic interference.
- Nastavení rozlišení: Check if the source device's output resolution is compatible with the extender (up to 1080p@60Hz).
- Žádný zvuk:
- Source Audio Settings: Verify that the audio output settings on your source device are correctly configured for HDMI.
- Display Audio Settings: Check the audio input settings on your display device.
- Kabel HDMI: Ensure the HDMI cables are functioning correctly and support audio transmission.
- Časté výpadky připojení:
- Stabilní výkon: Ensure both TX and RX units receive stable power from reliable USB sources. Avoid using low-power USB ports.
- Integrita kabelu: Zkontrolujte všechny kabely, zda nejsou poškozené.
- Environmentální faktory: High temperatures or poor ventilation can affect performance. Ensure adequate airflow around the units.
8. Záruka a podpora
For warranty information or technical support regarding your Yoidesu HDMI Transmitter and Receiver, please refer to the documentation provided at the time of purchase or contact Yoidesu customer service directly through their official website or the retailer where the product was purchased. Please have your model number (Yoidesudyntggcesm6619) and purchase details ready when contacting support.