
CLOUDY BAY CBLD001WHA
Uživatelská příručka k nástěnnému stmívači Cloudy Bay CBLD001WHA
Model: CBLD001WHA
Zavedení
This manual provides detailed instructions for the installation, operation, and maintenance of your Cloudy Bay In-Wall Dimmer Switch, Model CBLD001WHA. This dimmer switch is designed for use with LED, CFL, and incandescent light fixtures, offering both single-pole and 3-way control options. Please read these instructions carefully before installation and retain them for future reference.

Přední view of the Cloudy Bay In-Wall Dimmer Switch.
Bezpečnostní informace
- VAROVÁNÍ: To avoid fire, shock, or death, turn off power at the circuit breaker or fuse and test that power is off before wiring.
- Instalujte v souladu se všemi národními a místními elektrickými předpisy.
- Pokud si nejste jisti jakoukoli částí těchto pokynů, obraťte se na kvalifikovaného elektrikáře.
- Nepoužívejte s nestmívatelnými světelnými zdroji.
- This dimmer is for indoor use only.
Co je v krabici
Před zahájením instalace ověřte, zda jsou všechny komponenty přítomny:
- 1 x Dimmer Switch
- 1 x Screwless Cover Plate (Outer Plate)
- 1 x Inner Plate (Mounting Frame)
- 4 x drátěné matice
- 4 x montážní šrouby
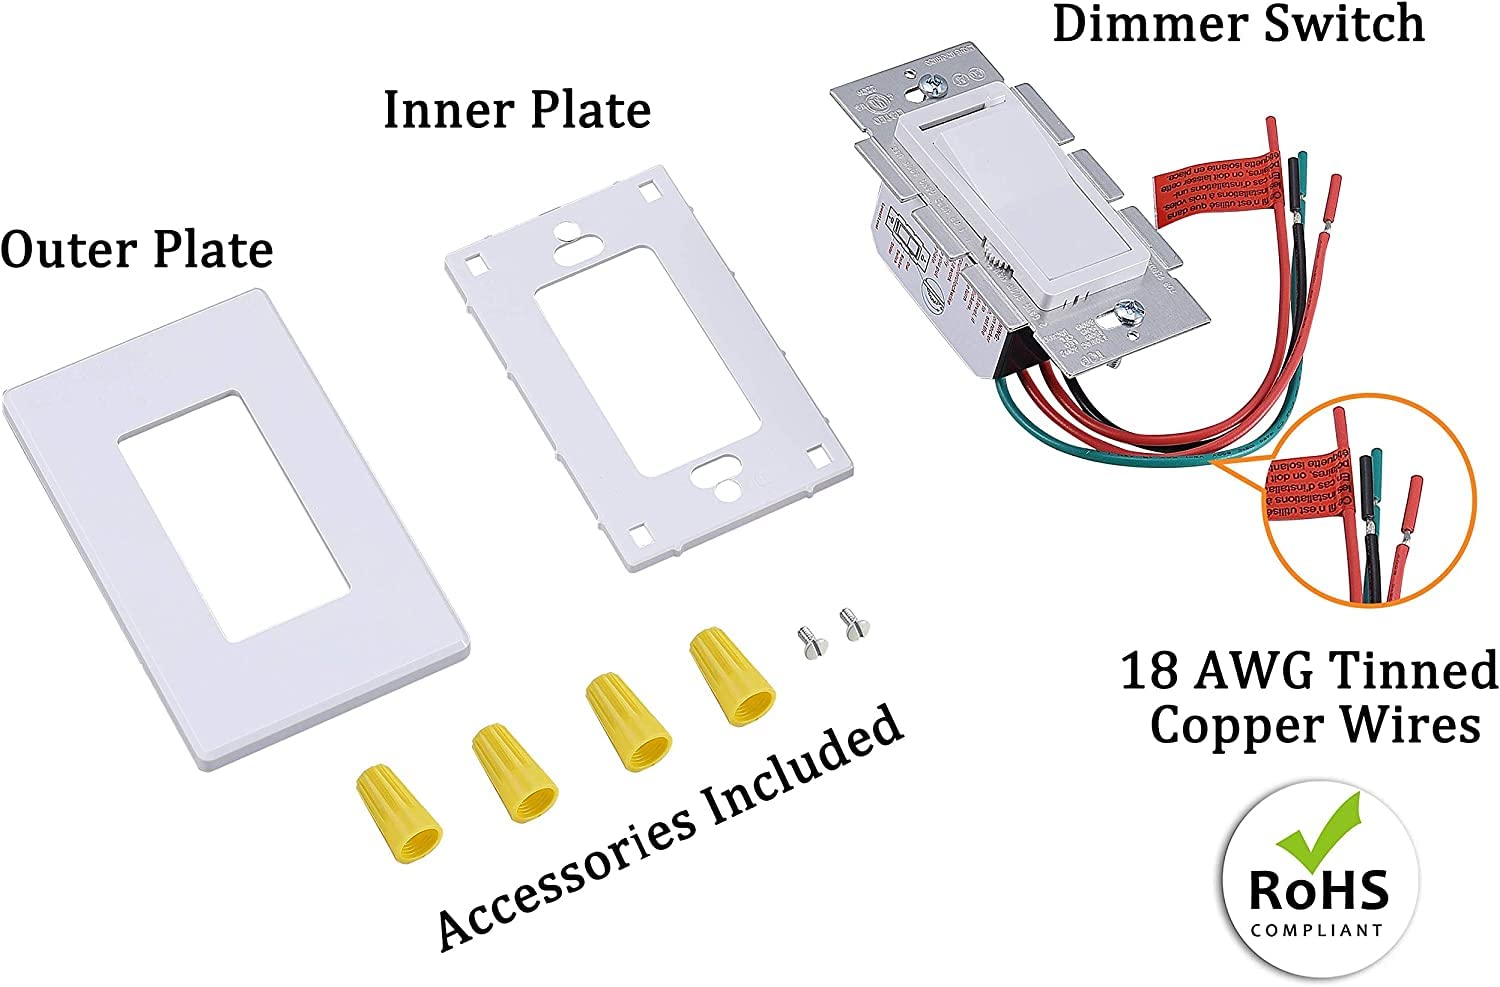
Illustration of the dimmer switch components, including the dimmer unit, inner plate, outer plate, wire nuts, and mounting screws.
Nastavení a instalace
Krok 1: Vypněte napájení
Before starting any electrical work, turn off the power at the circuit breaker or fuse box. Ensure the power is off by testing the circuit with a voltage tester.
Krok 2: Odstraňte stávající přepínač
Carefully remove the wall plate and mounting screws from the existing switch. Gently pull the old switch out of the electrical box. Do not disconnect wires yet.
Step 3: Identify Circuit Type and Wires
Determine if your wiring is a single-pole or 3-way configuration. A single-pole circuit controls lights from one location, while a 3-way circuit controls lights from two locations.
Jednopólové zapojení:
Typically involves two wires connected to the switch (Hot Input and Load) plus a ground wire. One of the red wires on the dimmer will be capped off.

Diagram illustrating single-pole wiring for the dimmer switch, showing connections for hot input, load, and ground wires.
3-cestné zapojení:
Involves three wires connected to the switch (Hot Input, Traveler 1, Traveler 2) plus a ground wire. The dimmer switch will replace one of the existing 3-way switches.

Diagram illustrating 3-way wiring for the dimmer switch, showing connections for hot input, two traveler wires, and ground.
Step 4: Wire Your New Dimmer
Connect the dimmer switch wires to the house wires using the provided wire nuts. Ensure all connections are secure.
- Připojte zelený nebo holý měděný zemnící vodič z nástěnné krabice do zelený drát na stmívač.
- Připojte black dimmer wire k hot input wire z nástěnné krabice.
- Pro Jednopólové: Connect one of the red dimmer wires k zatěžovací drát (to the light fixture). Cap off the other red dimmer wire with a wire nut.
- Pro 3-cestný: Connect the two red dimmer wires k těm dvěma cestovní dráty from the wall box. If the on/off direction is reversed after wiring, try switching the two red wires.

Detailed diagram showing wiring connections for both single-pole and 3-way installations, along with steps for mounting and adjusting the dimming range.
Step 5: Mount the Dimmer
Carefully push all wires into the wall box, leaving enough room to insert the dimmer. Secure the dimmer to the wall box using the provided mounting screws.
Step 6: Separate Mounting Frame from Wall Plate
Gently insert a flat-head screwdriver into the slots on the side of the wall plate to separate the inner mounting frame from the outer decorative wall plate.

Illustration demonstrating the separation of the face plate from the mounting frame.
Krok 7: Nainstalujte nástěnnou desku
Place the decorative wall plate over the installed mounting frame. Snap the outer plate onto the inner frame until it clicks securely into place.
Step 8: Adjust Dimming Range (Sensitivity Adjustment)
A trim dial located below the cover plate allows for sensitivity adjustment to optimize compatibility with various LED lamps and prevent flickering at low light levels.
- Zapněte napájení na jističi.
- Turn the dimmer on and set the slide control to the lowest dimming level.
- Remove the outer wall plate to access the trim dial.
- Use a small screwdriver to turn the trim dial clockwise to increase the minimum brightness or counter-clockwise to decrease it. Adjust until the desired minimum light level is achieved without flickering.
- Turn the dimmer off, then back on to ensure the bulbs turn on consistently at the minimum setting.
- Once adjusted, replace the outer wall plate.

Illustration detailing the location and function of the dimming range adjustment wheel.
Návod k obsluze
The Cloudy Bay Dimmer Switch features a rocker switch for on/off control and a slide control for dimming.
- kolébkový spínač: Press the top of the rocker switch to turn lights ON. Press the bottom to turn lights OFF.
- Ovládání posuvníku: Move the slider up to increase brightness and down to decrease brightness.
Illustration of the dimmer switch controls: rocker switch for on/off and slide control for brightness adjustment.
Kompatibilita
This dimmer switch is compatible with the following bulb types:
- Žárovka: Up to 600W (120V/60Hz)
- Dimmable CFL: Up to 150W (120V/60Hz)
- Stmívatelné LED: Up to 150W (120V/60Hz)
Důležité poznámky:
- Do not mix bulb types on the same dimmer circuit.
- Dimmable LEDs may not dim to the same low level as incandescent or halogen bulbs. The dimming range of LEDs can vary by manufacturer. If your bulbs hum, buzz, or flicker, they may not be fully compatible with this dimmer. Refer to the 'Adjusting Dimming Range' section for optimization.

Visual representation of the dimmer's compatibility with different bulb types and associated wattage hodnocení.
Údržba
The dimmer switch requires minimal maintenance. To clean, gently wipe the surface with a soft, damp tkanina. Nepoužívejte abrazivní čisticí prostředky nebo rozpouštědla.
Odstraňování problémů
| Problém | Řešení |
|---|---|
| Light flashes in the whole dimming range |
|
| Light flashes in low dimming range | Slightly turn the adjustment dial counter-clockwise to achieve full compatibility with the lights. Refer to 'Adjusting Dimming Range' section. |
| Jiné záležitosti | Obtain a dimmer compatibility list from your light bulb/lighting fixture supplier. A broader dimmer list often means less dimming issues like flicker or buzz. Consider using FCC compliant lighting products for stable performance. |

Visual representation of the troubleshooting guide, outlining common problems and their respective solutions.
Specifikace
| Funkce | Specifikace |
|---|---|
| Číslo modelu | CBLD001WHA |
| Provozní režim | ZAP-STM-VYP |
| Aktuální hodnocení | 1.25 Amps |
| Provozní svtage | 120 voltů |
| Typ kontaktu | Normálně otevřeno |
| Typ konektoru | Clamp |
| Terminál | Šroub |
| Typ obvodu | 3-way / Single Pole |
| Typ pohonu | Tlačítko (kolébkové) |
| Max Incandescent Load | 600W |
| Max Dimmable LED/CFL Load | 150W |
| Rozměry (D x Š x V) | 1.85 x 2.76 x 4.53 palce |
| Certifikace | Seznam UL |

Detailed dimensions of the dimmer switch, inner plate, and outer plate.
Záruka a podpora
This Cloudy Bay Dimmer Switch comes with a 1-Year Warranty. If you encounter any issues with dimming or have questions regarding the product, please contact Cloudy Bay customer support for assistance.
Pro další podporu navštivte prosím Obchod CLOUDY BAY or refer to the official product documentation.
Ask a question about this manual
Ask about setup, troubleshooting, compatibility, parts, safety, or missing instructions. Manuals+ will review the question and use this page’s manual context to help answer it.