1. Úvod
This manual provides detailed instructions for the installation, operation, and maintenance of the Walfront HF020-7X1T1M Stepper Motor Motion Controller Module. This module is designed for precise control of stepper motors in various industrial automation applications.
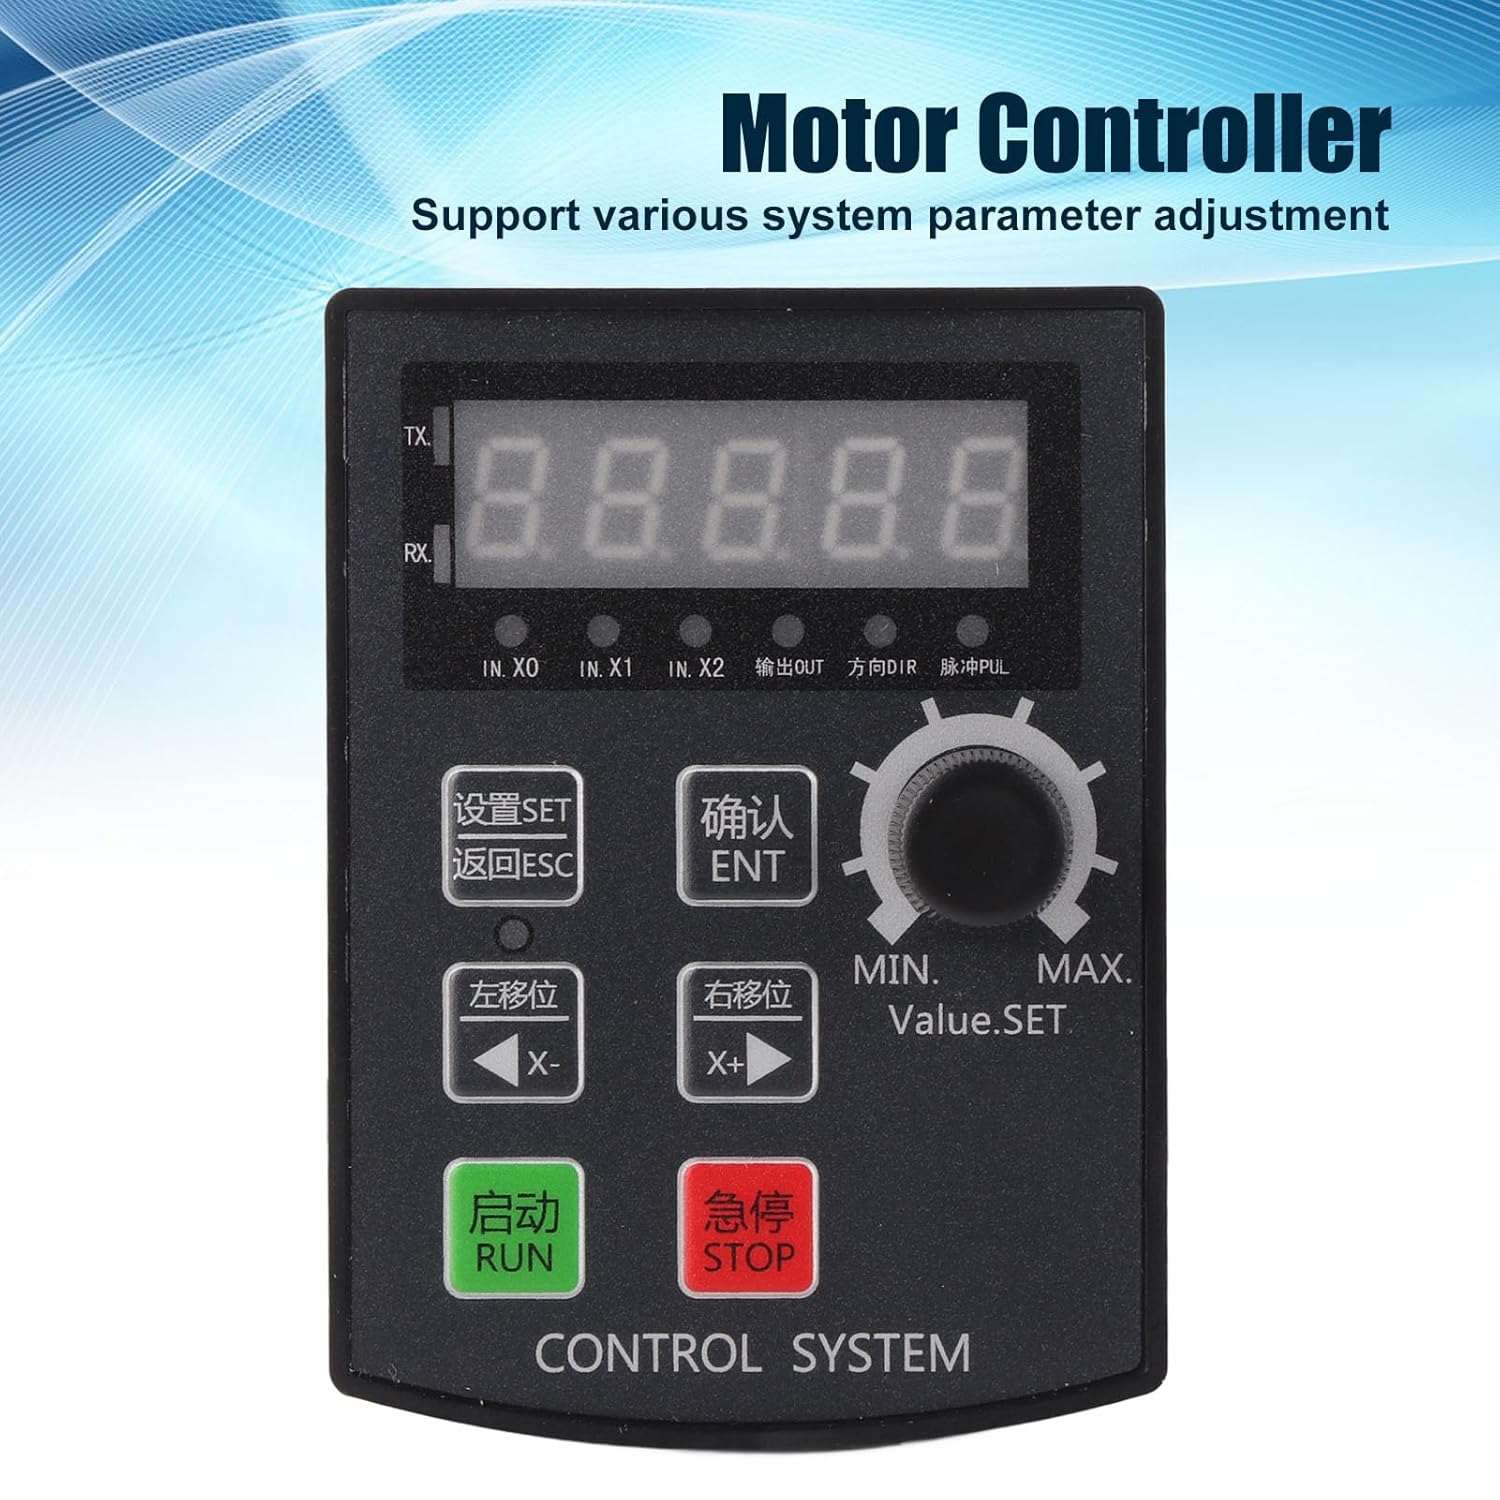
Obrázek 1: Přední strana view of the Walfront HF020-7X1T1M Stepper Motor Motion Controller Module, showing the 5-digit display and control buttons.
2. Klíčové vlastnosti
- Řízení parametrů: Supports precise positioning, angle, and revolution control, along with various system parameter adjustments.
- Debugging Convenience: Allows for manual motor movement, simplifying the debugging process.
- Široká aplikace: Suitable for industrial automation control, small machinery and equipment, automatic painting systems, and rotary indexing tools.
- High Pulse Frequency: Operates with a motor pulse frequency of 85 KHz.
- Kompatibilita ovladače: The 24V motor pulse voltage collector can be directly connected to 5-24V drivers.
- Jasný displej: Features a 5-digit digital screen with a high-brightness digital tube for clear information display and positive/negative limit communication.
3. Specifikace
| Parametr | Hodnota |
|---|---|
| Model produktu | HF020-7X1T1M |
| Materiál | ABS |
| Provozní svtage | DC 12-24V |
| Velikost otvoru | Přibližně 92 x 69.8 mm / 3.62 x 2.75 palce |
| Provozní prostředí | -5℃ to 60℃ (non-condensing) |
| Motor Pulse Frequency | 85 kHz |
| Motor Pulse Voltage | 24V collector (directly connectable to 5-24V driver) |
| Struktura zobrazení | 5-digit, high-brightness digital tube |
| Výstupy | 2 outputs (0V output voltage) |
| Vstupy | 7 inputs (0V as valid signal) |
| Rozměry balení | 15.1 x 10.4 x 4.2 cm |
| Hmotnost | 120 gramů |
| Země původu | Čína |
4. Nastavení a instalace
Proper installation and wiring are crucial for the safe and effective operation of the controller module. Ensure all connections are secure and follow electrical safety guidelines.
4.1 Fyzická instalace
The module is designed for panel mounting. Cut an opening of approximately 92 x 69.8 mm (3.62 x 2.75 inches) in your control panel. Insert the module and secure it using the provided mounting hardware.

Obrázek 2: Nahoře view of the controller module, showing the removable green terminal blocks for wiring connections.
4.2 Zapojení kabeláže
Connect the power supply, motor driver, and input/output signals to the corresponding terminal blocks on the module. The module operates on DC 12-24V. The motor pulse voltage collector is 24V and can be directly connected to 5-24V drivers. Ensure correct polarity for the power supply.
- Příkon: Connect DC 12-24V to the designated power terminals.
- Motor Driver Connection: Connect the pulse (PUL) and direction (DIR) signals to your stepper motor driver. The module provides 85 KHz pulse frequency.
- Inputs (IN.X0, IN.X1, IN.X2, etc.): The module has 7 inputs. A 0V signal is considered valid for these inputs.
- výstupy: The module provides 2 outputs with 0V output voltage.

Obrázek 3: Úhlové view of the module's rear, highlighting the terminal blocks for input, output, and power connections.
5. Návod k obsluze
The HF020-7X1T1M controller features a user-friendly interface with a 5-digit display and dedicated buttons for various functions.

Figure 4: Close-up of the control panel, showing the display, rotary encoder, and function buttons for setting parameters and controlling motor movement.
5.1 Ovládací panel Overview
- 5místný displej: Shows current values, parameters, and status.
- Tlačítko SET: Vstupuje do režimu nastavení parametrů.
- Tlačítko ESC: Ukončí aktuální menu nebo zruší operaci.
- ENT (OK) Button: Potvrzuje výběry nebo vstupuje do podnabídek.
- X- (Left Shift) Button: Moves cursor left or decreases value.
- X+ (Right Shift) Button: Moves cursor right or increases value.
- Tlačítko SPUSTIT: Zahájí provoz motoru.
- Tlačítko STOP: Zastaví chod motoru.
- Rotary Encoder (Value.SET): Adjusts numerical values or navigates menus.
5.2 Nastavení parametrů
To adjust system parameters:
- Stiskněte tlačítko SOUBOR tlačítko pro vstup do režimu nastavení parametrů.
- Použijte Rotační kodér or X- / X+ buttons to navigate through parameters.
- Stiskněte ORL pro výběr parametru k úpravě.
- Adjust the value using the Rotační kodér or X- / X+ tlačítka.
- Stiskněte ORL pro potvrzení nové hodnoty.
- Stiskněte ESC pro ukončení režimu nastavení parametrů.
5.3 Manual Motor Movement
For debugging or precise manual control, the module supports manual motor movement:
- Ensure the motor is connected and powered.
- Použijte X- a X+ buttons to manually jog the motor in the desired direction.
- The speed of manual movement may be adjustable in parameters.
6. Údržba
The Walfront HF020-7X1T1M module is designed for durability and requires minimal maintenance. Adhering to these guidelines will ensure its longevity and reliable performance.
- Čištění: Keep the module clean and free from dust and debris. Use a soft, dry cloth for cleaning. Avoid using liquid cleaners or solvents.
- Podmínky prostředí: Operate the module within the specified temperature range of -5℃ to 60℃ and in a non-condensing environment. Protect it from excessive moisture, direct sunlight, and corrosive substances.
- Kontroly připojení: Pravidelně kontrolujte všechna kabelová připojení, abyste se ujistili, že jsou bezpečná a bez koroze nebo poškození.
- Aktualizace firmwaru: Zkontrolujte výrobce website for any available firmware updates. Follow the provided instructions carefully if performing an update.
7. Řešení problémů
This section provides guidance for common issues you might encounter with the HF020-7X1T1M module.
7.1 Controller Version Viewing Method
Na view the controller's version number:
- Stiskněte a podržte ENT (OK) klíč.
- Při držení ORL, power on the module.
- The version number will be displayed on the screen, for example, [21.100].
- The first two digits (e.g., 21) indicate the year (e.g., 2021).
- The next two digits (e.g., 10) indicate the month (e.g., October).
- The last digit (e.g., 0) indicates the version without RS485 communication, while 8 indicates a version with RS485 communication.
7.2 Běžné problémy
- Bez napájení: Check the DC 12-24V power supply connection and ensure correct polarity. Verify the power source is active.
- Motor se nehýbe: Verify motor driver connections (PUL, DIR), power to the motor driver, and motor wiring. Check if the RUN command has been issued and if parameters are set correctly.
- Incorrect Movement: Review the direction and step parameters. Ensure the motor driver is configured correctly for the stepper motor.
- Chyby zobrazení: If the display shows unusual characters or no information, try restarting the module. If the issue persists, contact support.
8. Záruka a podpora
For warranty information, technical support, or service inquiries, please refer to the documentation provided with your purchase or contact Walfront customer service through their official channels. Keep your purchase receipt for warranty claims.