1. Úvod
The EVTSCAN Peakmeter PM8213C is a portable digital multimeter designed for various electrical measurements. This instrument offers stable performance, high precision, and low power consumption, making it a reliable tool for both professional and DIY users. Its compact appearance and comprehensive features ensure accurate readings for voltage, current, resistance, continuity, non-contact voltage (NCV), frequency, and duty cycle.
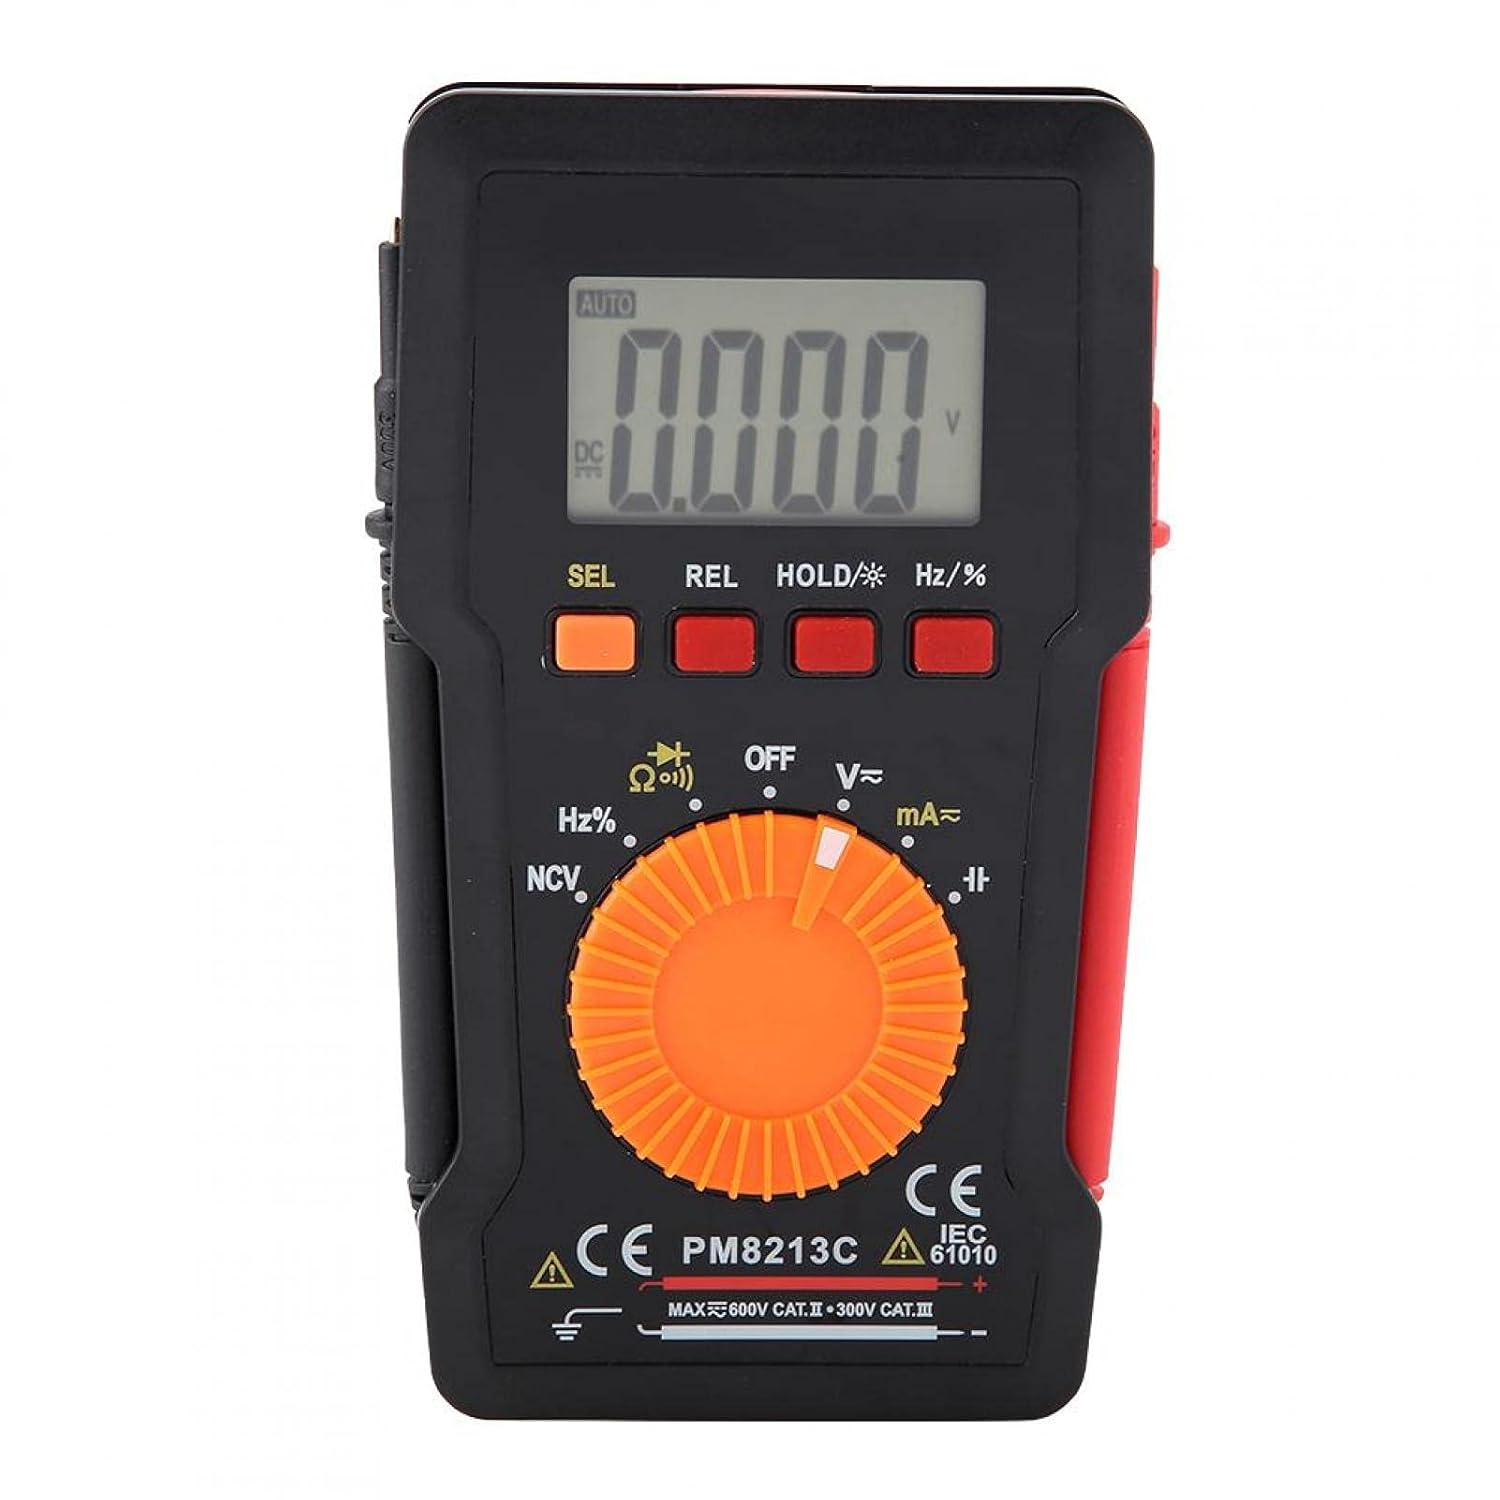
Obrázek 1: Přední strana view of the EVTSCAN Peakmeter PM8213C Digital Multimeter.
2. Bezpečnostní informace
To ensure safe operation and service of the meter, please read this manual carefully before use. Failure to observe safety warnings can result in serious injury or death. Always adhere to local and national safety codes.
- Nepřekračujte maximální vstupní limity pro žádnou funkci.
- Buďte opatrní při práci s objtagnad 30 V AC RMS, 42 V peak nebo 60 V DC. Tyto objemytages představují nebezpečí úrazu elektrickým proudem.
- Before measuring current, ensure the meter's test leads are connected to the correct input jacks and the function switch is set to the appropriate current range.
- Před změnou polohy přepínače funkcí vždy odpojte měřicí vodiče od obvodu.
- Pro zajištění přesných údajů ihned vyměňte baterii, jakmile se zobrazí indikátor slabé baterie.
- Do not operate the meter if it appears damaged or if the protective casing je odstraněno.
- Během měření držte ruce a prsty za bariérami sondy.
3. Konec produktuview
3.1. Součásti
The PM8213C multimeter consists of the following main components:
- LCD displej: Zobrazuje naměřené hodnoty, jednotky a funkční indikátory.
- Funkční tlačítka: SEL (Select), REL (Relative), HOLD (Data Hold), Hz/% (Frequency/Duty Cycle).
- Otočný přepínač: Used to select the desired measurement function (e.g., V~, V-, Ω, Continuity, NCV, Hz%, mA~, A~).
- Vstupní konektory: Terminals for connecting test leads (COM, VΩHz, mA, A).
- Testovací potenciální zákazníci: Red and black leads for connecting to the circuit under test.
- Ochranné pouzdro: Provides protection for the meter.

Figure 2: Key features of the PM8213C Multimeter, including LCD screen and compact design.
3.2. Zobrazit symboly
Familiarize yourself with the symbols that may appear on the LCD display:
- AUTO: Auto-ranging mode is active.
- DC/AC: Stejnosměrný proud / Střídavý proud.
- V: Voltů (svtagE).
- Ω: Ohmy (odpor).
- Hz: Hertz (frekvence).
- %: Pracovní cyklus.
- NCV: Bezkontaktní svtage detekce.
- DRŽET: Data Hold function is active.
- REL: Režim relativního měření.
- Symbol baterie: Indikuje nízkou kapacitu baterie.
- OOL: Indikace překročení rozsahu.
4. Nastavení
4.1. Instalace baterie
The PM8213C requires one CR2032 (3V) button cell battery for operation. The battery is typically not included in the package.
- Ujistěte se, že je multimetr VYPNUTÝ.
- Vyhledejte přihrádku na baterie na zadní straně měřiče.
- K otevření krytu přihrádky na baterie použijte vhodný nástroj (např. malý šroubovák).
- Insert the CR2032 battery, observing the correct polarity (+ and - markings).
- Nasaďte zpět kryt prostoru pro baterie a zajistěte jej.
4.2. Připojení testovacího vodiče
Connect the test leads to the appropriate input jacks before taking any measurements.
- Připojte černý testovací kabel k COM (společný) vstupní konektor.
- Pro většinu měření (objemtage, resistance, frequency, duty cycle, continuity), connect the červený testovací kabel k VΩHz vstupní jack.
- For current measurements (mA), connect the červený testovací kabel k mA vstupní jack.
- For higher current measurements (A), connect the červený testovací kabel k A input jack (if available and distinct from mA). Note: The PM8213C typically uses a single current input for mA/A, check the dial for specific ranges.
5. Návod k obsluze
5.1. Zapnutí/vypnutí
To turn the multimeter ON, rotate the function switch from the OFF position to any desired measurement function. To turn the multimeter OFF, rotate the function switch to the OFF position. The meter features an automatic power-off function after approximately 30 minutes of inactivity to conserve battery life.
5.2. Volba funkce
Use the rotary switch to select the primary measurement function. For functions with multiple modes (e.g., AC/DC voltage, continuity/diode), press the SEL tlačítko pro přepínání mezi režimy.
5.3. Měření stejnosměrného napětí (DC Vol)tage (V-)
- Připojte červený měřicí vodič do zdířky VΩHz a černý měřicí vodič do zdířky COM.
- Set the rotary switch to the V- position.
- Připojte měřicí vodiče paralelně k DC napětí.tage source or component you wish to measure.
- Přečtěte si svtage hodnota na LCD displeji.
5.4. Měření AC Voltage (V~)
- Připojte červený měřicí vodič do zdířky VΩHz a černý měřicí vodič do zdířky COM.
- Set the rotary switch to the V~ position.
- Připojte měřicí vodiče paralelně k AC napětí.tage source or component.
- Přečtěte si svtage hodnota na LCD displeji.
5.5. Měření odporu (Ω)
- Před měřením odporu se ujistěte, že je obvod bez napětí.
- Připojte červený měřicí vodič do zdířky VΩHz a černý měřicí vodič do zdířky COM.
- Nastavte otočný přepínač do polohy Ω.
- Připojte měřicí vodiče k součástce, jejíž odpor chcete měřit.
- Odečtěte hodnotu odporu na LCD displeji.
5.6. Test kontinuity (Ω))))
- Ujistěte se, že je obvod bez napětí.
- Připojte červený měřicí vodič do zdířky VΩHz a černý měřicí vodič do zdířky COM.
- Set the rotary switch to the Continuity position (often shared with Resistance or Diode). Press SEL if needed to select continuity.
- Připojte měřicí vodiče k součástce nebo vodiči.
- If continuity exists (low resistance), the meter will emit an audible beep.
5.7. Nekontaktní svtage (NCV) Detekce
- Nastavte otočný přepínač do polohy NCV.
- Move the top edge of the multimeter close to the conductor suspected of having AC voltage.
- Měřič bude indikovat přítomnost střídavého proudu.tage through an audible beep and/or visual indicator (e.g., LED).
5.8. Measuring Frequency (Hz) and Duty Cycle (%)
- Připojte červený měřicí vodič do zdířky VΩHz a černý měřicí vodič do zdířky COM.
- Set the rotary switch to the Hz/% position.
- Připojte měřicí vodiče paralelně ke zdroji signálu.
- Stiskněte tlačítko Hz/% button to toggle between frequency and duty cycle measurements.
- Odečtěte hodnotu na LCD displeji.
5.9. Measuring Current (mA~, A~)
- VAROVÁNÍ: Nikdy nepřipojujte měřič paralelně ktage source when measuring current. This will blow the fuse and can damage the meter.
- Ujistěte se, že je obvod bez napětí.
- Připojte černý testovací kabel ke konektoru COM.
- Pro miliampere (mA) measurements, connect the red test lead to the mA jack. For ampere (A) measurements, connect the red test lead to the A jack (if separate).
- Set the rotary switch to the appropriate mA~ or A~ position.
- Open the circuit where you want to measure current and connect the meter in series with the load.
- Re-energize the circuit and read the current value on the LCD display.
6. Údržba
6.1. Čištění
Otřete pouzdro měřiče čističemamp hadříkem a jemným čisticím prostředkem. Nepoužívejte abrazivní prostředky ani rozpouštědla. Udržujte vstupní svorky čisté a bez nečistot a vlhkosti.
6.2. Výměna baterie
When the low battery indicator appears on the display, replace the CR2032 battery promptly to ensure accurate measurements.
- Vypněte multimetr a odpojte všechny měřicí kabely.
- Otevřete kryt bateriového prostoru na zadní straně glukometru.
- Vyjměte starou baterii CR2032.
- Insert a new CR2032 (3V) button cell battery, ensuring correct polarity.
- Bezpečně zavřete kryt prostoru pro baterie.
6.3. Výměna pojistky
If the current measurement function stops working, the fuse may need replacement. The fuse specification is F 400mA/250V.
- Vypněte multimetr a odpojte všechny měřicí kabely.
- Open the meter's casing (refer to the battery replacement section for access, or consult the full service manual if necessary).
- Locate the blown fuse.
- Carefully remove the old fuse and replace it with a new fuse of the exact same type and rating (F 400mA/250V).
- Reassemble the meter's casinbezpečně.
7. Řešení problémů
If the meter does not function correctly, check the following points before seeking service:
- Žádné zobrazení nebo slabé zobrazení: Zkontrolujte instalaci baterie a v případě potřeby ji vyměňte.
- Nesprávné hodnoty: Ensure test leads are correctly connected to the appropriate input jacks and the rotary switch is set to the correct function and range. Check battery level.
- Měření proudu nefunguje: Check and replace the fuse if blown. Ensure test leads are connected in series with the circuit.
- "OOL" displayed: Naměřená hodnota překračuje zvolený rozsah. Přepněte na vyšší rozsah nebo se ujistěte, že vstupní hodnota odpovídá možnostem měřiče.
8. Specifikace
| Nadmořská výška | Méně než 2000 m |
| Provozní teplota | 0 ~ 40 °C |
| Provozní vlhkost | <80% RH (not considered at <10 °C) |
| Skladovací teplota | -10 ~ 60 °C |
| Skladovací vlhkost | <70% RH (remove batteries) |
| Teplotní koeficient | 0.1 precision/°C |
| Max. přípustný objemtage (Vstup do země) | 600V DC nebo AC rms |
| Ochrana pojistek | F 400mA/250V |
| Sampsazba ling | Přibližně 3krát za sekundu |
| Automatické vypnutí | Přibližně 30 minut |
| Zobrazit | Maximum 3999 counts |
| Zobrazení překročení rozsahu | "OOL" |
| Napájení | CR2032 (3V) button cell battery |
| Hmotnost | Approximately 120 - 142 g |
| Rozměry (D x Š x V) | 127 x 70 x 12.5 mm (cca 12.8 x 7.5 x 1.3 cm) |
8.1. DC svtage (PM8213C)
| Rozsah | Rezoluce | Přesnost |
|---|---|---|
| 4 V | 0.001 V | ± (0.1 % + 3 číslic) |
| 40 V | 0.01 V | ± (0.1 % + 3 číslic) |
| 400 V | 0.1 V | ± (0.1 % + 3 číslic) |
| 600 V | 1 V | ± (0.1 % + 3 číslic) |
8.2. Obsah balení
- 1 x Digital Multimeter (PM8213C)
- 2 x testovací vodiče
- 1x Ochranné pouzdro
9. Záruka a podpora
Pro informace o záruce nebo technickou podporu se prosím obraťte přímo na prodejce nebo výrobce. Uschovejte si účtenku jako doklad o koupi.