
1. Úvod
Thank you for choosing the LifePlus Commercial Ice Maker. This appliance is designed to provide a continuous supply of fresh ice cubes for various settings, including homes, offices, bars, and restaurants. With its efficient ice production and user-friendly features, it aims to enhance your daily ice needs. Please read this manual thoroughly before operation to ensure proper use, maintenance, and safety.
Klíčové vlastnosti:
- High Capacity: Produces up to 80 lbs of ice per 24 hours.
- Quick Production: 32 ice cubes in approximately 11-20 minutes per cycle.
- Large Storage: Integrated 13 lbs ice storage bin.
- Dual Water Input: Supports both direct tap water connection and bottled water.
- Adjustable Ice Thickness: Three size options (Small, Medium, Large).
- Automatic Cleaning Function.


2. Bezpečnostní pokyny
To prevent injury to users or property damage, ensure all safety precautions are followed. Keep this manual for future reference.
Obecná bezpečnost:
- Neprovozujte spotřebič s poškozeným kabelem nebo zástrčkou.
- Udržujte spotřebič mimo zdroje tepla a přímého slunečního záření.
- Zajistěte dostatečné větrání kolem jednotky. Neblokujte větrací otvory.
- Neponořujte spotřebič, kabel ani zástrčku do vody nebo jiných kapalin.
- Před čištěním nebo pokud spotřebič delší dobu nepoužíváte, odpojte jej ze zásuvky.
- Tento spotřebič není určen pro použití osobami (včetně dětí) se sníženými fyzickými, smyslovými nebo duševními schopnostmi nebo nedostatečnými zkušenostmi a znalostmi, pokud na ně nedohlíží osoba odpovědná za jejich bezpečnost nebo jim nebyla poskytnuta instrukce ohledně používání spotřebiče.
Elektrická bezpečnost:
- Connect to a properly grounded electrical outlet only.
- Nepřetěžujte elektrické obvody.
- Do not use extension cords unless absolutely necessary and ensure they are rated for the appliance's power requirements.
3. Konec produktuview
Familiarize yourself with the components and features of your LifePlus Ice Maker.
Komponenty:
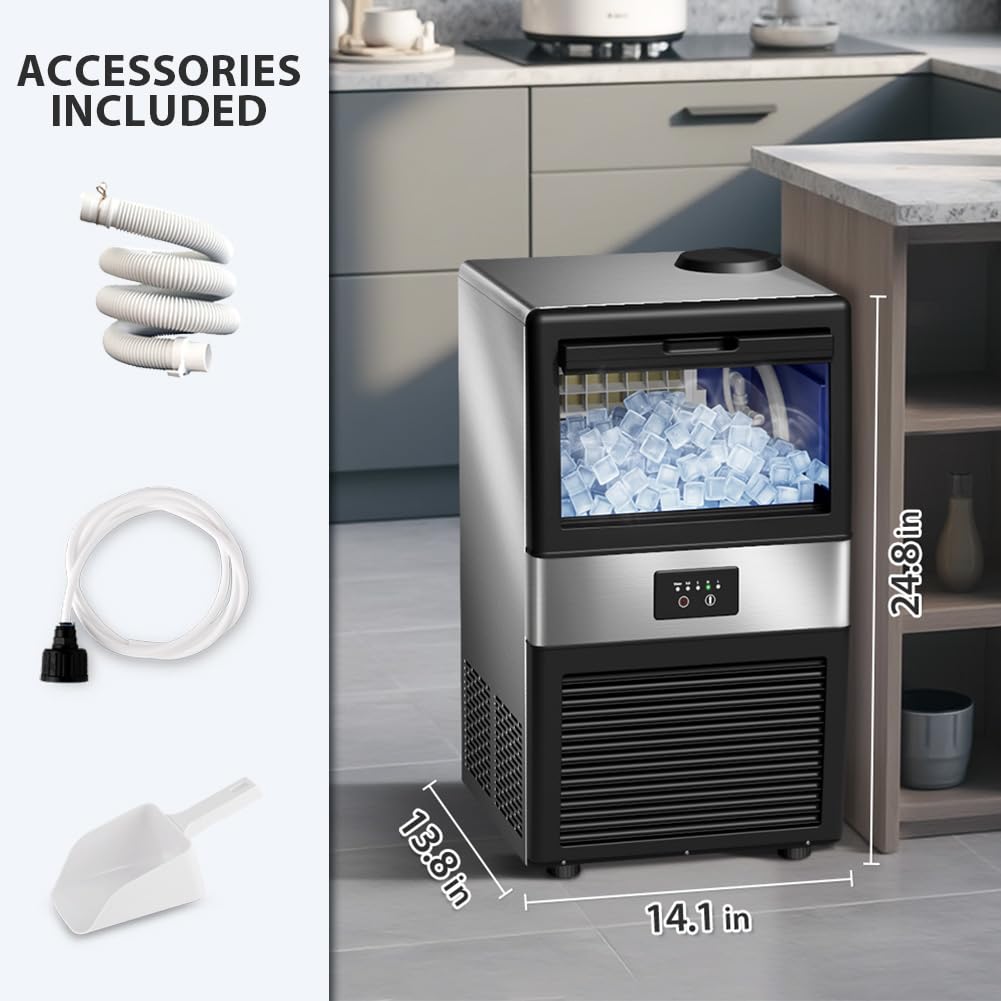
- Jednotka výrobníku ledu
- Naběračka ledu
- Water Supply Hose (9-inch long with faucet connector)
- Draining Hose (6.5-inch long)
Vnitřní vlastnosti:
- Efektivní kompresor: Ensures rapid ice production.
- Spolehlivý materiál: Constructed with food-grade steel and ABS, featuring a foaming layer for insulation.
- Anti-rust and Healthy Ice Tray: Designed for durability and hygiene.
- Ovládací panel: Intuitive interface with indicator lights for power, ice full, and water shortage.


4. Nastavení
Follow these steps to set up your ice maker for the first time.
4.1 Vybalení a umístění:
- Opatrně odstraňte veškerý obalový materiál.
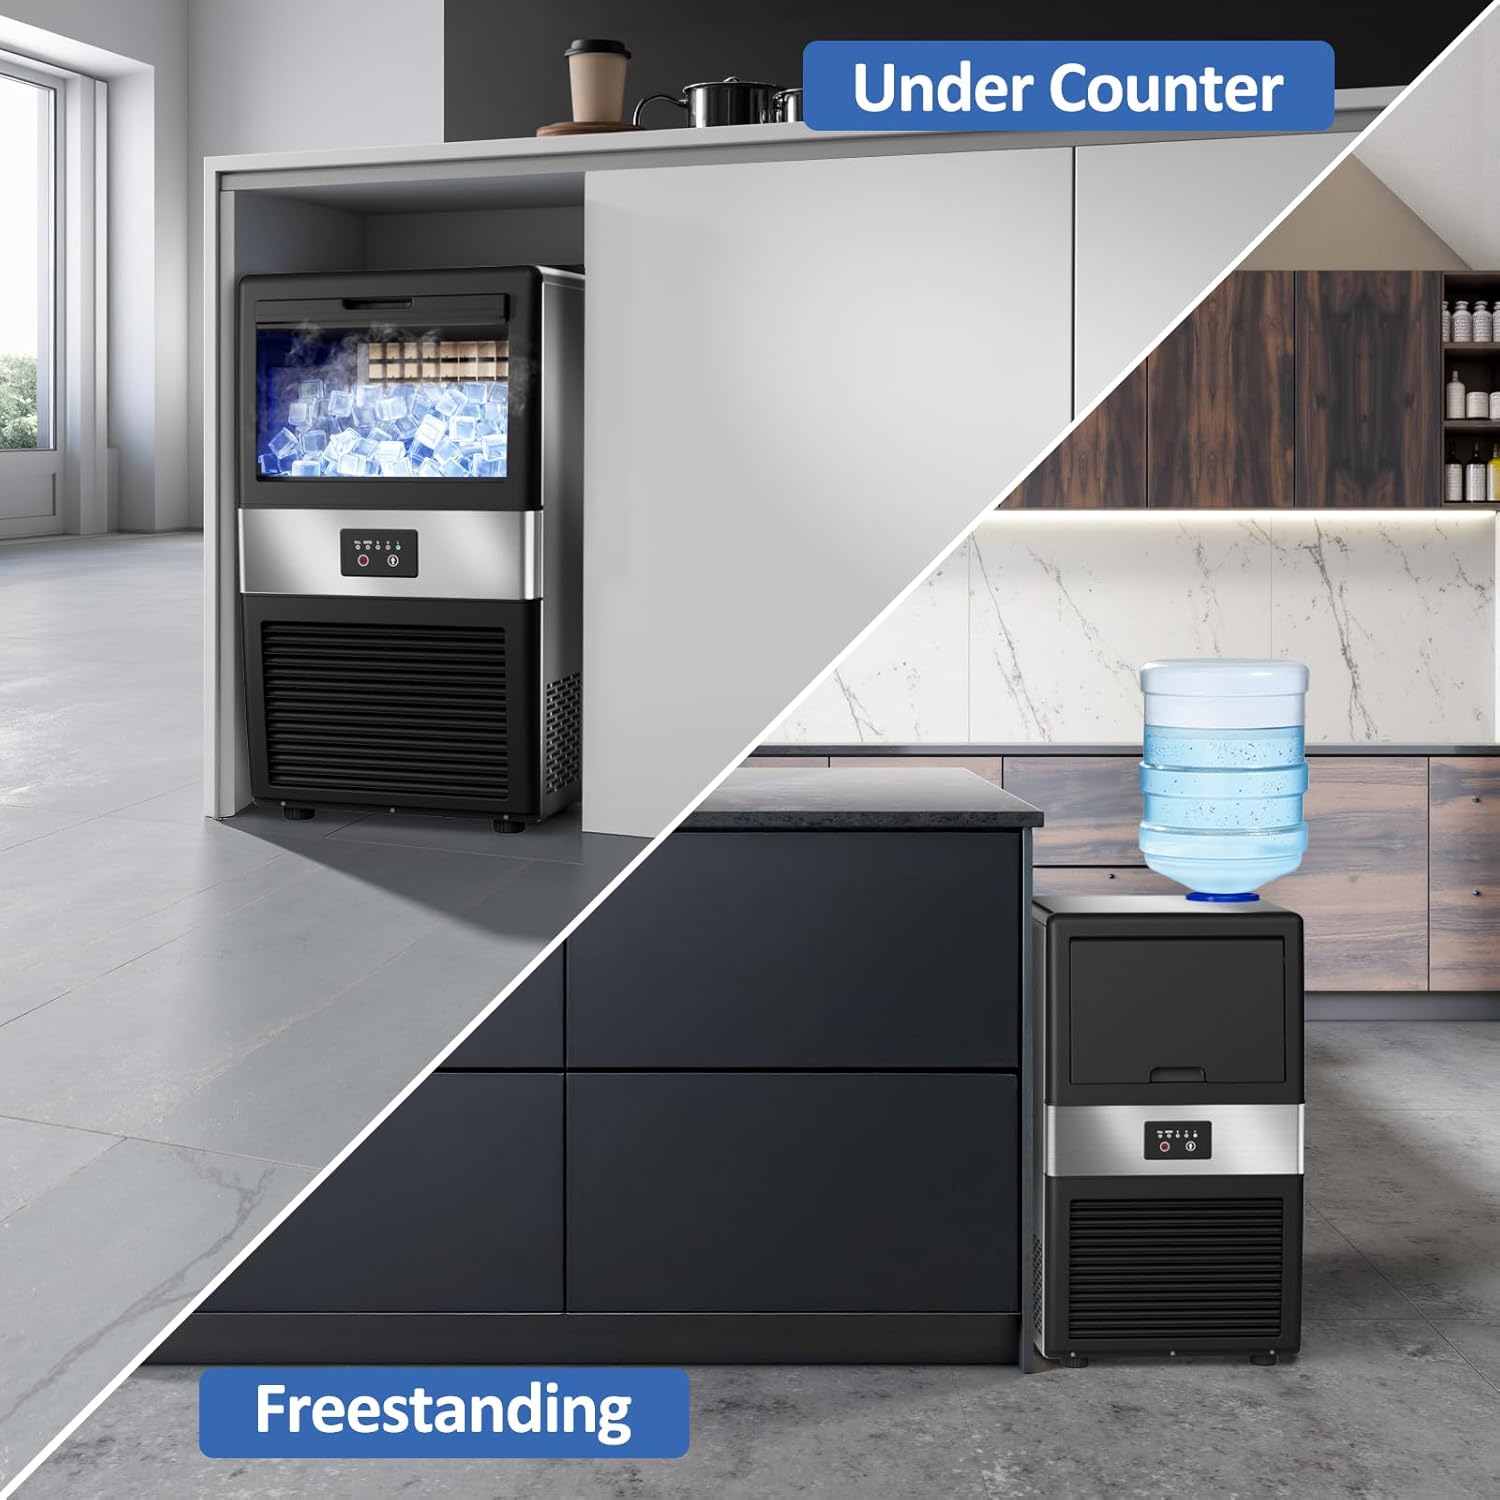
- Place the ice maker on a flat, stable surface. Ensure there is adequate space around the unit for ventilation.
- Before first use, allow the unit to stand upright for at least 24 hours to allow the refrigerant to settle.

4.2 Připojení vody:
The LifePlus Ice Maker offers two ways to add water:
- Direct Tap Water Connection: Connect the provided water supply hose to a potable water source and the designated inlet on the ice maker. Ensure the valve is set to the correct position (horizontal or vertical) as per the connection type.
- Bottled Water (Bucket Water): Place a standard 5-gallon water bottle on top of the ice maker's water dispenser port.
Once water is connected, plug in the power cord and turn on the ice maker.


5. Návod k obsluze
Operating your LifePlus Ice Maker is straightforward.
5.1 Ice Production:
- Ensure the unit is plugged in and has a water supply.
- Press the Power button on the control panel to start the ice making process.
- The unit will automatically begin producing ice. A batch of 32 ice cubes is typically ready in 11-20 minutes, depending on the selected ice thickness and ambient temperature.

5.2 Adjusting Ice Thickness:
You can select from three ice cube thickness settings (S-M-L) to suit your preference. Refer to the control panel for the selection button.
- Malé (S): Approximately 11 minutes per cycle, ideal for smoothies.
- Střední (M): Approximately 15 minutes per cycle, suitable for general drinks.
- Velké (L): Approximately 20 minutes per cycle, perfect for chilling beer or seafood.


5.3 kontrolky:
The control panel features indicator lights that provide status updates:
- Led plný: Illuminates when the ice storage bin is full, pausing ice production.
- Přidat vodu: Illuminates when the water reservoir is low, indicating a need for water refill.

6. Údržba a čištění
Pravidelné čištění a údržba zajistí dlouhou životnost a optimální výkon vašeho výrobníku ledu.
6.1 Auto Cleaning Function:
The ice maker is equipped with a one-button auto-cleaning function to ensure ice cubes are clean and free of odor.
- Ensure the unit has water.
- Press the dedicated auto-clean button (refer to your control panel for exact button).
- The unit will cycle water through its system and drain it, removing impurities.

6.2 Manual Cleaning:
For thorough cleaning, especially if the unit has been stored or used infrequently:
- Odpojte výrobník ledu ze zásuvky.
- Drain any remaining water from the reservoir using the drain hose.
- Wipe down the interior and exterior surfaces with a soft cloth and mild detergent. Rinse thoroughly.
- Clean the ice tray and ice scoop regularly.
- Ensure all parts are dry before reassembling and operating the unit.
7. Řešení problémů
V této části naleznete běžné problémy a jejich řešení.
| Problém | Možná příčina | Řešení |
|---|---|---|
| Výrobník ledu nevyrábí led. | No water supply; Power off; Ambient temperature too high. | Check water connection/refill water; Ensure unit is plugged in and powered on; Operate in a cooler environment. |
| "Add Water" indicator light is on. | Vodní nádrž je prázdná nebo téměř nízká. | Refill water reservoir or check water supply connection. |
| "Ice Full" indicator light is on. | Ice storage bin is full. | Remove ice from the storage bin. |
| Kostky ledu jsou příliš malé nebo měkké. | Water temperature too high; Ambient temperature too high; Ice thickness setting is too low. | Use colder water; Ensure proper ventilation; Select a larger ice thickness setting (M or L). |
| Neobvyklý hluk během provozu. | Unit not level; Internal components vibrating. | Ensure the unit is on a flat, stable surface; This may be normal during certain cycles. If persistent or loud, contact support. |
Pokud problém přetrvává i po vyzkoušení těchto řešení, kontaktujte zákaznickou podporu.
8. Specifikace
Detailed technical specifications for the LifePlus Commercial Ice Maker.
| Atribut | Hodnota |
|---|---|
| Číslo modelu | DBJ-32A |
| Rozměry produktu (D x Š x V) | 13.8 cm x 14.1 cm x 24.8 cm |
| Hmotnost | 43 libry |
| Kapacita výroby ledu | Až 80 kg / 24 hodin |
| Kapacita zásobníku ledu | 13 libry |
| Doba cyklu ledových kostek | 11-20 Minutes (32 cubes per cycle) |
| Wattage | 324 wattů |
| Výrobce | LifePlus |
9. Záruka a podpora
LifePlus stands behind the quality of its products. This ice maker comes with a standard manufacturer's warranty covering defects in materials and workmanship under normal use. Please refer to the warranty card included with your purchase for specific terms and conditions, including the warranty period and coverage details.
For technical assistance, troubleshooting beyond this manual, or warranty claims, please contact LifePlus Customer Support. Have your model number (DBJ-32A) and purchase information ready when contacting support.
Kontakt na zákaznickou podporu:
- Please refer to your product packaging or the official LifePlus webstránky s nejaktuálnějšími kontaktními informacemi.