1. Úvod
Thank you for choosing the KRUPS Essential EA8105 Automatic Espresso Machine. This appliance is designed to deliver a perfectly balanced coffee experience, from bean to cup. Equipped with advanced KRUPS Thermoblock technology, it ensures optimal temperature control for exceptional coffee flavor. This manual provides essential information for the safe and efficient use, setup, operation, and maintenance of your machine.
2. Bezpečnostní pokyny
- Před použitím spotřebiče si pečlivě přečtěte všechny pokyny.
- Neponořujte spotřebič, napájecí kabel ani zástrčku do vody nebo jiné tekutiny.
- Zajistěte zvtagNapětí ve vaší elektrické síti odpovídátage.
- Udržujte spotřebič mimo dosah dětí.
- Pokud spotřebič nepoužíváte a před čištěním, odpojte jej ze zásuvky.
- Neprovozujte žádný spotřebič s poškozenou šňůrou nebo zástrčkou nebo poté, co spotřebič nefunguje správně nebo byl jakýmkoliv způsobem poškozen.
- Use only original KRUPS accessories and spare parts.
- Tento spotřebič je určen pouze pro použití v domácnosti.
3. Komponenty produktu

Obrázek 3.1: Přední view of the KRUPS Essential EA8105 Automatic Espresso Machine, showing the bean hopper, control panel, coffee spouts, and steam nozzle.
- Zásobník na fazole: Pro celá kávová zrna.
- Ovládací panel: Buttons and dial for various functions (on/off, coffee volume, steam).
- Nádrž na vodu: Odnímatelná nádrž na vodu.
- Výpustky kávy: Připravuje uvařenou kávu.
- Parní tryska: Pro napěnění mléka.
- Odkapávač: Sbírá přebytečnou tekutinu.
- Nádoba na kávovou sedlinu: Sbírá použitou kávovou sedlinu.
- Aqua Filter Claris Cartridge: Water filter for improved water quality.

Obrázek 3.2: Detailní záběr view of the coffee spouts and steam nozzle, highlighting the dispensing area.
4. Nastavení
4.1 Vybalení
- Opatrně vyjměte stroj a veškeré příslušenství z obalu.
- Odstraňte všechny ochranné fólie a balicí materiály.
- Place the machine on a stable, flat, heat-resistant surface, away from water splashes.
4.2 Water Tank and Aqua Filter Claris
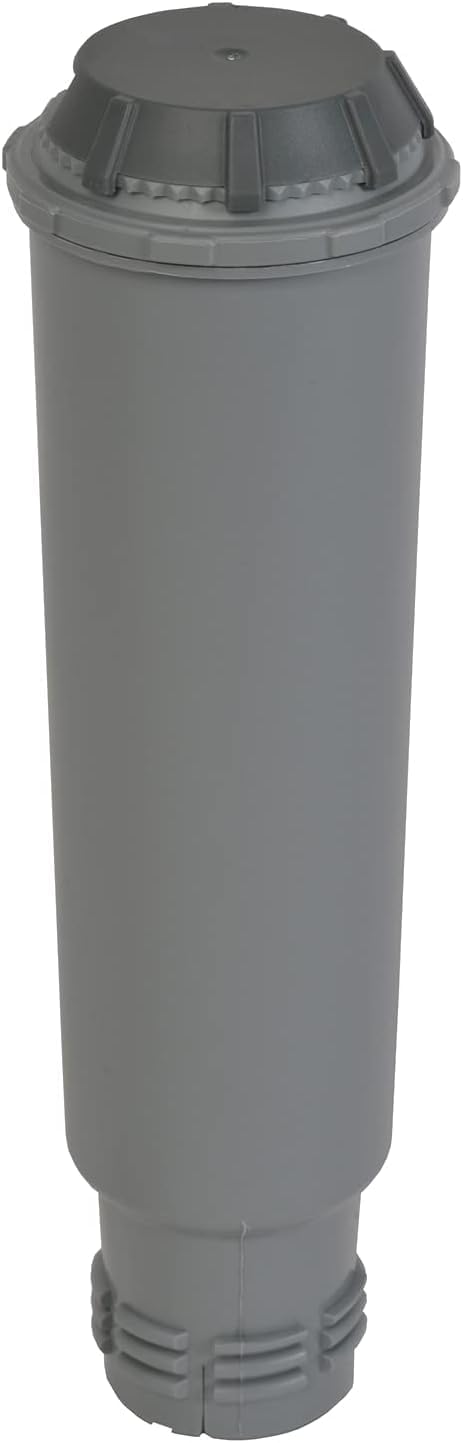
Obrázek 4.1: The Aqua Filter Claris water filter cartridge, designed to reduce chlorine and limescale.
- Vyjměte nádržku na vodu ze zadní části stroje.
- If using the Aqua Filter Claris cartridge (included), prepare it according to its separate instructions (usually involves rinsing).
- Insert the prepared filter into the water tank.
- Naplňte nádržku na vodu čerstvou, studenou vodou po úroveň MAX.
- Vložte nádržku na vodu zpět do přístroje a ujistěte se, že je bezpečně usazena.
4.3 Zásobník na zrna
- Otevřete víko zásobníku na kávová zrna, který se nachází na horní straně kávovaru.
- Fill the hopper with whole coffee beans. Do not use ground coffee, instant coffee, or caramelized beans, as this can damage the grinder.
- Bezpečně zavřete víko.
4.4 První použití / Základní nátěr
- Zapojte stroj do uzemněné elektrické zásuvky.
- Zapněte stroj pomocí tlačítka napájení.
- The machine will perform an initial rinse cycle. Follow any on-screen prompts or indicator lights.
- Umístěte pod výpust kávy nádobu, do které se bude sbírat voda.
- Jakmile je cyklus oplachování dokončen, je stroj připraven k použití.
5. Návod k obsluze
5.1 Příprava espressa/kávy
- Ujistěte se, že je nádržka na vodu naplněná a že zásobník na kávová zrna obsahuje kávová zrna.
- Umístěte jeden nebo dva šálky pod výpust kávy.
- Use the central dial to select your desired coffee volume (e.g., 20ml to 220ml).
- Press the coffee button (single or double cup, depending on model) to start brewing.
- The machine will grind the beans, tamp, and extract the coffee. Brewing will stop automatically.
5.2 Nastavení síly kávy
The coffee strength can typically be adjusted by changing the grinding fineness (if available on your model) or by selecting a smaller coffee volume for a more concentrated shot.
5.3 Steam Nozzle / Milk Frothing
- Naplňte džbán studeným mlékem (mléčným nebo rostlinným).
- Umístěte parní trysku do mléka, těsně pod hladinu.
- Activate the steam function (refer to your machine's specific button/dial for steam).
- Pohybujte džbánem nahoru a dolů, abyste vytvořili pěnu.
- Once desired texture is achieved, turn off the steam function.
- Důležité: Immediately clean the steam nozzle after each use to prevent milk residue buildup.
6. Údržba
6.1 Denní čištění
- Vyprázdněte a opláchněte odkapávací misku a nádobu na mletou kávu.
- Otřete vnější část stroje reklamouamp tkanina.
- Clean the steam nozzle thoroughly after each use.
6.2 Odvápnění
The machine features an automatic cleaning and descaling program. The 'CALC' indicator light will illuminate when descaling is required. Follow the instructions provided by the machine's display or indicator lights for the descaling process. Use only KRUPS descaling solution.
6.3 Aqua Filter Claris Replacement
The Aqua Filter Claris cartridge should be replaced approximately every 2-3 months, or as indicated by the machine. Regular filter replacement helps maintain water quality and reduces limescale buildup.
7. Řešení problémů
- Nevydává se káva: Check water tank level, ensure beans are in the hopper, check for blockages in coffee spouts.
- Slabá káva: Adjust coffee volume to a smaller setting, check bean freshness, ensure grinder is not clogged.
- Stroj se nezapíná: Check power connection, ensure plug is fully inserted into the outlet.
- Únik: Ensure water tank is correctly seated, check drip tray for overflow.
- Chybové zprávy: Refer to the machine's display or indicator lights for specific error codes and consult the full manual or KRUPS support.
8. Specifikace
| Značka | KRUPS |
| Číslo modelu | EA8105 |
| Barva | Bílý |
| Typ kávovaru | Espresso kávovar (z kávových zrn do šálku) |
| Speciální funkce | Water Filter (Aqua Filter Claris) |
| Materiál | Měď (vnitřní součásti) |
| Provozní režim | Plně automatické |
| Typ kávy | Celé fazole |
| Zahrnuté komponenty | Filtrační vložka |
| Vhodné do myčky | Žádný |
9. Záruka a podpora
For warranty information, please refer to the warranty card included with your product or visit the official KRUPS website. For technical support, spare parts, or service, please contact KRUPS customer service in your region. Keep your proof of purchase for warranty claims.