
WAINLUX JL3
Uživatelská příručka k laserovému gravírovacímu stroji WAINLUX JL3
Model: JL3
Značka: WAINLUX
1. Úvod
The WAINLUX JL3 Laser Engraver is a versatile and powerful machine designed for precision engraving and cutting. It features a unique auto power-off function for safety when the machine is offset. This manual provides essential information for setting up, operating, and maintaining your JL3 laser engraver to ensure optimal performance and safety.

Figure 1: WAINLUX JL3 Laser Engraver in operation, demonstrating an engraved owl design on a wooden surface.
2. Obsah balení
Upon unpacking your WAINLUX JL3, please verify that all the following items are included:
- WAINLUX JL3 Laser Engraver Unit (Aluminum profile + Acrylic frame)
- Laser Module (20W version, as specified)
- Napájení
- Datový kabel (USB)
- U Disk (containing software and drivers)
- Ochranné brýle
- Kraft Paper and Black Card (for testing)
- Testovací deska
- Uživatelská příručka (tento dokument)
- Small Brush and Wrench (for maintenance/assembly)

Figure 2: All components included in the WAINLUX JL3 Laser Engraver package.
3. Specifikace
| Funkce | Detail |
|---|---|
| Model produktu | JL3 |
| Výkon laseru | 20W (Electric Power) |
| Oblast gravírování | 410 x 370 mm (approx. 16.1" x 14.5") |
| Rozměry produktu | 590 x 510 x 210 mm |
| Hmotnost produktu | 2.68 kg |
| Materiál produktu | Aluminium Profile + Acrylic |
| Konektivita | Computer USB, Mobile APP (WiFi), One-key Offline Engraving |
| Podporovaný OS | Windows, MAC, Android, iOS |
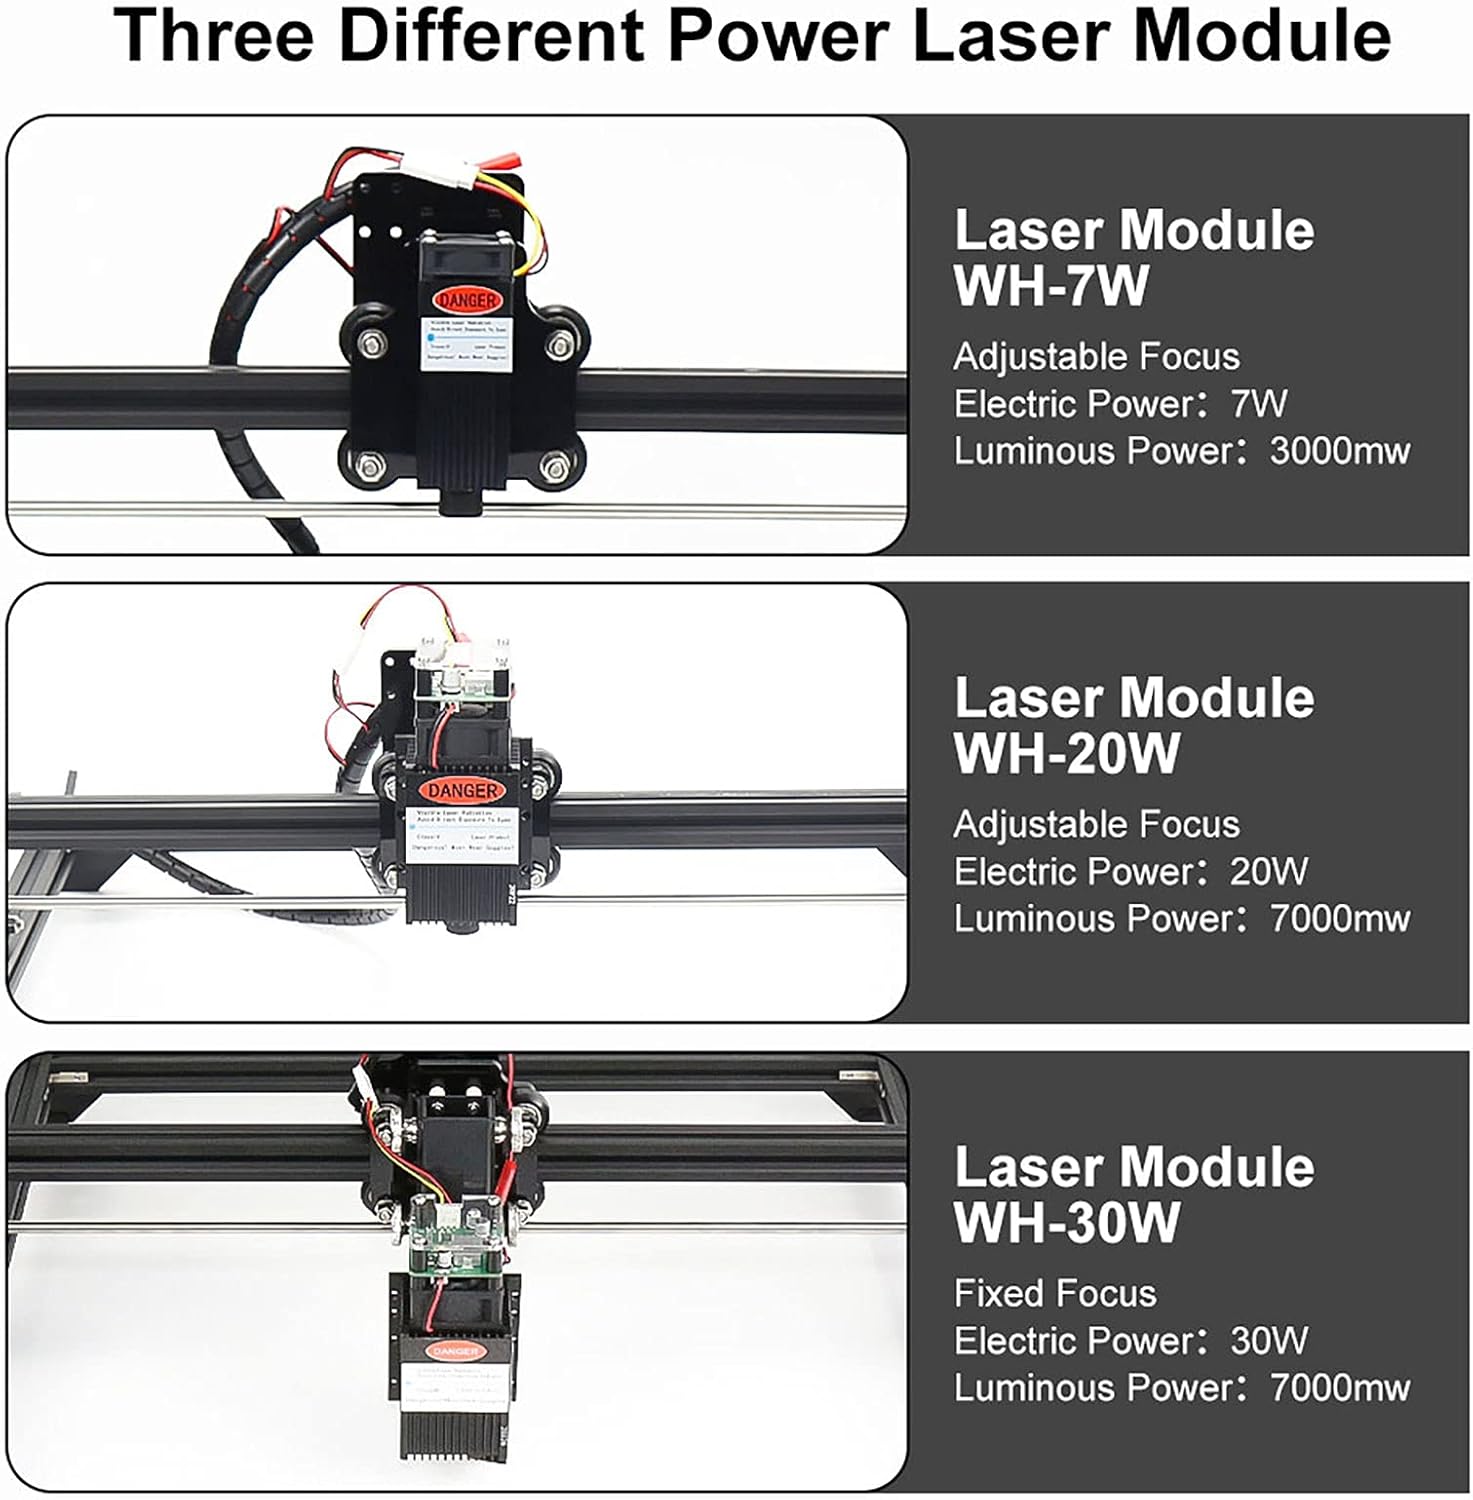
Figure 3: Illustration of various laser module power options available for WAINLUX engravers, including the 20W module.

Obrázek 4: Přesview of the WAINLUX JL3's large engraving area and structural components.
4. Nastavení
Before operating your WAINLUX JL3, ensure it is properly set up and connected.
4.1. Prvotní montáž
The JL3 comes partially assembled. Follow the detailed instructions in the included physical user manual for complete assembly of the aluminum profile and acrylic components, and for mounting the laser module securely.
4.2. Instalace softwaru
- Vložte dodaný USB disk do počítače.
- Locate and install the appropriate software and drivers for your operating system (Windows or MAC).
- For mobile control, download the WAINLUX APP from your device's app store (Android or iOS).
4.3. Connecting the Engraver
The JL3 offers multiple connection options:
- Computer USB Connection: Connect the engraver to your computer using the provided USB data cable. Ensure the necessary drivers are installed for proper communication.
- Mobile APP (WiFi) Connection: Connect your mobile device to the engraver via WiFi using the WAINLUX APP. Follow the in-app instructions for pairing.
- One-key Offline Engraving: For pre-loaded designs, the machine supports offline engraving without a continuous computer or mobile connection. Refer to the software guide for preparing offline files.

Figure 5: WAINLUX software interface on both desktop and mobile devices, demonstrating connectivity options.
5. Návod k obsluze
This section outlines the general steps for operating your WAINLUX JL3 Laser Engraver.
5.1. Konec softwaruview
The WAINLUX software provides a user-friendly interface for preparing your engraving projects. It supports various input types:
- Image Engraving: Import common image formats.
- Text Engraving: Create and engrave text with various fonts.
- Vector Diagram Engraving: Import vektoru files for precise cuts and engravings.
The software offers four engraving modes:
- Černobílý: For high-contrast images.
- Obrys: Engraves only the contours of a design.
- Oddělený: Creates a dotted or patterned effect.
- Skica: Simulates a hand-drawn sketch.
The software also features automatic detection of the maximum carving area, simplifying project setup.
5.2. Engraving Process
- Připravte materiál: Place your chosen material flat and securely within the engraving area.
- Návrh v softwaru: Open the WAINLUX software (on PC or mobile APP) and import or create your design.
- Upravit nastavení: Select the appropriate engraving mode, adjust laser power, speed, and other parameters based on your material and desired outcome.
- Předview a pozice: Použijte předběžné nastavení softwaruview funkce pro zajištění správného umístění návrhu na materiálu.
- Začněte gravírovat: Initiate the engraving process from the software. The machine will begin working.
5.3. Compatible Materials
The WAINLUX JL3 is capable of engraving and cutting a wide range of materials, including but not limited to:
- Lepenka
- Dřevo
- Kůže
- Tkanina
- Bambus
- Plstěný
- Fruit (e.g., peels)
- Plastic (certain types)
- Acrylic (certain types)
- Metal with spray paint coating (engraves the coating)
Note: The surface of transparent or reflective materials needs to be coated with black baking paint or a similar opaque, non-reflective layer for the laser to engrave effectively.

Obrázek 6: Přamples of materials successfully engraved by the WAINLUX JL3.

Obrázek 7: Další příkladamples showcasing the versatility of the WAINLUX JL3 in engraving various objects.
6. Bezpečnost a údržba
Adhering to safety guidelines and performing regular maintenance will ensure the longevity and safe operation of your engraver.
6.1. Bezpečnostní opatření
- Ochrana očí: Always wear the provided protective goggles when the laser is in operation. Do not look directly at the laser with naked eyes to avoid injury.
- Bezpečnost rukou: Never place your hands or any body parts under the laser head while the machine is working.
- Automatic Safety Feature: The laser head is designed to automatically close (power off) if abnormal movement is detected, enhancing safety.
- Větrání: Ensure adequate ventilation in your workspace, especially when engraving materials that may produce fumes.
6.2. Údržba
- Laserová hlava: The laser head is a consumable item and has a limited lifespan.
- Období chlazení: To prolong the life of the laser module, it is recommended to follow these power-off schedules:
- After four hours of continuous engraving, power off for ten minutes.
- After one hour of continuous engraving, power off for ten minutes.
- Čištění: Regularly clean the laser lens and the machine's frame using a soft, dry cloth to prevent dust and debris buildup.
7. Řešení problémů
If you encounter any issues during the setup or operation of your WAINLUX JL3 Laser Engraver, please consider the following general advice:
- Problémy s připojením: Ensure all cables are securely connected and that your device (computer/mobile) is properly paired via USB or WiFi.
- Problémy se softwarem: Verify that you have the latest version of the WAINLUX software and drivers installed. Try restarting the software or your device.
- Kvalita gravírování: Check your material type and adjust laser power and speed settings accordingly. Ensure the material surface is clean and properly prepared.
- Laser nesvítí: Confirm the laser module is correctly installed and connected. Check for any error messages in the software.
For persistent problems or issues not covered here, please refer to the comprehensive troubleshooting section in the physical user manual or contact WAINLUX customer support.
8. Záruka a podpora
WAINLUX is committed to providing high-quality products and excellent customer service. While specific warranty details are typically provided with your purchase documentation, WAINLUX offers support for its products.
If you encounter any problems during use, please contact WAINLUX customer support immediately. Our team is ready to assist you with troubleshooting, technical queries, and any other support needs to ensure your satisfaction with the JL3 Laser Engraver.
Please retain your purchase receipt and product serial number for any warranty claims or support inquiries.
Ask a question about this manual
Ask about setup, troubleshooting, compatibility, parts, safety, or missing instructions. Manuals+ will review the question and use this page’s manual context to help answer it.