
1. Úvod
Thank you for choosing the Dasqua 4710-1205 Digital Depth Gauge. This precision instrument is designed for accurate measurement of hole depths and depths of features on workpieces, including those with grooved or raised surfaces. Manufactured in accordance with DIN 863 standards, this gauge provides reliable and consistent results. Please read this manual thoroughly before operation to ensure proper use and to maintain the longevity of your tool.
2. Bezpečnostní pokyny
- Always handle the depth gauge with care to avoid dropping or impacting it, which can affect its accuracy.
- Keep the gauge clean and free from dust, dirt, and moisture.
- Do not attempt to disassemble or modify the instrument. Repairs should only be performed by qualified personnel.
- Pokud měřidlo nepoužíváte, uložte jej do ochranného pouzdra, aby nedošlo k poškození.
- Uchovávejte baterie mimo dosah dětí. Použité baterie zlikvidujte zodpovědně.
3. Obsah balení
Po vybalení se prosím ujistěte, že jsou všechny níže uvedené položky přítomny a v dobrém stavu:
- Dasqua 4710-1205 Digital Depth Gauge
- Set of Extension Rods (various lengths)
- Ochranné úložné pouzdro
- Návod k použití (tento dokument)
- Battery (may be pre-installed or separate)
4. Konec produktuview
The Dasqua 4710-1205 Digital Depth Gauge features a large, easy-to-read display and a hardened, ground, and lapped spindle for ultimate precision. It includes a ratchet stop mechanism for constant measuring force.
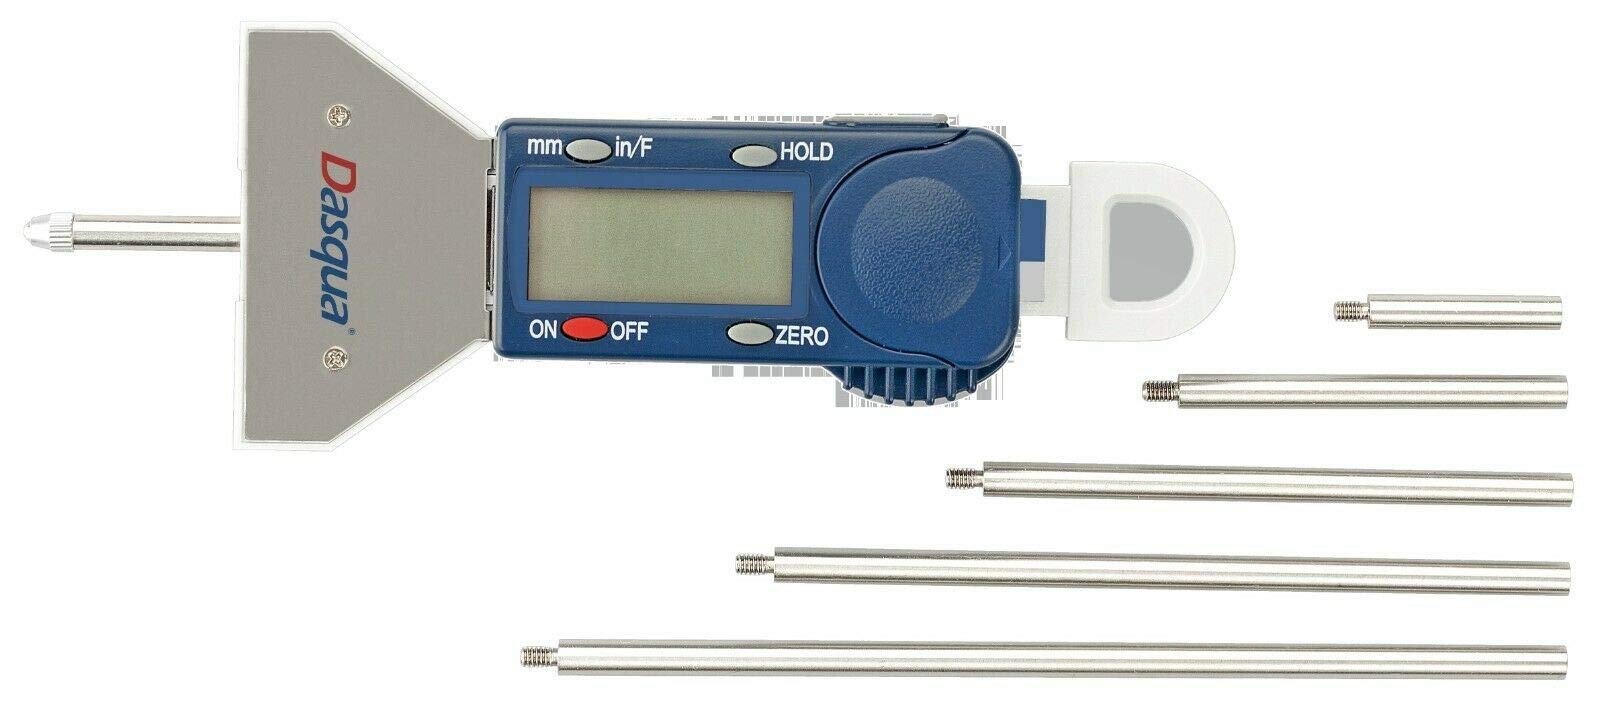
Obrázek 1: Dasqua 4710-1205 Digital Depth Gauge with its included extension rods. This image shows the main body of the gauge, the digital display, control buttons, and several extension rods of varying lengths.
Klíčové komponenty:
- Digitální displej: Large LCD for clear reading of measurements.
- Measuring Base: Provides a stable reference surface.
- Vřeteno: The movable rod that extends to measure depth.
- Ratchet Stop: Ensures consistent measuring pressure.
- Ovládací tlačítka: For Power ON/OFF, Zero setting, and Unit conversion (if applicable).
- Prodlužovací tyče: Attach to the spindle to increase the measuring range.
5. Nastavení
5.1. Instalace baterie
- Locate the battery compartment cover, usually on the back or side of the digital display unit.
- K otevření krytu použijte malý šroubovák nebo minci.
- Insert the battery (typically a CR2032 coin cell) with the positive (+) side facing up.
- Bezpečně nasaďte kryt prostoru pro baterie.
5.2. Počáteční čištění
Before first use, gently wipe all measuring surfaces with a clean, lint-free cloth. Avoid using harsh solvents.
5.3. Attaching Extension Rods
Select the appropriate extension rod based on the depth you intend to measure. Carefully screw the chosen extension rod onto the end of the gauge's spindle. Ensure it is finger-tight but do not overtighten.
6. Návod k obsluze
6.1. Zapnutí/vypnutí napájení
Stiskněte tlačítko ON/OFF button to turn the gauge on. Press it again to turn the gauge off. The gauge may also have an auto-off feature after a period of inactivity.
6.2. Zero Setting
- Place the measuring base firmly on a flat, stable reference surface.
- Extend the spindle (with any attached extension rod) until its tip makes contact with the reference surface. Use the ratchet stop to apply consistent, light pressure.
- Stiskněte tlačítko NULA button. The display should now read 0.00 mm. The gauge is now ready for measurement.
6.3. Měření
- Ensure the gauge is properly zeroed on a suitable reference surface.
- Place the measuring base of the gauge firmly on the top surface of the workpiece or hole from which you want to measure the depth.
- Carefully extend the spindle until its tip reaches the bottom of the hole or feature. Use the ratchet stop to ensure consistent measuring force.
- Odečtěte naměřenou hodnotu přímo z digitálního displeje.
6.4. Převod jednotek (pokud je to relevantní)
If your model supports it, press the mm / palec button to switch between metric (millimeters) and imperial (inches) units.
7. Údržba
7.1. Čištění
After each use, wipe the gauge clean with a dry, lint-free cloth. For stubborn dirt, a cloth lightly dampened with isopropyl alcohol can be used, but avoid excessive moisture. Do not use abrasive cleaners or solvents.
7.2. Skladování
Store the depth gauge in its original protective case in a dry, temperature-controlled environment. Avoid areas with high humidity or extreme temperature fluctuations.
7.3. Výměna baterie
When the display becomes dim or erratic, it's time to replace the battery. Follow the instructions in Section 5.1.
8. Řešení problémů
| Problém | Možná příčina | Řešení |
|---|---|---|
| Displej je prázdný nebo tmavý. | Slabá nebo vybitá baterie. | Vyměňte baterii (viz kapitola 5.1). |
| Nepřesné údaje. | Gauge not properly zeroed; dirt on measuring surfaces; damaged spindle. | Re-zero the gauge (refer to Section 6.2); clean measuring surfaces; if damaged, contact support. |
| Tlačítka nereagují. | Low battery; internal electronic issue. | Replace battery; if problem persists, contact support. |
9. Specifikace
- Model: Dasqua 4710-1205
- Rozsah měření: 0-25 mm
- Promoce: 0.01 mm
- Norma: Manufactured in accordance with DIN 863
- Vlastnosti: Ratchet stop for constant pressure, hardened, ground, and lapped spindle, large easy-to-read display, includes extension rods.
10. Záruka a podpora
Dasqua products are manufactured to high-quality standards. For specific warranty information, please refer to the warranty card included with your product or visit the official Dasqua webmísto.
For technical support, spare parts, or service inquiries, please contact your authorized Dasqua dealer or the Dasqua customer service department. When contacting support, please have your model number (4710-1205) and purchase date available.