
1. Úvod
This manual provides detailed instructions for the setup, operation, and maintenance of your BALDR Wireless Weather Station. This device accurately measures indoor and outdoor temperature and humidity, displays weather forecasts, and includes an alarm clock function. Please read this manual thoroughly before use to ensure proper functionality and longevity of the product.
2. Bezpečnostní informace
- Do not expose the main unit or outdoor sensor to extreme temperatures, direct sunlight for prolonged periods, or excessive moisture.
- Zabraňte pádu zařízení nebo jeho vystavení silným nárazům.
- Use only the specified battery types (AAA for main unit, AA for outdoor sensor).
- Nekombinujte staré a nové baterie ani různé typy baterií.
- Použité baterie zlikvidujte v souladu s místními předpisy.
- Udržujte zařízení mimo dosah silných elektromagnetických polí.
3. Obsah balení
- 1 x Hlavní zobrazovací jednotka
- 1 x Bezdrátový venkovní senzor
- 1 x Návod k použití
4. Konec produktuview

Obraz: Main display unit and outdoor sensor with key components labeled. The main unit features a calendar, weather forecast, current time, channel indicator, outdoor temperature & humidity, and indoor temperature & humidity. The back of the main unit shows a hanging hole, back buttons, battery compartment, and stand bracket. The outdoor sensor is a compact rectangular device.
Main Display Unit Features:
- Podsvícený LCD displej
- Zobrazení vnitřní teploty a vlhkosti
- Outdoor Temperature & Humidity Display
- Weather Forecast Icons (Sunny, Sunny to Cloudy, Cloudy, Rainy, Stormy)
- Time (12/24 hour format)
- Date & Weekday
- Budík s funkcí odložení buzení
- MAX/MIN Temperature & Humidity Records
- Podporuje až 3 bezdrátové venkovní senzory (jeden je součástí balení)
Wireless Outdoor Sensor Features:
- Bezdrátově přenáší data o teplotě a vlhkosti do hlavní jednotky.
- Channel selection switch (CH1, CH2, CH3).
- LED indicator for signal transmission.
5. Nastavení
5.1 Battery Installation and Initial Pairing
For successful pairing, ensure the main unit and outdoor sensor are placed close to each other during initial setup. Install batteries in the main unit first, then in the outdoor sensor.
- Outdoor Sensor Battery Installation:
Open the battery compartment of the outdoor sensor. Set the channel switch to CH1. Insert 2 new 'AA' batteries, observing polarity. Close the battery compartment. - Main Unit Battery Installation:
Open the battery compartment of the main unit. Insert 2 new 'AAA' batteries, observing polarity. Close the battery compartment. The main unit will power on and begin searching for the outdoor sensor. - Párování:
Allow 2-3 minutes for the main unit to receive the signal from the outdoor sensor. Do not move the units during this time. Once connected, outdoor temperature and humidity will display on the main unit.

Obraz: Close-up of the outdoor sensor's battery compartment, showing the channel switch set to CH1.

Obraz: Two AA batteries correctly inserted into the outdoor sensor's battery compartment.

Obraz: Two AAA batteries correctly inserted into the main unit's battery compartment.

Obraz: The main unit and outdoor sensor placed side-by-side to facilitate initial pairing.
Video: This video demonstrates the quick setup process for the BALDR Wireless Weather Station, including battery installation for both the sensor and the main unit, and the initial pairing steps.
5.2 Umístění snímače
The outdoor sensor should be placed in a location that provides accurate readings and is protected from direct weather elements.
- Choose a shaded area to avoid direct sunlight, which can cause inaccurate temperature readings.
- Protect the sensor from direct rain and snow.
- Ensure the sensor is within the transmitting range of the main unit (up to 328ft/100m in open air). Walls and other obstructions can reduce this range.
- Mount the sensor vertically using the integrated hanging hole or place it on a flat surface.

Obraz: The wireless outdoor sensor mounted on an exterior wall, illustrating its 100m (328ft) transmitting range to the indoor receiver.

Obraz: An outdoor sensor mounted under a roof eave, demonstrating ideal placement for protection from direct elements.

Obraz: The main unit shown in two placement options: standing on a tabletop and mounted on a wall, highlighting its versatility.
6. Návod k obsluze
6.1 Zobrazení nadview
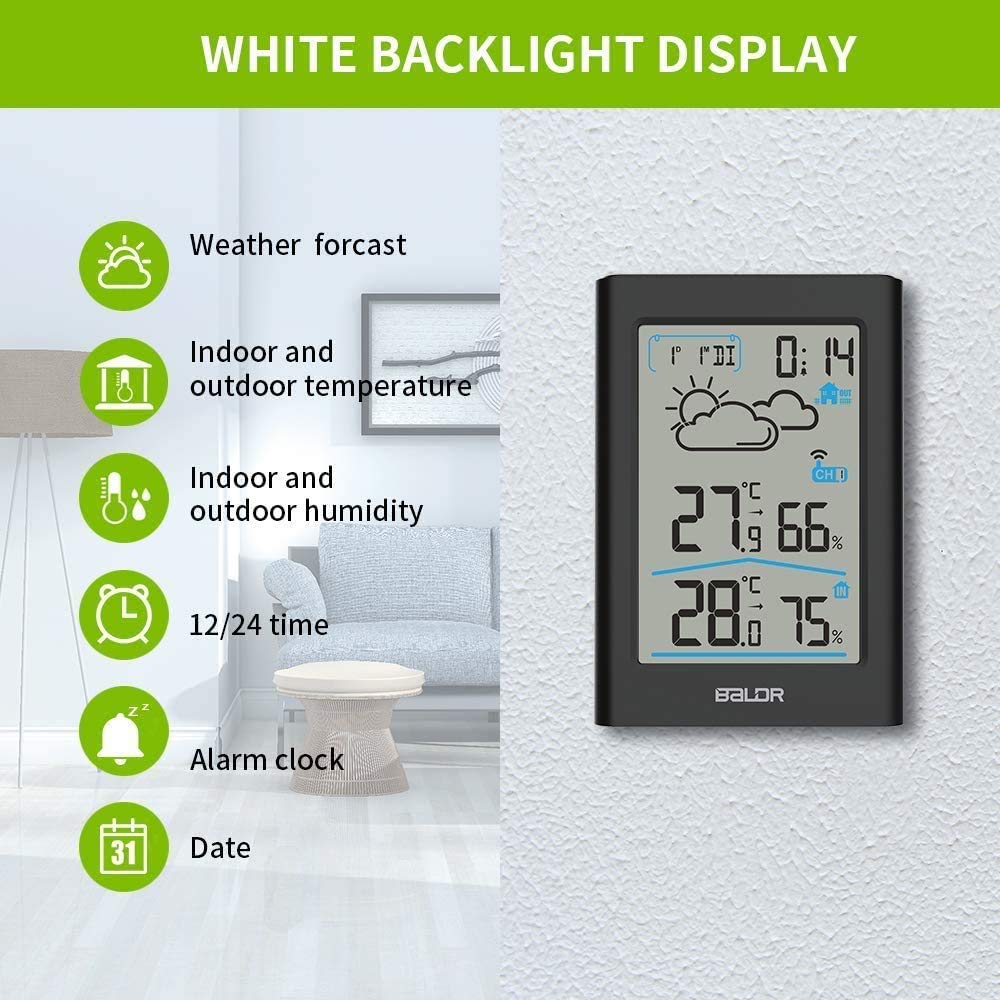
Obraz: The main display unit showing various readings: weather forecast icon, indoor and outdoor temperature, indoor and outdoor humidity, 12/24 hour time, alarm clock status, and date.
6.2 Funkce podsvícení
Touch the top button of the main unit to activate the white backlight. The backlight will remain on for 20 seconds, making it easier to read in dim light conditions.

Obraz: The weather station display with its white backlight illuminated, showing clear visibility in a low-light environment.
6.3 Nastavení času a data
To enter setting mode, long press the 'SET/C/F' button. Use the 'MEM/▼' or 'CH/▲' buttons to adjust values. Press 'SET/C/F' to confirm and move to the next setting.
- Formát 12H/24H: Select your preferred time format.
- Nastavení hodin: Nastavte aktuální hodinu.
- Nastavení minut: Nastavte aktuální minutu.
- Nastavení roku: Nastavte aktuální rok.
- MD/DM Selectable: Choose between Month/Date or Date/Month format.
- Nastavení měsíce: Nastavte aktuální měsíc.
- Nastavení data: Nastavte aktuální datum.
- Weekday Language Setting: Select the language for the weekday display (GER, ENG, ITA, FRE, DUT, SPA, DAN).
- Key Tone ON/OFF: Povolit nebo zakázat zvuky stisknutí tlačítek.
6.4 Výběr jednotky teploty
Press the 'SET/C/F' button (short press) to switch between Celsius (℃) and Fahrenheit (℉).
6.5 Předpověď počasí
The weather station provides a weather forecast for the next 12-24 hours based on atmospheric pressure changes. The icons displayed are: Sunny, Sunny to Cloudy, Cloudy, Rainy, and Stormy.
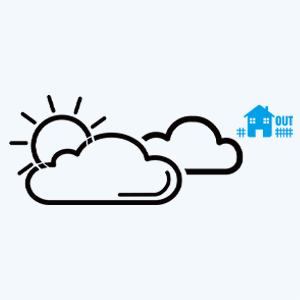
Obraz: A close-up of the weather forecast section on the display, showing various weather icons.

Obraz: The weather station display showing various weather forecast icons (sunny, cloudy, rainy, stormy) overlaid on corresponding real-world sky conditions.
6.6 Záznamy MAX/MIN
The weather station records the maximum and minimum temperature and humidity values over a 24-hour period.
- Press the 'MEM/▼' button once to check the maximum temperature and humidity.
- Press the 'MEM/▼' button twice to check the minimum temperature and humidity.
- To clear the MAX/MIN records, press and hold the 'MEM/▼' button.
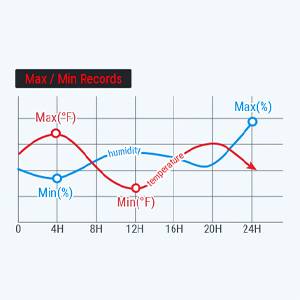
Obraz: A graphical representation of temperature and humidity trends over 24 hours, indicating maximum and minimum recorded values.
6.7 Nastavení alarmu
- Check Alarm Time: Press the 'ALARM' button once.
- Turn ON/OFF Alarm: Press the 'ALARM' button twice.
- Nastavit čas alarmu: Long press and hold the 'ALARM' button to enter alarm setting mode. Use 'MEM/▼' or 'CH/▲' to adjust values. Press 'ALARM' to confirm.
- Funkce odložení: When the alarm sounds, press the top button to activate snooze. The alarm will sound again after 5 minutes.
6.8 Změna kanálu senzoru
If you have multiple outdoor sensors (up to 3 supported), you can switch between their readings or enable a channel scan.
- Press the 'CH/▲' button to set the channel. The setting order is CH1 → CH2 → CH3 → Channel Scan.
- In Channel Scan mode, the display will cycle through readings from all connected sensors at 10-second intervals.
7. Údržba
7.1 Čištění
Otřete zařízení měkkým, damp tkanina. Nepoužívejte abrazivní čisticí prostředky nebo rozpouštědla.
7.2 Výměna baterie
Replace batteries when the low battery indicator appears on the display. Always replace all batteries with new ones of the same type.

Obraz: The main unit and outdoor sensor with their battery compartments open, illustrating where batteries are inserted.
8. Řešení problémů
8.1 No Outdoor Temperature/Humidity Display
- Ensure both the main unit and outdoor sensor have fresh batteries installed correctly.
- Verify the outdoor sensor's channel switch matches the selected channel on the main unit (or is in scan mode).
- Place the outdoor sensor closer to the main unit to check if it's a range issue.
- Avoid placing the units near large metal objects, electronic devices, or thick walls that can interfere with the wireless signal.
- Perform a reset: Remove batteries from both units, wait a few minutes, then reinsert batteries into the main unit first, then the outdoor sensor.
Video: This video addresses common reasons why the display unit might not receive outdoor temperature and humidity data, providing visual guidance on correct battery installation and channel setting to resolve connectivity issues.
8.2 Nepřesné hodnoty
- Ensure the outdoor sensor is not in direct sunlight or exposed to heat sources.
- Verify the main unit is not placed near heat-emitting appliances or in direct sunlight indoors.
- Po počátečním nastavení nebo přemístění nechte obě jednotky alespoň 30 minut stabilizovat.
9. Specifikace
| Funkce | Specifikace |
|---|---|
| Číslo modelu | B0341TH-B1 |
| Zdroj napájení (hlavní jednotka) | 2 x AAA baterie (nejsou součástí balení) |
| Zdroj napájení (venkovní senzor) | 2 x AA baterie (nejsou součástí balení) |
| Technologie připojení | Bezdrátový |
| Bezdrátové Dosah | Až 100 m (328 stop) ve volném prostoru |
| Přesnost teploty | ±1℃ (±2℉) |
| Přesnost vlhkosti | ± 2-3% RH |
| Typ zobrazení | LCD s podsvícením |
| Rozměry produktu | 0.86"D x 3.15"W x 4.76"H (Main Unit) |
| Materiál | Akrylonitril-butadien-styren (ABS), polykarbonát |
10. Záruka a podpora
BALDR products are designed and manufactured to the highest quality standards. For warranty information or technical support, please refer to the contact details provided on the official BALDR webwebu nebo v dokumentaci k nákupu.