YIHUA 936A II
Uživatelská příručka k sadě pájecí stanice YIHUA 936A II
Model: 936A II
1. Úvod
Thank you for choosing the YIHUA 936A II Soldering Iron Station Kit. This manual provides essential information for the safe and efficient operation, maintenance, and troubleshooting of your new soldering station. Please read this manual thoroughly before use and retain it for future reference.
The YIHUA 936A II is a 65W soldering station designed for various soldering and desoldering applications on both Surface Mount Technology (SMT) and through-hole components, including SOP, DIP, and SOIC packages.
2. Bezpečnostní informace
WARNING: Improper use of soldering equipment can cause serious injury or damage. Always follow these safety guidelines:
- Always work in a well-ventilated area to avoid inhaling solder fumes. Use a fume extractor if available.
- The soldering iron tip reaches very high temperatures (up to 896°F / 480°C). Avoid direct contact with skin or flammable materials.
- Always place the soldering iron in its designated stand when not in use.
- Používejte vhodné osobní ochranné prostředky, včetně ochranných brýlí, abyste se chránili před postříkáním roztavenou pájkou.
- Ensure the power cord is in good condition and properly connected to a grounded outlet (110-127V US-standard).
- Do not operate the soldering station near flammable liquids or gases.
- Udržujte děti a nepovolané osoby mimo pracovní oblast.
- Disconnect the power when performing maintenance or when the unit is not in use.
- Do not modify the soldering station or its components. Use only genuine YIHUA replacement parts.
3. Obsah balení
Ověřte, zda jsou v balení obsaženy všechny níže uvedené položky:
- 1 x YIHUA 936A II Soldering Station
- 1 x držák páječky
- 5 x Assorted Soldering Tips
- 1 x Pack of Solder (1.0mm 15g)
- 1 x 817C Soldering Iron
- 1 x Napájecí kabel

Figure 3.1: Complete YIHUA 936A II Soldering Iron Station Kit with included accessories.
4. Konec produktuview a Komponenty
Familiarize yourself with the main components of your YIHUA 936A II Soldering Station.

Figure 4.1: Labeled diagram of the YIHUA 936A II Soldering Station and its main parts, including the power switch, temperature adjustment dial, operation indicator, soldering iron receptacle, heat-resistant silicone cord, interchangeable soldering iron tips, and heat-resistant bakelite sleeve.
4.1 Ovládací panel

Figure 4.2: The control panel features an ON/OFF switch, a temperature adjustment dial with Celsius/Fahrenheit markings, and a HEATING indicator light. The indicator light shows the status: ON (heating up), BLINKS (temperature stabilization, ready for use), OFF (cooling down).
4.2 Soldering Iron Stand

Figure 4.3: The soldering iron stand includes a tip cleaner kit (with brass wool and rosin), a cleaning sponge (to be wet with de-ionized water before use), tip storage slots for regularly used tips, and a heat-resistant silicone protective edge to prevent damage to the heating element.
5. Pokyny k nastavení
Pro první použití pájecí stanice postupujte podle těchto kroků:
- Umístění stanice: Position the soldering station on a stable, heat-resistant surface in a well-ventilated area.
- Assemble the Iron Stand: Attach the soldering iron holder to the main unit. Ensure it is secure.
- Připravte si čisticí houbičku: Lehce dampen the cleaning sponge with de-ionized water. Do not over-saturate.
- Připojení páječky: Plug the 817C soldering iron's connector into the receptacle on the front of the soldering station. Ensure a firm connection.
- Vložte napájecí kabel: Connect the power cord to the back of the soldering station and then to a grounded 110-127V AC outlet.
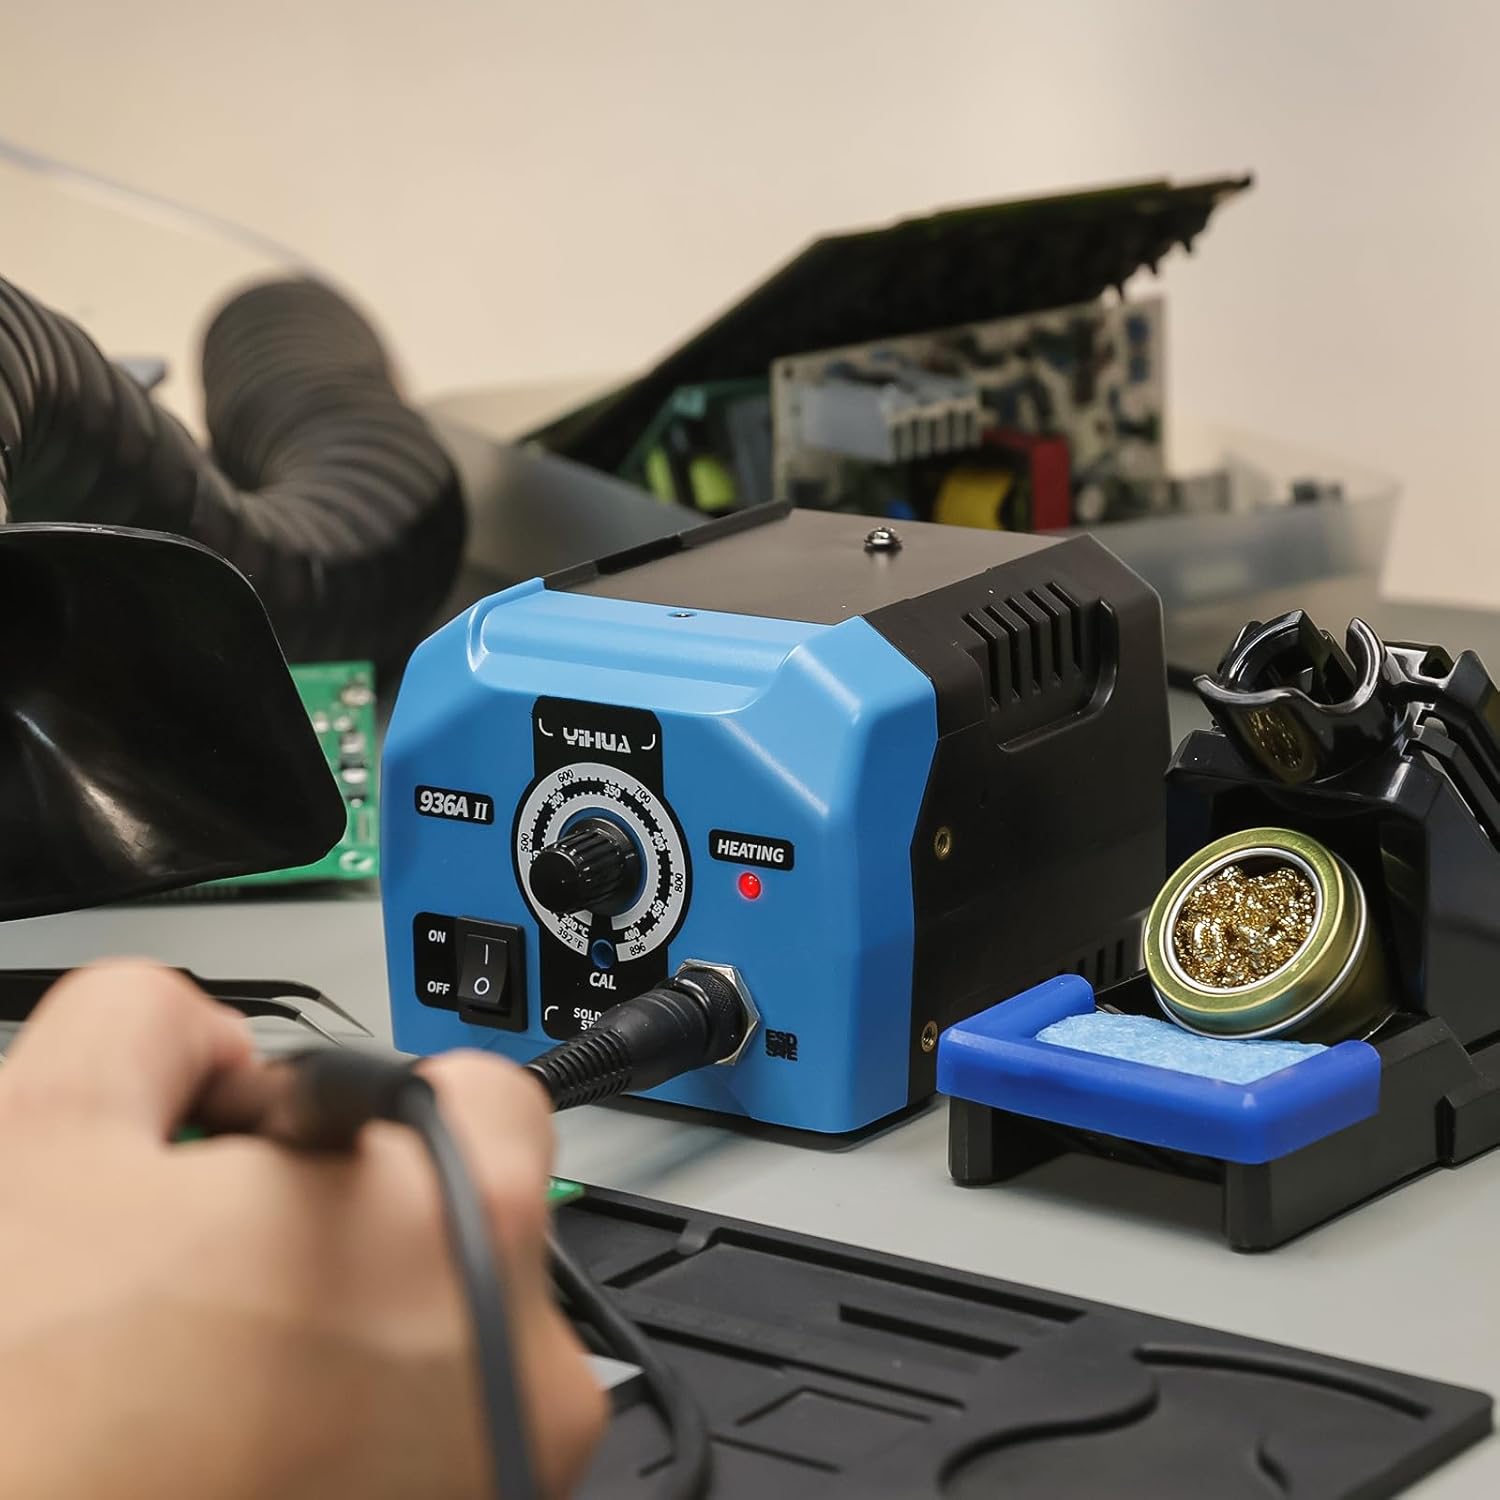
Figure 5.1: Visual guide for initial setup and operation. Steps include connecting the iron, turning on the unit, coating the tip with solder, observing the indicator light, cleaning and tinning the tip, and safely storing the iron after use.
6. Návod k obsluze
6.1 Zapnutí a nastavení teploty
- Zapnout: Flip the ON/OFF switch to the "ON" position. The "HEATING" indicator light will illuminate.
- Nastavit teplotu: Rotate the temperature adjustment dial to your desired working temperature. The range is 392°F (200°C) to 896°F (480°C).
- Počkejte na stabilizaci: The "HEATING" indicator light will blink rapidly once the set temperature is reached and stabilized. The station is now ready for use.
6.2 Proces pájení
- Cínujte špičku: Before first use and periodically during operation, melt a small amount of solder onto the tip. This "tinning" protects the tip and improves heat transfer.
- Vyčistěte hrot: Use the brass wool or damp sponge in the iron stand to clean any excess solder or oxidation from the tip.
- Aplikujte teplo: Place the hot soldering iron tip against both the component lead and the PCB pad simultaneously. Allow a moment for the joint to heat up.
- Aplikujte pájku: Touch the solder wire to the heated joint (not directly to the iron tip). The solder should flow smoothly and evenly around the joint.
- Odstraňte pájku a železo: Once a good solder joint is formed, remove the solder wire first, then remove the soldering iron. Allow the joint to cool naturally without disturbance.
- Re-tin Tip: Briefly re-tin the tip with a small amount of fresh solder before returning the iron to its stand.
6.3 Recommended Temperature Guidelines
The optimal soldering temperature depends on the type of solder, component, and application. General guidelines are provided below:
- For leaded solder (e.g., Sn60/Pb40): Typically 600-700°F (315-370°C).
- For lead-free solder (e.g., Sn-Ag-Cu): Typically 700-800°F (370-425°C).
Obecné pravidlo palce: Set the soldering iron/station temperature approximately 50°C / 90°F above the solder's melting point. For a smoother soldering experience, add an additional 100°C / 180°F to provide a heat reserve for quick thermal recovery of the tip after the solder connection is made.

Figure 6.1: Illustration of recommended temperature calculation for soldering, using lead-free solder as an example (220°C melting point + 50°C + 100°C = 370°C).
7. Údržba
Správná údržba zajistí dlouhou životnost a výkon vaší pájecí stanice.
7.1 Péče o pájecí hrot
- Čistěte pravidelně: Always clean the tip before and after each soldering session using the brass wool or damp houba.
- Cínujte špičku: Always tin the tip with a fresh coat of solder before storing the iron. This prevents oxidation.
- Vyhněte se nadměrnému tlaku: Do not apply excessive pressure to the tip, as this can damage it.
- Výměna opotřebovaných hrotů: Replace tips when they become pitted, corroded, or no longer hold solder effectively.
7.2 Čištění stanice
- Před čištěním se ujistěte, že je jednotka vypnutá a odpojená od sítě.
- Otřete vnější povrch stanice měkkým hadříkemamp tkanina. Nepoužívejte abrazivní čisticí prostředky nebo rozpouštědla.
- Periodically clean the brass wool and replace the cleaning sponge as needed.
8. Řešení problémů
This section addresses common issues you might encounter with your YIHUA 936A II Soldering Station.
| Problém | Možná příčina | Řešení |
|---|---|---|
| Páječka se nezahřívá. |
|
|
| Solder not melting or poor solder joints. |
|
|
| "HEATING" indicator light not blinking. |
|
|
If you encounter issues not covered here, please refer to the Warranty and Support section for assistance.
9. Specifikace
| Funkce | Detail |
|---|---|
| Model | YIHUA 936A II |
| Spotřeba energie | 65 wattů |
| Vstupní objemtage | 110-127 Volts AC (US Standard) |
| Teplotní rozsah | 392 ° F ~ 896 ° F (200 ° C ~ 480 ° C) |
| Teplotní stabilita | Vynikající |
| Topné těleso | Keramický |
| Rozměry (stanice) | 5.63 x 4.92 x 3.78 palce (14.3 x 12.5 x 9.6 cm) |
| Hmotnost položky | 4.38 libry (1.99 kg) |
| Materiály | Ceramic, Plastic, Bakelite |
10. Záruka a podpora
YIHUA poskytuje 12měsíční technická záruka výrobce exkluzivně v USA for the 936A II Soldering Iron Station Kit.
For technical assistance, troubleshooting, or warranty claims, please contact YIHUA customer support. You can typically find Profesionální pomoc 24/7 na Amazonu or through the official YIHUA webmísto.
Uschovejte si prosím doklad o koupi pro ověření záruky.