
1. Úvod
Thank you for choosing the BALDR Digital Wireless Weather Station. This device provides accurate indoor and outdoor temperature and humidity readings, along with a weather forecast function. It features a clear LCD display, supports up to three outdoor sensors, and includes alarm, snooze, and backlight functions. Please read this manual carefully before use to ensure proper operation and longevity of your device.

Image 1.1: BALDR Digital Wireless Weather Station main unit and outdoor sensor.
2. Co je v krabici
- 1 x BALDR Digital Wireless Weather Station (Main Unit)
- 1 x Bezdrátový venkovní senzor
- 1 x Uživatelská příručka
3. Konec produktuview
3.1 Vlastnosti hlavní jednotky
- Zobrazení vnitřní teploty a vlhkosti
- Outdoor Temperature & Humidity Display (up to 3 channels)
- Weather Forecast Icons (Sunny, Partly Cloudy, Cloudy, Rainy, Snowing)
- Temperature & Humidity Trend Indicator
- Max/Min Temperature & Humidity Records
- Time (12/24H format), Date, Weekday Display
- Funkce Alarm a Snooze
- Warm Orange Backlight
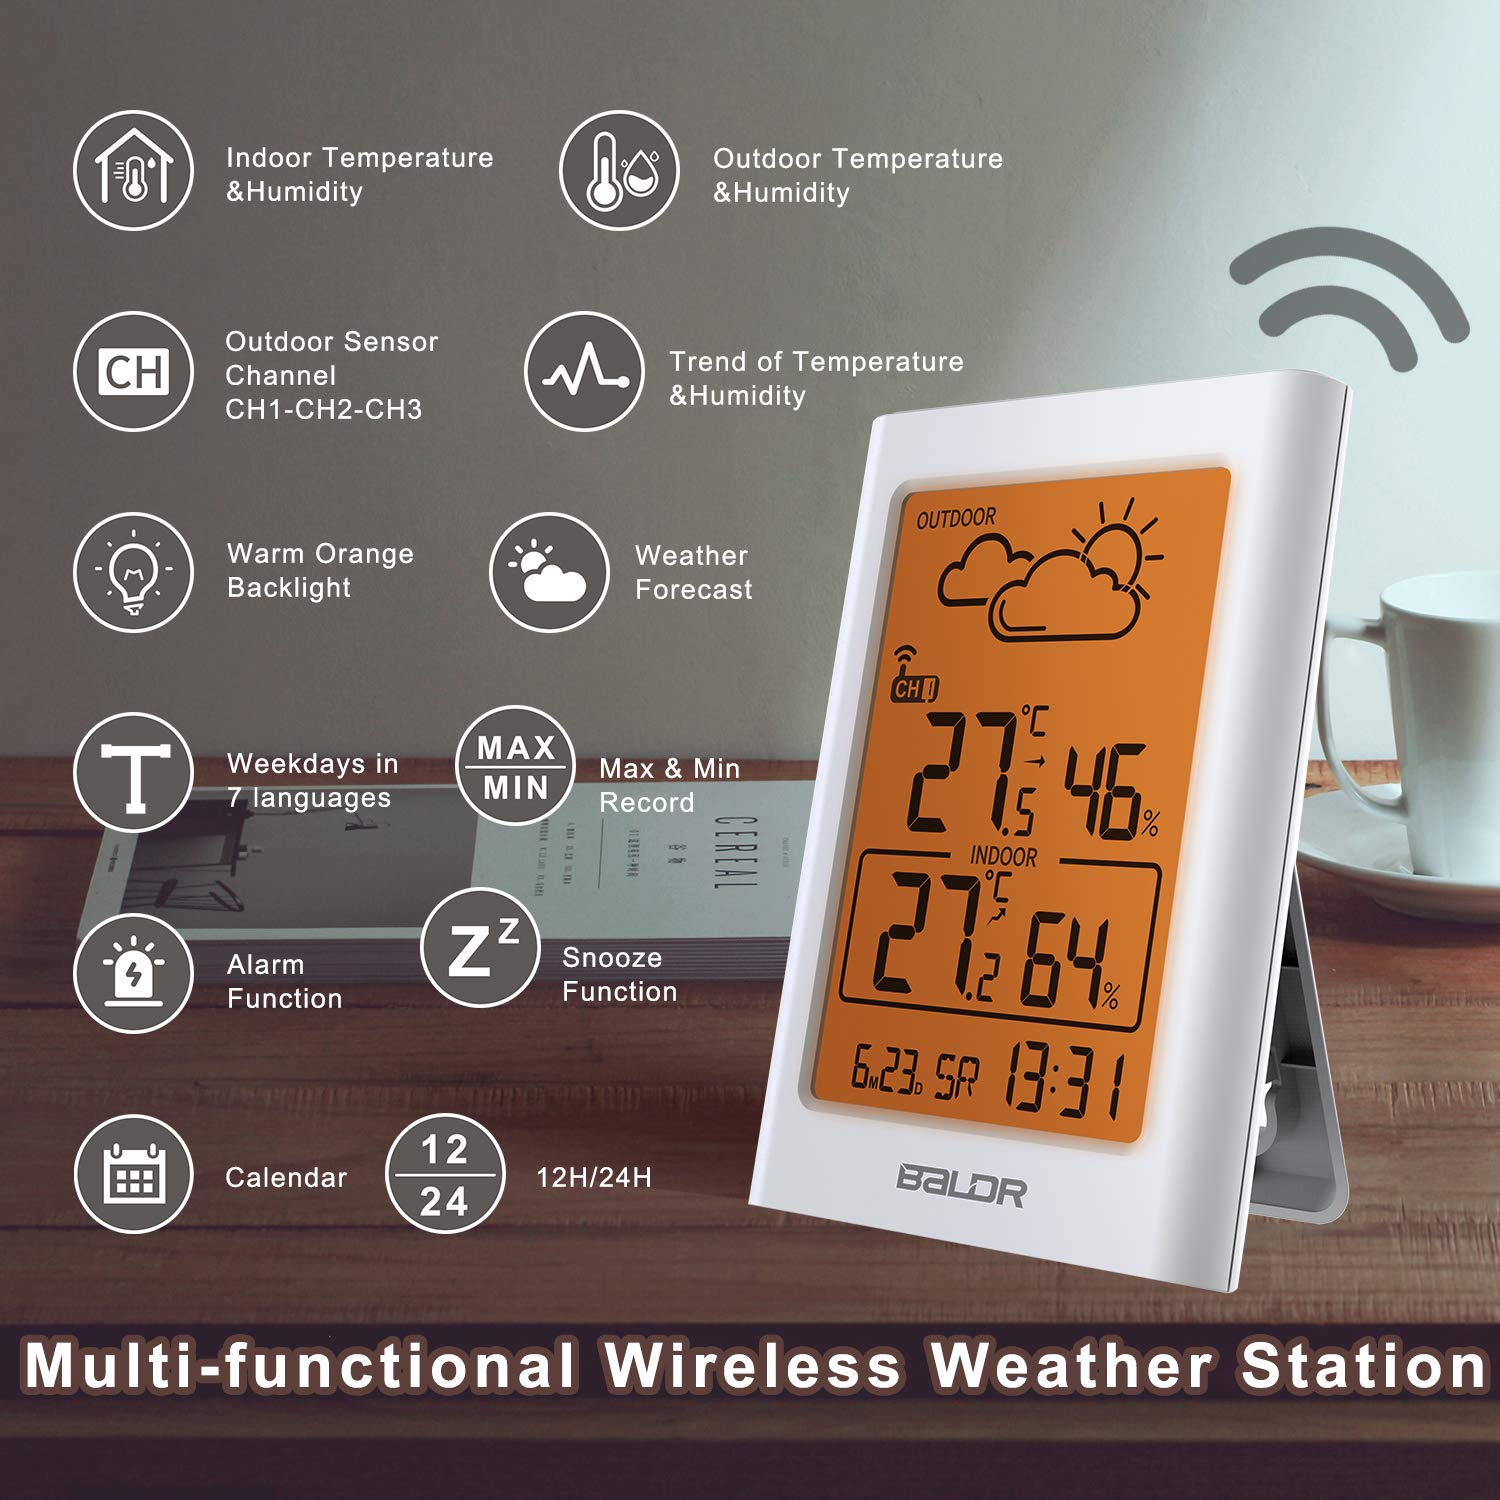
Obrázek 3.1: Konecview of the weather station's multi-functional display.
3.2 Outdoor Sensor Features
- Bezdrátový přenos až 100 metrů (328 stop)
- Třída vodotěsnosti IP54
- Supports hanging or standing placement

Obrázek 3.2: Zadní strana view of the main unit with ventilation for accurate readings.
4. Nastavení
4.1 Instalace baterie
The weather station and outdoor sensor require batteries (not included).
- Open the battery compartment on the back of the main unit. Insert 2 x AAA batteries, observing polarity (+/-).
- Open the battery compartment on the back of the outdoor sensor. Insert 2 x AA batteries, observing polarity (+/-).
- Bezpečně uzavřete oba prostory pro baterie.

Obrázek 4.1: Instalace baterií pro hlavní jednotku a venkovní senzor.
4.2 Umístění snímače
Pro optimální výkon zvažte následující:
- Place the main unit indoors, away from direct sunlight and heat sources.
- Position the outdoor sensor within 100 meters (328 feet) of the main unit, ensuring minimal obstructions.
- Mount the outdoor sensor in a shaded area, protected from direct rain and sunlight, to ensure accurate temperature and humidity readings. The IP54 rating provides protection against splashes, but direct exposure to heavy rain or submersion should be avoided.
- The sensor can be hung on a wall or placed on a flat surface.

Image 4.2: Recommended placement options for the main unit and outdoor sensor.

Image 4.3: Correct outdoor sensor placement under shelter for weather protection.
4.3 Počáteční synchronizace
After battery installation, the main unit will automatically search for the outdoor sensor signal. This process may take a few minutes. Ensure both units are within range of each other.
- If the outdoor temperature/humidity does not appear, press the "CH" button on the main unit to cycle through channels or press the "TX" button inside the outdoor sensor's battery compartment to manually send a signal.
- The weather station can support up to 3 outdoor sensors. Additional sensors are sold separately.

Image 4.4: Multi-sensor support and wireless range illustration.
5. Návod k obsluze
5.1 Zobrazení informací
LCD displej zobrazuje následující informace:
- Venkovní sekce: Outdoor temperature, outdoor humidity, current channel (CH1, CH2, or CH3), wireless signal strength, weather forecast icon.
- Vnitřní sekce: Indoor temperature, indoor humidity.
- Spodní část: Time, date, weekday.

Image 5.1: Weather forecast icons on the display.
5.2 Nastavení času a data
Refer to the buttons on the back of the main unit:
- Stiskněte a podržte tlačítko „SET“ pro vstup do režimu nastavení času.
- Pro úpravu hodnot použijte tlačítka „NAHORU“ a „DOLŮ“.
- Press "SET" again to confirm and move to the next setting (e.g., 12/24H format, hour, minute, year, month, day).
- Press "SET" repeatedly until all settings are confirmed or wait for 10 seconds for automatic exit.
5.3 Funkce budíku a opakovaného buzení
- Nastavení budíku: Stiskněte tlačítko „ALARM“ pro view the alarm time. Press and hold "ALARM" to enter alarm setting mode. Use "UP" and "DOWN" to adjust, and "ALARM" to confirm.
- Aktivace/deaktivace alarmu: Press "ALARM" once to toggle the alarm on/off. An alarm icon will appear/disappear on the display.
- Odložit: When the alarm sounds, press the "SNOOZE/LIGHT" button to activate snooze. The alarm will sound again after a few minutes.
5.4 Provoz podsvícení
Press the "SNOOZE/LIGHT" button to activate the warm orange backlight for 20 seconds, improving visibility in low-light conditions.

Image 5.2: Display with the warm orange backlight.
5.5 Záznamy max./min.
The weather station records the maximum and minimum indoor/outdoor temperature and humidity values over a 24-hour period.
- Press the "MEM" button once to view maximum records.
- Press "MEM" again to view minimum records.
- Press "MEM" a third time to return to current readings.
- To clear records, press and hold the "MEM" button while viewzáznamů.
5.6 Multi-Sensor Display
If you have multiple outdoor sensors, press the "CH" button on the main unit to cycle through the channels (CH1, CH2, CH3) and view the readings from each sensor.

Image 5.3: Monitoring multiple locations with additional sensors.

Image 5.4: Cycling through sensor channels on the main unit.
5.7 Předpověď počasí
The weather station uses Weather Forecast 2.0 technology to predict weather trends for the next 12-24 hours. The icons displayed are:
- Slunný
- Částečně oblačno
- Zataženo
- Deštivý
- Sněží
The forecast is based on atmospheric pressure changes and is an estimation, not a guarantee of future weather conditions.

Image 5.5: Weather forecast icon indicating cloudy conditions.
5.8 Temperature and Humidity Trend
The display shows arrows indicating the trend of temperature and humidity (rising, steady, or falling) over the last 10 seconds, providing a quick overview of environmental changes.

Image 5.6: Visual representation of temperature and humidity trends.
6. Údržba
- Výměna baterie: Replace batteries in both the main unit and outdoor sensor when the low battery indicator appears on the display. Always replace with new batteries of the specified type (AAA for main unit, AA for sensor).
- Čištění: Otřete jednotky měkkým hadříkemamp tkanina. Nepoužívejte abrazivní čisticí prostředky nebo rozpouštědla.
- Péče o senzor: Ensure the outdoor sensor's ventilation openings are clear of debris. Periodically check its placement to ensure it remains protected from extreme weather conditions.
7. Řešení problémů
| Problém | Řešení |
|---|---|
| Žádné údaje o venkovní teplotě/vlhkosti. |
|
| Nepřesné údaje. |
|
| Displej je tmavý nebo prázdný. |
|
8. Specifikace
| Funkce | Detail |
|---|---|
| Model | BA-102TY |
| Značka | Baldr |
| Zdroj napájení (hlavní jednotka) | Battery powered (2 x AAA, not included) |
| Zdroj napájení (venkovní senzor) | Napájení z baterií (2 x AA, nejsou součástí balení) |
| Technologie připojení | 433 MHz or 868 MHz Wireless |
| Bezdrátové Dosah | Až 100 metrů (328 stop) ve volném prostoru |
| Přesnost teploty | ±1 °C |
| Typ zobrazení | LCD |
| Materiál | Plast |
| Outdoor Sensor Waterproof Rating | IP54 |
| Frekvence aktualizace dat | Každé 10 sekundy |

Image 8.1: Approximate dimensions of the main unit and outdoor sensor.
9. Záruka a podpora
For warranty information or technical support, please refer to the contact details provided with your purchase or visit the official BALDR webwebu. Uschovejte si účtenku jako doklad o koupi.