1. Úvod
Thank you for choosing the AOG L-Series 30-Inch 3-Burner Built-in Propane Gas Grill with Rotisserie. This manual provides essential information for the safe and efficient installation, operation, maintenance, and troubleshooting of your new grill. Please read all instructions carefully before using the appliance and retain this manual for future reference.
This grill is designed for outdoor use only and must be installed by a qualified professional in accordance with all local codes and regulations.
2. Důležité bezpečnostní informace
WARNING: For Outdoor Use Only. Improper installation, adjustment, alteration, service, or maintenance can cause injury or property damage. Read the installation, operating, and maintenance instructions thoroughly before installing or servicing this equipment.
2.1 Bezpečnost plynu
- Always check for gas leaks after connecting the propane supply. Use a soap and water solution; never use an open flame.
- Neskladujte ani nepoužívejte benzín nebo jiné hořlavé výpary a kapaliny v blízkosti tohoto ani jiného spotřebiče.
- Propanová láhev, která není připojena k použití, nesmí být skladována v blízkosti tohoto nebo jakéhokoli jiného zařízení.
- Ensure adequate ventilation around the grill. Do not obstruct the flow of combustion and ventilation air.
2.2 Obecná bezpečnostní opatření
- Během provozu udržujte děti a domácí zvířata mimo gril.
- Nikdy nenechávejte gril během používání bez dozoru.
- Při manipulaci s horkými součástmi vždy používejte ochranné rukavice.
- Ensure the grill is installed on a stable, non-combustible surface.
- Dodržujte dostatečné odstupy od hořlavých materiálů, jak je uvedeno v montážních pokynech.
3. Nastavení a instalace
This section provides general guidance. Refer to the separate detailed installation guide for specific instructions regarding built-in enclosure requirements, gas line connections, and electrical wiring.
3.1 Vybalení a kontrola
- Opatrně odstraňte veškerý obalový materiál.
- Inspect the grill for any shipping damage. Report any damage to your dealer immediately.
- Ujistěte se, že jsou přítomny všechny součásti uvedené v dodacím listu.
3.2 Built-in Enclosure Requirements
The AOG 30PBL grill is designed for built-in installation. The enclosure must be constructed from non-combustible materials and provide adequate ventilation. Consult the detailed installation guide for precise cutout dimensions and clearance requirements.
3.3 Gas Connection (Propane)
This grill operates on liquid propane (LP) gas. The gas connection must be performed by a qualified gas technician. Ensure the gas supply line is properly sized and all connections are leak-tested before initial use.
3.4 Elektrické připojení
The grill features interior halogen lighting and backlit knobs, requiring a 120-volt electrical connection. This connection should be made by a qualified electrician in accordance with local electrical codes.

Obrázek 1: Přesview of the AOG L-Series 30-Inch Built-in Propane Gas Grill.
4. Návod k obsluze
4.1 Počáteční vyhoření
Before cooking food for the first time, operate the grill on high heat for 15-20 minutes with the hood closed. This will burn off any manufacturing residues and prepare the cooking surfaces.
4.2 Zapálení hlavních hořáků
- Ensure the propane supply valve is open.
- Push in and turn a main burner control knob counter-clockwise to the HIGH position.
- Press the electronic push-button ignition. You should hear a clicking sound and see the burner ignite.
- Pokud se hořák nezapálí do 5 sekund, otočte knoflík do polohy OFF, počkejte 5 minut a postup opakujte.
- Jakmile se plamen zapálí, upravte ho na požadovanou teplotu vaření.

Obrázek 2: Detail view of the U-shaped main burner, designed for even heat distribution.
4.3 Using the Rotisserie Burner
The grill is equipped with a 10,000 BTU infrared back burner for rotisserie cooking.
- Securely attach the food to the rotisserie spit rod.
- Insert the spit rod into the rotisserie motor and support brackets.
- Turn on the rotisserie burner control knob.
- Activate the rotisserie motor (if applicable, usually a separate switch).
- Monitor cooking progress. The main burners can be used simultaneously for additional heat if desired.
4.4 Interior Halogen Lighting and Backlit Knobs
For night grilling, the grill features interior halogen lighting and backlit control knobs. These are activated by a push button located on the right side of the grill control panel, requiring a 120-volt electrical connection.
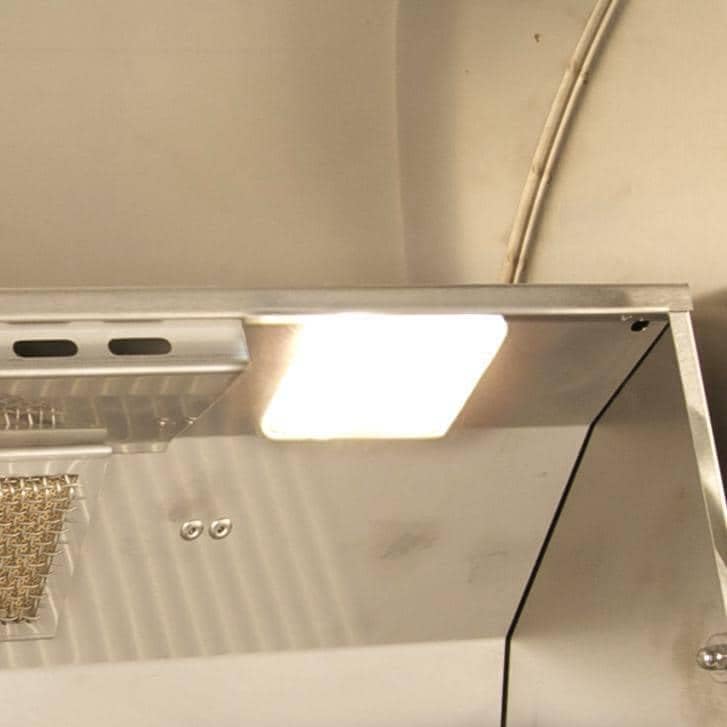
Figure 3: Interior halogen lighting illuminates the cooking surface for evening use.

Figure 4: Backlit control knobs provide visibility and precise temperature control in low light conditions.
5. Údržba a péče
Regular cleaning and maintenance will ensure the longevity and optimal performance of your AOG grill.
5.1 Cleaning Cooking Grids
After each use, once the grill has cooled, clean the stainless steel cooking grids with a grill brush. For stubborn residue, use warm soapy water and a non-abrasive scrubber.

Figure 5: Durable stainless steel cooking grids for consistent grilling results.
5.2 Cleaning Vaporizer Panels
The stainless steel vaporizer panels (also known as flame tamers) help distribute heat evenly and minimize flare-ups. Periodically remove and clean them to prevent grease buildup. Use a plastic scraper or brush to remove debris.

Figure 6: Stainless steel vaporizer panels ensure even heat distribution and reduce flare-ups.
5.3 Čištění exteriéru
Clean the stainless steel exterior with a mild detergent and warm water. Wipe in the direction of the grain to avoid scratching. Avoid abrasive cleaners or steel wool, which can damage the finish.
5.4 Systém řízení tuku
The funneled grease management system with a slide-out drip tray simplifies cleanup. Regularly empty and clean the drip tray to prevent grease fires and maintain hygiene.
5.5 Příprava na zimu a skladování
If the grill will not be used for an extended period, especially in cold climates, disconnect the gas supply, clean the grill thoroughly, and cover it with a protective grill cover. Store the propane tank in a well-ventilated outdoor area, away from direct sunlight and heat sources.
6. Řešení problémů
This section addresses common issues you might encounter with your grill. For problems not listed here, contact a qualified service technician.
| Problém | Možná příčina | Řešení |
|---|---|---|
| Hořák se nezapálí | No gas supply; clogged burner port; faulty igniter; loose electrical connection. | Check propane tank and valve; clean burner ports; check igniter electrode and wire; ensure electrical connections are secure. |
| Nerovnoměrné teplo | Clogged burner ports; dirty vaporizer panels; low gas pressure. | Clean burner ports; clean vaporizer panels; check propane tank level and regulator. |
| Rožňák se neotáčí | Motor unplugged or faulty; food too heavy; spit rod not properly engaged. | Check motor power connection; ensure food weight is within limits; verify spit rod engagement. |
| Světla nefungují | No electrical power; faulty bulb; loose wiring. | Check 120V power connection; replace bulb; inspect wiring for damage. |
7. Specifikace
| Funkce | Specifikace |
|---|---|
| Číslo modelu | 30PBL |
| Značka | AOG |
| Typ paliva | Propanový plyn |
| Typ instalace | Vestavěný |
| Počet hlavních hořáků | 3 |
| Rotisserie Burner BTU | 10,000 XNUMX BTU |
| Plocha varné plochy | 540 čtverečních palců |
| Materiál | Commercial Grade 304 Stainless Steel, Brass |
| Speciální funkce | Interior Halogen Lighting, Backlit Knobs, Rotisserie Kit |
| Rozměry položky (D x Š x V) | 26.25 x 34 x 20.07 palce |
| Hmotnost položky | 140 libry |
| Výrobce | AOG |
| UPC | 619655061320 |
8. Záruka a podpora
AOG products are manufactured to high standards and come with a manufacturer's warranty. For specific warranty details, including coverage periods and terms, please refer to the warranty card included with your product or visit the official AOG webmísto.
For technical support, replacement parts, or service inquiries, please contact your authorized AOG dealer or the manufacturer's customer service department. Ensure you have your model number (30PBL) and proof of purchase available when contacting support.