
1. Úvod
This manual provides detailed instructions for the safe installation, operation, and maintenance of your CLY 25W LED Floodlight with Motion Sensor. Please read this manual thoroughly before installation and retain it for future reference.

Image 1.1: The CLY 25W LED Floodlight with Motion Sensor installed outdoors, providing bright illumination for a residential area.
2. Bezpečnostní pokyny
Abyste zajistili bezpečný provoz, dodržujte prosím následující opatření:
- Instalaci musí provést kvalifikovaný elektrikář v souladu s místními předpisy pro elektroinstalaci.
- Před instalací, údržbou nebo čištěním se ujistěte, že je odpojeno napájení.
- Nedívejte se přímo do LED světelného zdroje, když je rozsvícený, mohlo by dojít k poškození očí.
- Udržujte výrobek mimo dosah hořlavých materiálů.
- Produkt žádným způsobem neupravujte. Neoprávněné úpravy mohou vést ke ztrátě záruky a představovat bezpečnostní riziko.
- Ujistěte se, že montážní povrch je dostatečně pevný, aby unesl hmotnost světlometu.
3. Obsah balení
Před zahájením instalace ověřte, zda jsou všechny komponenty přítomny:
- CLY 25W LED Floodlight with Motion Sensor
- Montážní šrouby a hmoždinky
- Návod k použití

Image 3.1: The CLY 25W LED Floodlight, showing the integrated motion sensor, power cable, and included mounting screws and wall plugs.
4. Konec produktuview
The CLY 25W LED Floodlight is designed for outdoor illumination with an integrated motion sensor for enhanced security and energy efficiency. Key features include:
- Vysoký jas a energetická účinnost: 25W power consumption, delivering 2100 lumens of 6500K cold white light, equivalent to a 250W incandescent lamp.
- Pokročilý senzor pohybu: PIR sensor with a detection distance of up to 12 meters and an adjustable detection angle.
- Odolné a odolné vůči povětrnostním vlivům: IP66 rated for protection against dust and powerful water jets, suitable for various weather conditions.
- Efektivní odvod tepla: Constructed with plastic-clad aluminum and a fin-shaped design to ensure optimal heat management and extend lifespan.
- Dlouhá životnost: Designed for a lifespan of up to 50,000 hours.

Image 4.1: Key lighting specifications and components, including LED array, lumen output, color temperature, and aluminum reflector.

Image 4.2: Details on efficient heat dissipation, the 1-meter power cable, and the durable nano material lens.

Image 4.3: The floodlight's IP66 waterproof rating, ensuring reliable operation in rainy conditions.
5. Nastavení a instalace
Pro správnou instalaci postupujte podle následujících kroků:
- Vyberte umístění: Select a suitable mounting location. The ideal mounting height is between 3 to 5 meters for optimal motion detection and lighting coverage. Ensure the detection area is clear of obstructions.
- Označte vrtné body: Use the adjustable metal bracket as a template to mark the drilling points on the wall or ceiling.
- Vrtací otvory: Vyvrtejte otvory v označených bodech a vložte do nich hmoždinky.
- Montážní držák: Secure the bracket to the surface using the provided screws.
- Nastavení úhlu světlometu: Attach the floodlight to the bracket. The bracket allows for 180-degree adjustment, and the motion sensor can be rotated 360 degrees horizontally and 180 degrees vertically to cover the desired area.
- Zapojení: Connect the floodlight's power cable to your main power supply. The cable includes a live wire (brown/red) and a neutral wire (blue). Ensure connections are secure and insulated.
- Test: Restore power and test the floodlight's functionality.

Image 5.1: Visual guide for adjusting the floodlight and motion sensor, along with the three primary installation steps.

Image 5.2: Optimal detection range and lighting coverage for the floodlight, including recommended mounting height.
6. Návod k obsluze
The motion sensor has two adjustable settings: Lighting Time and Sensitivity.
6.1. Lighting Time Setting (L)
This dial controls how long the light remains on after motion is detected and stops. Available settings are 10 seconds, 45 seconds, 120 seconds, and 600 seconds.
- Rotate the 'L' dial to select the desired duration.
6.2. Sensitivity Setting (M)
This dial determines when the motion sensor activates based on ambient light levels.
- Rotate the 'M' dial towards the symbol měsíce (
 ) for night-only detection. The light will only activate when it's dark.
 - Rotate the 'M' dial towards the symbol slunce () for day and night detection. The light will activate regardless of ambient light levels.

Image 6.1: Motion sensor adjustment dials for lighting time and sensitivity settings.
7. Údržba
Pravidelná údržba zajišťuje optimální výkon a dlouhou životnost vašeho světlometu:
- Čištění: Periodically clean the surface of the floodlight and the motion sensor lens with a soft, damp tkanina. Nepoužívejte abrazivní čisticí prostředky nebo rozpouštědla.
- Inspekce: Regularly check the power cable and connections for any signs of damage or wear.
- Vypnout: Před jakýmkoli čištěním nebo kontrolou vždy odpojte napájení.
8. Řešení problémů
If you encounter issues with your CLY LED Floodlight, refer to the following common problems and solutions:
| Problém | Možná příčina | Řešení |
|---|---|---|
| Světlo se nerozsvítí. | No power supply; faulty wiring; sensor setting incorrect. | Check power connection and circuit breaker. Verify wiring. Adjust 'M' dial to 'sun' for testing. |
| Světlo svítí nepřetržitě. | Continuous motion detected; sensor faulty; wiring error. | Ensure no constant motion in detection area. Check wiring. If problem persists, contact support. |
| Světlo bliká nebo mihotá. | Unstable power supply; loose connection; product defect. | Check power supply stability. Secure all wiring connections. If problem persists, contact support. |
| Pohybový senzor nedetekuje. | Sensor obstructed; sensitivity too low; incorrect 'M' setting. | Clear obstructions from sensor. Increase sensitivity. Ensure 'M' dial is set appropriately for ambient light. |
9. Specifikace
| Funkce | Specifikace |
|---|---|
| Značka | CLY |
| Číslo modelu | FLB025 |
| Spotřeba energie | 25 wattů |
| Světelný tok | 2100 XNUMX lumenů |
| Teplota barev | 6500 Kelvinů (studená bílá) |
| Žárovkový ekvivalent | 250 wattů |
| Životnost | 50,000 hodiny |
| Hodnocení voděodolnosti | IP66 |
| Materiál | Hliník, Plast |
| svtage | 25 voltů |
| Úhel paprsku | 120 stupňů |
| Rozsah detekce pohybu | 0-12 metry |
| Úhel detekce pohybu | 120-180 stupňů |
| Rozměry produktu (D x Š x V) | 16 x 1.8 x 13.8 cm |
| Hmotnost produktu | 340 gramů |
| Délka kabelu | 1 metru |
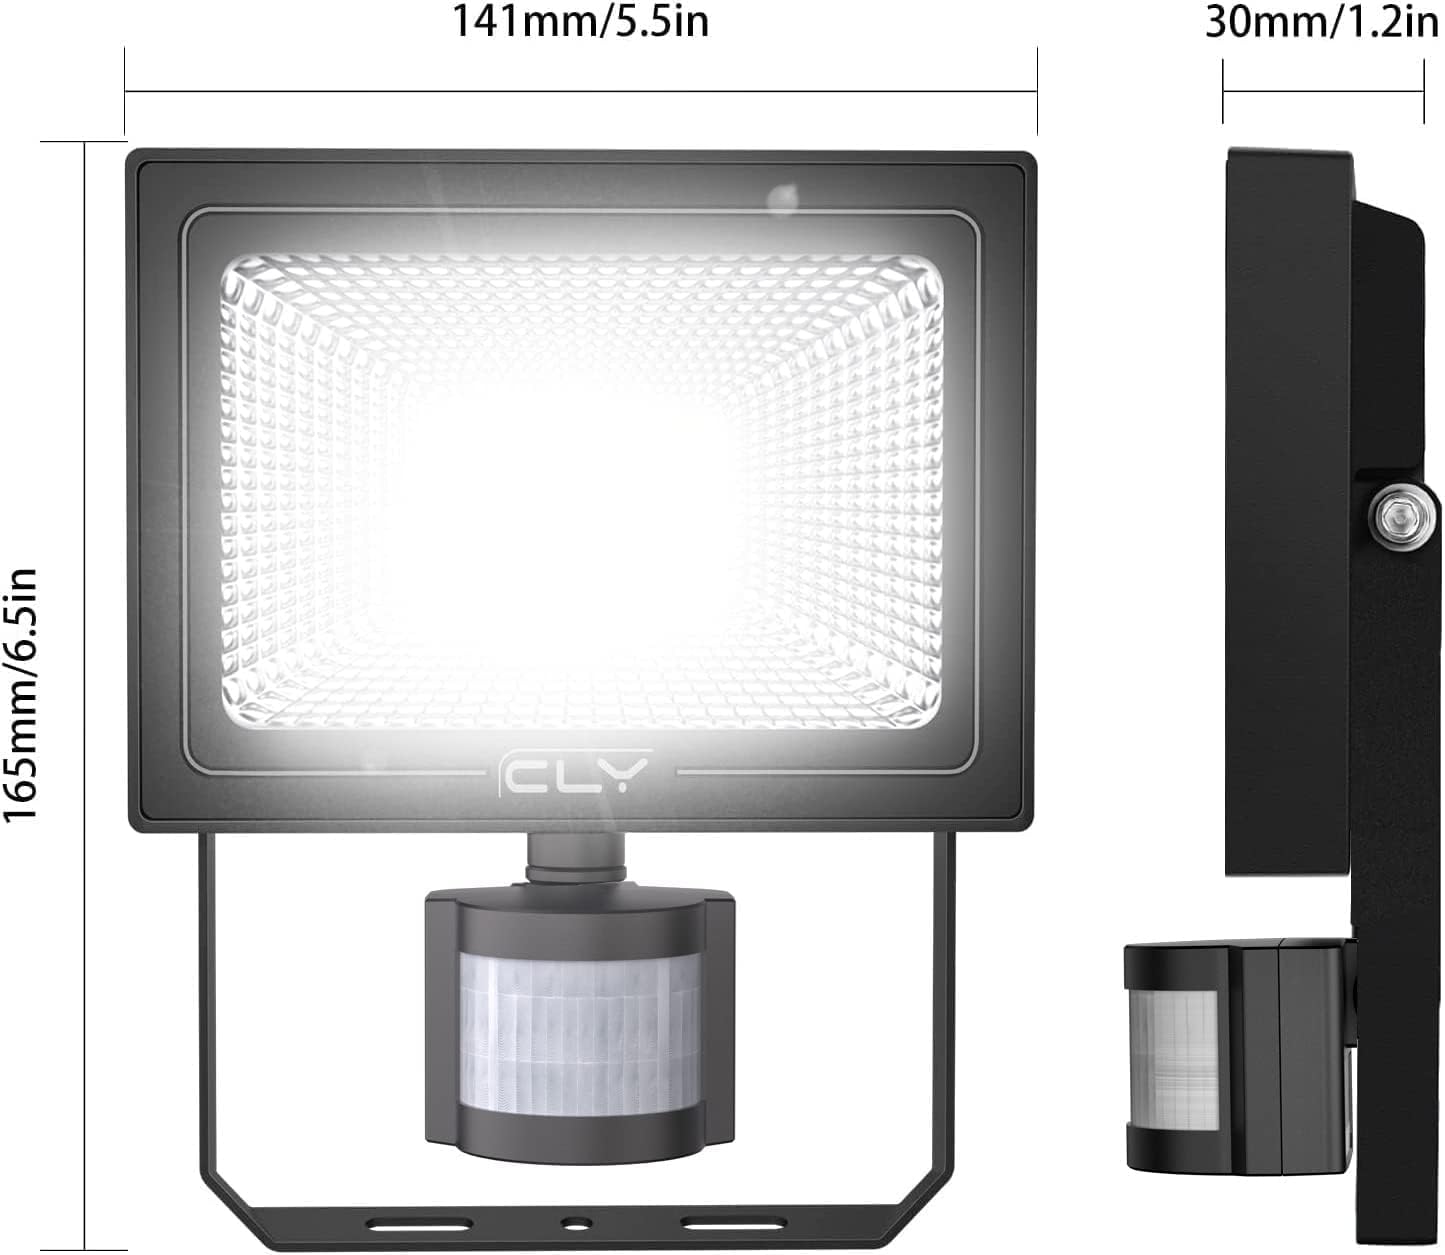
Image 9.1: Detailed dimensions of the CLY 25W LED Floodlight.

Image 9.2: EU Energy Label for model FLB025. For more details, visit eprel.ec.europa.eu/qr/979497.
10. Záruka a podpora
CLY provides a Roční výměnná služba pro tento produkt od data nákupu.
If you have any questions, require technical assistance, or need to claim warranty service, please contact us through Amazon or via the service email provided in the original packaging. We aim to respond to all inquiries within 24 hours.