1. Úvod
Děkuji za nákupasing the Myra TouYinGer X20 LED Projector. This manual provides essential information for setting up, operating, and maintaining your projector. Please read it thoroughly before use to ensure proper operation and to extend the lifespan of your device.
2. Bezpečnostní informace
- Use the projector in a dark and cool environment for optimal performance and extended product life.
- Avoid using the projector in dusty or humid conditions.
- Neblokujte ventilační otvory projektoru.
- Nedívejte se přímo do objektivu projektoru, když je zapnutýamp je zapnuto.
- This projector is not recommended for office presentations or educational use.
- Ensure the power supply matches the projector's requirements (AC110V~240V 50Hz/60Hz).
3. Obsah balení
Pečlivě vybalte krabici a ujistěte se, že jsou všechny níže uvedené položky přítomny a v dobrém stavu. Pokud některé položky chybí nebo jsou poškozeny, kontaktujte zákaznickou podporu.
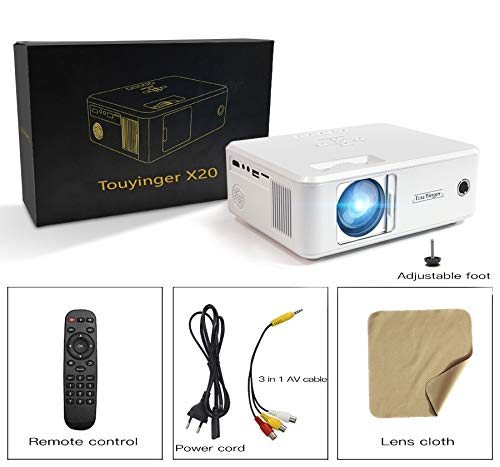
Image: The Myra TouYinGer X20 Projector shown with its packaging box and included accessories: remote control, power cord, 3-in-1 AV cable, and a lens cleaning cloth.
- Myra TouYinGer X20 LED Projector
- Dálkové ovládání
- Napájecí kabel
- AV kabel 3 v 1
- Objektiv čistící hadřík
- Uživatelská příručka (tento dokument)
4. Konec produktuview
4.1 Rozměry a součásti
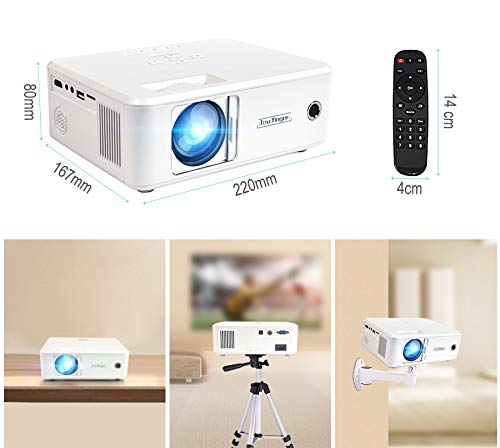
Obrázek: Nahoře view of the Myra TouYinGer X20 Projector showing its dimensions (220mm length, 167mm width, 80mm height). Also shown are the remote control dimensions (14cm length, 4cm width) and examples of projector placement: tabletop, tripod mount, and wall mount.
The projector features a compact design with various ports for connectivity. Key components include the lens, focus ring, keystone correction, input ports (HDMI, USB, VGA, AV, SD card slot), and power input.
4.2 Rozhraní
- HDMI: For connecting to devices like laptops, gaming consoles, and Blu-ray players.
- USB: Pro připojení USB flash disků pro přehrávání médií files. (Note: Supports Pendrive only, not hard disks or phones).
- VGA: Pro připojení k počítačům.
- AV: For connecting to older devices using the included 3-in-1 AV cable.
- Slot pro SD kartu: Pro přehrávání médií filepřímo z SD karty.
- 3.5mm audio port: Pro připojení externích reproduktorů nebo sluchátek.
5. Nastavení
5.1 Umístění
Position the projector on a stable, flat surface or mount it using a compatible tripod or ceiling mount. Ensure there is adequate ventilation around the projector. The projection distance ranges from 1.2 to 3.8 meters, yielding a screen size of 37 to 130 inches. For best results, use in a dark environment.
5.2 Připojení napájení
- Připojte napájecí kabel k napájecímu vstupu projektoru.
- Plug the other end of the power cord into a suitable electrical outlet (AC110V~240V, 50Hz/60Hz).
- Kontrolka napájení na projektoru se rozsvítí.
5.3 Připojení vstupních zdrojů
Connect your desired media source (e.g., laptop, USB drive, DVD player) to the corresponding port on the projector.
- HDMI: Connect an HDMI cable from your device to the projector's HDMI port.
- USB/SD: Insert a USB flash drive or SD card into the respective slot.
- VGA: Připojte kabel VGA z počítače k portu VGA projektoru.
- AV: Use the provided 3-in-1 AV cable to connect to devices with RCA outputs.
5.4 Zaostření a korekce lichoběžníkového zkreslení
- Soustředit: Otáčejte zaostřovacím kroužkem na objektivu projektoru, dokud nebude promítaný obraz jasný a ostrý.
- Korekce lichoběžníkového zkreslení: Use the keystone adjustment dial (±12 vertical) to correct trapezoidal distortion if the projector is not perfectly perpendicular to the screen.
6. Návod k obsluze
6.1 Zapnutí/vypnutí
- Zapnutí: Press the power button on the projector or the remote control. The LED lamp se zapne.
- Vypnout: Press the power button again. Allow the projector to cool down before unplugging it.
6.2 Výběr zdroje
Use the 'Source' button on the remote control or projector to cycle through available input sources (HDMI, USB, VGA, AV, SD).
6.3 Přehrávání médií (USB/SD)
When a USB drive or SD card is inserted, navigate the on-screen menu using the remote control to select the desired media type (Video, Music, Photo, Text) and then browse for your files.
- Podporované zvukové formáty: MP3, WMA, AAC
- Podporované video formáty: MPEG1, MPEG2, MPEG4, H264, RM, RMVB, MOV, MJPEG, VC1, DIVX, FLV (Note: AC3 audio is not supported).
- Podporované formáty obrázků: JPEG, BMP, PNG
6.4 3D funkce
The projector supports Red & Blue 3D format. To view 3D content, you will need compatible Red & Blue 3D glasses (not included).
7. Údržba
7.1 Čištění čoček
Use the provided lens cleaning cloth or a soft, lint-free cloth to gently wipe the projector lens. Avoid using abrasive cleaners or excessive force.
7.2 Ochrana proti prachu
The projector features an embedded lens cover for better lens and dust protection. Always replace the lens cover when the projector is not in use. Regularly clean the projector's exterior with a soft, dry cloth.
7.3 lamp Život
LED lamp has an estimated lifespan of 20,000 hours. Proper ventilation and operating conditions will help maximize lamp život.
8. Řešení problémů
Pokud se s projektorem setkáte s problémy, podívejte se na následující běžné problémy a jejich řešení:
| Problém | Možná příčina | Řešení |
|---|---|---|
| Na obrazovce není žádný obraz | Vybrán nesprávný vstupní zdroj; Uvolněné připojení kabelu; Problém s napájením | Vyberte správný vstupní zdroj; Zkontrolujte všechna kabelová připojení; Ujistěte se, že je projektor zapnutý. |
| Obraz je rozmazaný | Focus not adjusted; Projector too far/close to screen | Nastavení zaostřovacího kroužku; Nastavení projekční vzdálenosti. |
| Obrázek je lichoběžníkový | Projektor není kolmý k promítací ploše | Upravte kolečko pro korekci lichoběžníkového zkreslení. |
| Žádný zvuk | Volume too low; Audio format not supported; External speakers not connected | Increase volume; Check if audio format is supported (AC3 not supported); Connect external speakers if needed. |
| USB disk nebyl rozpoznán | Unsupported device; Corrupted files | Ensure it's a USB Pendrive (hard disks/phones not supported); Check file system and integrity. |
9. Specifikace
| Funkce | Specifikace |
|---|---|
| Model | X20 |
| Technologie displeje | TFT-single LCD panel + LED technologie |
| Nativní rozlišení | 800 x 600 dpi (Supports 720p, 1080p) |
| Jas | 2200 XNUMX lumenů |
| Kontrastní poměr | 1500:1 |
| Lamp Typ | LED diodaamp |
| Lamp Život | 20,000 hodin |
| Zobrazitelné barvy | 16.7 tis |
| Čočka | F=126 mm (Manual focusing) |
| Korekce lichoběžníkového zkreslení | ±12° Vertical (Manual) |
| Velikost projekčního plátna | 37-130 palců |
| Projekční vzdálenost | 1.2-3.8 metry |
| Poměr stran | 16:9 Nativní, kompatibilní 4:3 |
| Multimediální rozhraní | 1*VGA, 1*USB, 1*SD, 1*HDMI, 1*3.5mm Audio port, 1*AV, 1*TV |
| Napájení | AC 110V~240V 50Hz/60Hz |
| Rozměry | 212 mm x 150 mm x 78 mm |
| Hmotnost | 1.5 kg |
| Speciální funkce | Portable, Red & Blue 3D Support |
10. Záruka a podpora
The Myra TouYinGer X20 LED Projector comes with a 1 rok záruka od data nákupu.
For warranty claims, technical support, or any inquiries, please contact Myra customer service:
- Telefon: 8955589977
- E-mail: myrakhmshop@gmail.com
Před kontaktováním podpory si prosím připravte model produktu (X20) a podrobnosti o nákupu.