1. Úvod
Thank you for choosing the UT33C LCD Digital Multimeter. This manual provides detailed instructions for the safe and effective operation, maintenance, and troubleshooting of your device. Please read this manual thoroughly before use and keep it for future reference.
2. Bezpečnostní informace
Pro zajištění bezpečného provozu dodržujte prosím následující bezpečnostní opatření:
- Vždy dodržujte místní a národní bezpečnostní předpisy.
- Nepřekračujte maximální vstupní hodnoty uvedené pro každý rozsah.
- Při práci s obj. dbejte zvýšené opatrnostitagnad 30 V AC RMS, 42 V peak nebo 60 V DC. Tyto objemytages představují nebezpečí úrazu elektrickým proudem.
- Před změnou funkcí odpojte testovací vodiče od testovaného obvodu.
- Nepoužívejte měřič, pokud je poškozený nebo pokud jsou poškozené měřicí vodiče.
- Před použitím se ujistěte, že je kryt baterie bezpečně uzavřen.
- Replace the battery immediately when the low battery indicator appears.
- Nepoužívejte měřič v prostředí s výbušnými plyny, parami nebo prachem.
3. Konec produktuview
3.1 Komponenty
- LCD displej: Zobrazuje naměřené hodnoty, jednotky a funkční indikátory.
- Funkce otočného přepínače: Používá se k výběru požadované měřicí funkce.
- Tlačítko HOLD: Zmrazí aktuální údaj na displeji.
- Tlačítko podsvícení: Activates the display backlight for better visibility in low light.
- Vstupní konektory: Terminals for connecting test leads (VΩmA, COM, 10A).
3.2 Produkt Views

Obrázek 3.1: Přední strana view of the UT33C Digital Multimeter. This image displays the main components including the LCD screen, the central rotary switch for function selection, and the three input jacks at the bottom. The device is red with black accents.

Obrázek 3.2: Úhlové view of the UT33C Digital Multimeter. This perspective highlights the ergonomic shape of the device and shows the integrated kickstand on the back, allowing it to stand upright for easier viewing během používání.

Obrázek 3.3: Přední strana view of the UT33C Digital Multimeter with the LCD display illuminated. The screen shows a reading of '-1', indicating it is powered on and ready for measurement. The backlight function enhances visibility in dim conditions.
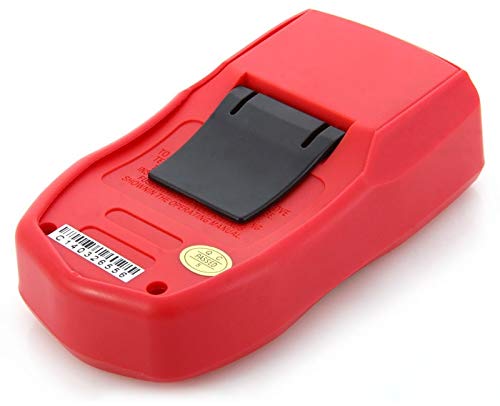
Obrázek 3.4: Zpět view of the UT33C Digital Multimeter. This image clearly shows the battery compartment cover and the foldable kickstand, which provides stability when the meter is placed on a flat surface.
4. Nastavení
4.1 Instalace baterie
- Ujistěte se, že je multimetr vypnutý, a odpojte všechny měřicí kabely.
- Najděte přihrádku na baterie na zadní straně jednotky.
- Odšroubujte upevňovací šroub(y) a sejměte kryt baterie.
- Vložte novou 9V baterii a dbejte na správnou polaritu (+/-).
- Nasaďte kryt baterie a zajistěte jej šroubem (šrouby).
4.2 Připojení měřicích kabelů
Černý měřicí vodič vždy připojte k COM (common) jack. Connect the red test lead to the appropriate input jack based on the measurement type:
- Za svtage, resistance, frequency, capacitance, diode, and continuity measurements, connect the red lead to the VΩmA zvedák.
- Pro měření proudu do 10 A připojte červený vodič k 10A zvedák.
5. Návod k obsluze
5.1 Zapnutí/vypnutí
To turn the multimeter on, rotate the function switch from the OFF position to any desired measurement function. To turn it off, rotate the switch back to the OFF position.
5.2 Volba funkce
Rotate the central function switch to select the desired measurement mode (e.g., DCV, ACV, DCA, ACA, Resistance, Temperature, Diode, Continuity).
5.3 Měření DC Voltage (DCV)
- Připojte černý testovací vodič k COM zdířku a červený měřicí kabel k VΩmA zvedák.
- Set the function switch to the desired DCV range (e.g., 200mV, 2V, 20V, 200V, 500V). If the voltagPokud je e neznámé, začněte s nejvyšším rozsahem a podle potřeby jej snižujte.
- Připojte měřicí vodiče k měřené součástce nebo obvodu a dodržte polaritu.
- Přečtěte si svtage hodnota na LCD displeji.
5.4 Měření AC Voltage (ACV)
- Připojte černý testovací vodič k COM zdířku a červený měřicí kabel k VΩmA zvedák.
- Set the function switch to the desired ACV range (e.g., 200V, 500V).
- Připojte měřicí vodiče k AC napětítage zdroj.
- Přečtěte si svtage hodnota na LCD displeji.
5.5 Measuring DC Current (DCA)
- Připojte černý testovací vodič k COM jack. For current up to 200mA, connect the red lead to the VΩmA jack. For current up to 10A, connect the red lead to the 10A zvedák.
- Set the function switch to the desired DCA range (e.g., 200µA, 2mA, 20mA, 200mA, 10A).
- Disconnect power to the circuit. Open the circuit where current is to be measured and connect the meter in series with the load.
- Zapněte obvod a odečtěte hodnotu proudu na LCD displeji.
5.6 Měření odporu (Ω)
- Připojte černý testovací vodič k COM zdířku a červený měřicí kabel k VΩmA zvedák.
- Set the function switch to the desired Resistance range (e.g., 200Ω, 2kΩ, 20kΩ, 200kΩ, 2MΩ, 20MΩ).
- Ujistěte se, že testovaný obvod nebo součástka je bez napětí.
- Připojte měřicí vodiče k součástce.
- Odečtěte hodnotu odporu na LCD displeji.
5.7 Measuring Temperature (°C/°F)
- Připojte teplotní sondu k VΩmA a COM jacky, dodržujte polaritu.
- Nastavte přepínač funkcí do polohy °C or °F pozice.
- Umístěte hrot teplotní sondy na předmět, jehož teplotu chcete měřit, nebo do jeho blízkosti.
- Odečtěte hodnotu teploty na LCD displeji.
5.8 Test diod
- Připojte černý testovací vodič k COM zdířku a červený měřicí kabel k VΩmA zvedák.
- Nastavte přepínač funkcí do polohy Dioda symbol.
- Připojte červený vodič k anodě a černý vodič ke katodě diody.
- Přečtěte si dopředu svtage drop on the display. Reverse the leads; the display should show OL (Open Loop) for a good diode.
5.9 Test kontinuity
- Připojte černý testovací vodič k COM zdířku a červený měřicí kabel k VΩmA zvedák.
- Nastavte přepínač funkcí do polohy Kontinuita symbol.
- Připojte měřicí vodiče k obvodu nebo součástce.
- If the resistance is below approximately 50Ω, the built-in buzzer will sound, indicating continuity. The display will show the resistance value.
5.10 Funkce Data Hold
Stiskněte tlačítko DRŽET button to freeze the current reading on the LCD display. Press it again to release the hold and resume live measurements.
5.11 Funkce podsvícení
Stiskněte tlačítko Podsvícení button to turn on the display backlight. Press it again to turn off the backlight. The backlight typically turns off automatically after a short period to conserve battery life.
6. Údržba
6.1 Čištění
Otřete pouzdro reklamouamp cloth and mild detergent. Do not use abrasives or solvents. Ensure the meter is off and leads are disconnected before cleaning.
6.2 Výměna pojistky
If the current measurement function fails, the fuse may need replacement. Refer to the specifications for the correct fuse type and rating. Always replace with a fuse of the same type and rating. Disconnect all leads and power off the meter before attempting fuse replacement.
6.3 Výměna baterie
When the low battery indicator appears on the display, replace the 9V battery as described in Section 4.1. Using the meter with a low battery may result in inaccurate readings.
6.4 Skladování
If the meter is not to be used for a long period, remove the battery to prevent leakage and damage to the meter. Store the meter in a cool, dry place, away from direct sunlight and extreme temperatures.
7. Řešení problémů
| Problém | Možná příčina | Řešení |
|---|---|---|
| Žádný displej nebo tlumený displej | Slabá nebo vybitá baterie; Nesprávná instalace baterie. | Replace battery; Check battery polarity. |
| "OL" displayed (Overload) | Vstupní hodnota překračuje zvolený rozsah; Rozpojený obvod (odpor/kontinuita). | Select a higher range; Check for open circuit or broken leads. |
| Nepřesné údaje | Low battery; Incorrect function/range selection; Damaged test leads. | Replace battery; Verify function and range; Check/replace test leads. |
| Žádné měření proudu | Blown fuse; Incorrect lead connection. | Replace fuse; Ensure leads are in 10A or VΩmA jack for current. |
8. Specifikace
| Parametr | Rozsah | Přesnost |
|---|---|---|
| DC svtage | 200mV / 2V / 20V / 200V / 500V | ± (0.5 % + 2) |
| AC svtage | 200V / 500V | ± (1.2 % + 10) |
| Stejnosměrný proud | 200µA / 2mA / 20mA / 200mA / 10A | ±(1%+2) for mA, ±(1.2%+5) for 10A |
| Odpor | 200 Ω / 2 kΩ / 20 kΩ / 200 kΩ / 2 MΩ / 20 MΩ | ± (0.8 % + 2) |
| Teplota | -40 °C až 1000 °C / -40 °F až 1832 °F | ±(1%+3) for °C, ±(1.5%+5) for °F |
| Počet zobrazení | 1999 | |
| Moc | 9V Battery (6F22) | |
| Rozměry | 130 mm x 73.5 mm x 35 mm | |
| Hmotnost | Cca. 156 g (včetně baterie) |
Poznámka: Specifikace se mohou změnit bez předchozího upozornění.
9. Záruka a podpora
This UT33C LCD Digital Multimeter is covered by a standard manufacturer's warranty against defects in materials and workmanship. The warranty period typically begins from the date of purchase. Please retain your proof of purchase for warranty claims.
The warranty does not cover damage caused by misuse, accident, unauthorized modification, neglect, or improper operation. Consumable parts such as batteries and fuses are not covered under warranty.
For technical support, warranty service, or inquiries regarding your product, please contact the retailer or manufacturer directly. Refer to the product packaging or the retailer's webweb pro konkrétní kontaktní informace.