
1. Konec produktuview
The GeekerChip Cat 6 Shielded RJ45 8P8C Connectors are designed for reliable and high-performance Ethernet network connections. These connectors are suitable for Cat5, Cat5e, and Cat6 shielded twisted pair (STP) cables, ensuring optimal conductivity and durability for various networking applications.
- Kompatibilita: Designed for Cat 6/7/5e/5 round shielded cables.
- Trvanlivost: Features 24K gold-plated contacts for corrosion resistance and maximum conductivity.
- Konstrukce: High-quality version with metal shielding for enhanced signal integrity.
- Všestrannost: Suitable for various environments including home, office, and school networks.
- Množství: This package includes 20 pieces of Cat6 RJ45 connectors.

Figure 1: GeekerChip Cat 6 Shielded RJ45 Connector (Main Product View)
2. Nastavení a instalace
Follow these steps to properly terminate your Cat 6 shielded Ethernet cable with the GeekerChip RJ45 connector. A proper crimping tool is required for this process.
2.1 Požadované nástroje
- Krimpovací nástroj RJ45
- Odizolovací kabel
- Nůžky na drát
- Cable Tester (recommended for verification)
2.2 kroky instalace
- Odstraňte plášť kabelu: Carefully strip approximately 15-20mm (0.6-0.8 inches) of the outer jacket from the end of your Cat 6 cable. Be careful not to cut or nick the inner wires or the shielding.
- Expose Wires and Shielding: For shielded cables, ensure the foil shield and drain wire are exposed. Untwist the individual wire pairs.
- Uspořádání drátů: Straighten each of the eight wires and arrange them according to either the T568A or T568B wiring standard. The T568B standard is most commonly used for new installations. Ensure the wires are flat and parallel.
- Ořezové dráty: Using wire cutters, trim the arranged wires straight across, ensuring they are all the same length. The ideal length is about 12-13mm (0.47-0.51 inches) from the edge of the jacket to the end of the wires.
- Vložení vodičů do konektoru: Carefully insert the trimmed and arranged wires into the RJ45 connector. Push them firmly until each wire reaches the front of the connector and the cable jacket is seated securely inside the connector's strain relief area. Ensure the metal shielding of the connector makes contact with the cable's shielding/drain wire.
- Krimpování: Place the loaded RJ45 connector into the appropriate slot on your crimping tool. Squeeze the handles of the crimping tool firmly and completely until you hear a click. This action pushes the gold-plated pins into the wires and secures the connector to the cable.
- Ověřit připojení: After crimping, visually inspect the connector to ensure all wires are properly seated and the pins have pierced the wires. Use a cable tester to verify continuity and correct wiring for all eight conductors.

Figure 2: T568A and T568B Wiring Standards for RJ45 Connectors. Follow one standard consistently for both ends of the cable.
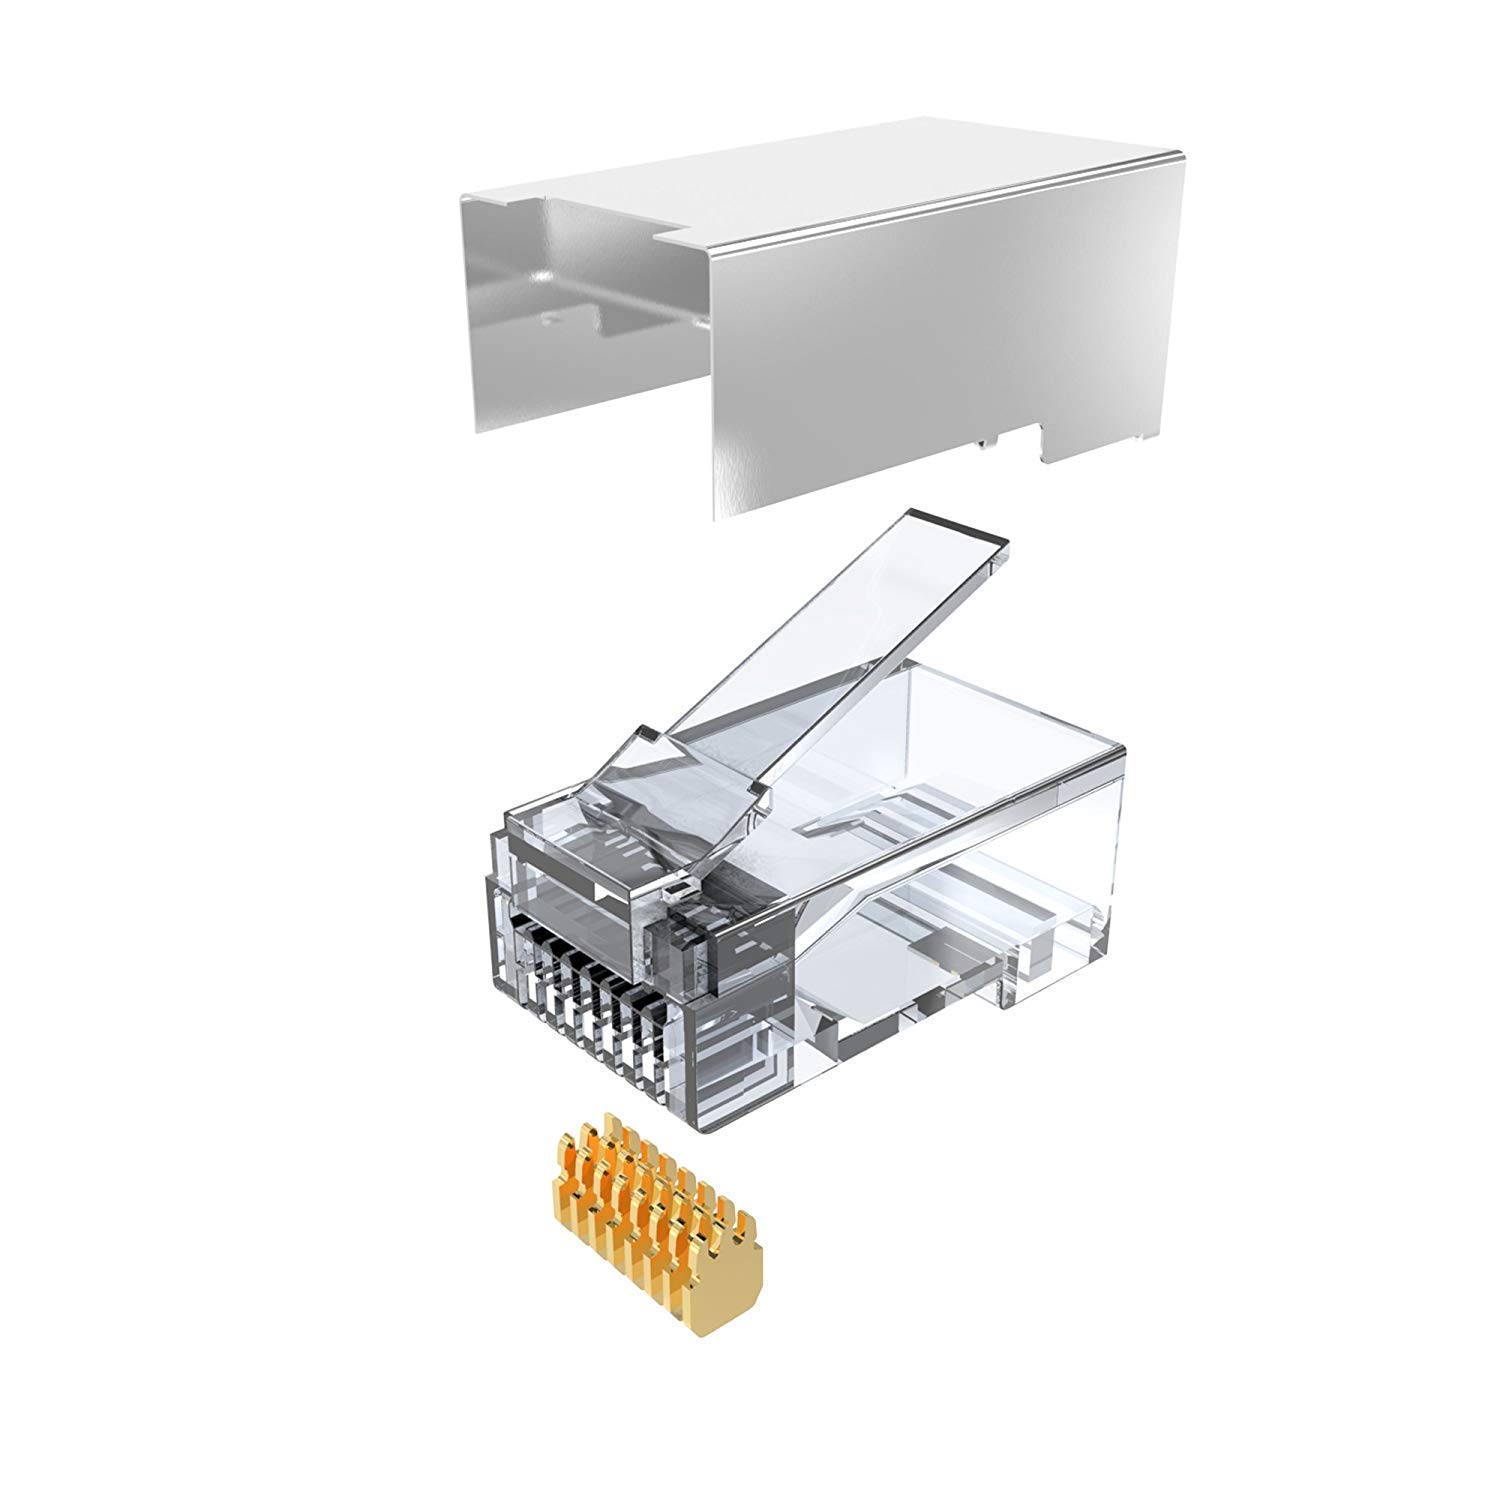
Obrázek 3: Rozložené view showing the components of the RJ45 connector, including the metal shielding and gold-plated contacts.

Figure 4: Various angles of the GeekerChip Cat 6 Shielded RJ45 Connector, highlighting its design and metal shielding.
3. Návod k obsluze
Once the Cat 6 cable is properly terminated with the GeekerChip RJ45 connectors, it is ready for use in your network. These connectors facilitate high-speed data transmission in various network setups.
- Připojovací zařízení: Insert the crimped RJ45 connector into any compatible Ethernet port on devices such as computers, routers, switches, modems, or network printers.
- Zabezpečené připojení: Ensure the connector clicks into place, indicating a secure physical connection.
- Odpojení: To disconnect, gently press the release tab on the connector and pull it straight out from the port. Avoid pulling the cable directly without pressing the tab, as this can damage the connector or the device port.

Obrázek 5: Přamples of compatible devices including servers, switches, routers, computers, laptops, and TV boxes.
4. Údržba
The GeekerChip RJ45 connectors are designed for durability and require minimal maintenance. Following these guidelines will help ensure their longevity and optimal performance:
- Udržujte v čistotě: Keep the connectors free from dust and debris. If necessary, gently clean the contacts with a dry, lint-free cloth or compressed air.
- Vyhněte se fyzickému stresu: Do not bend or twist the cable excessively near the connector. Avoid pulling on the cable itself when disconnecting; always use the release tab.
- Skladování: Store unused connectors in a dry, cool environment, away from direct sunlight and extreme temperatures.
- Inspekce: Periodically inspect connectors for any signs of damage, such as bent pins, cracks in the housing, or corrosion. Replace damaged connectors immediately to prevent network issues.
5. Řešení problémů
If you encounter issues with your network connection after installing the RJ45 connectors, consider the following troubleshooting steps:
- Žádné síťové připojení:
- Check Crimping: Ensure the connector is fully crimped and all pins are properly seated and making contact with the wires.
- Verify Wiring Standard: Confirm that both ends of the cable are wired according to the same standard (T568A or T568B).
- Kabelový tester: Use an Ethernet cable tester to check for continuity, open circuits, short circuits, or crossed pairs.
- Zkontrolujte dráty: Ensure no wires are cut or nicked during the stripping process.
- Slow Network Speed or Intermittent Connection:
- Shielding Integrity: For shielded cables, ensure the metal shielding of the connector is properly grounded to the cable's shield/drain wire to prevent electromagnetic interference (EMI).
- Kvalita kabelu: Ensure you are using a high-quality Cat 6 or compatible shielded cable.
- Délka kabelu: Verify that the cable length does not exceed the maximum recommended length for Cat 6 (100 meters or 328 feet).
- Kompatibilita zařízení: Ensure all connected network devices (router, switch, NIC) support Cat 6 speeds.
- Connector Not Fitting:
- Correct Type: Ensure you are using an RJ45 connector designed for Cat 6 cables, which typically accommodate larger gauge wires.
- Průměr kabelu: Verify that your cable's outer diameter is compatible with the connector's entry point.
6. Specifikace produktu
| Značka | GeekerChip |
| Název modelu | NET-ShieldedPlug-CAT6-20Pack |
| Typ konektoru | RJ45 |
| Kompatibilita typů kabelů | Shielded Cat 6/STP, also compatible with Cat5e, Cat5 |
| Počet kolíků | 8 (8P8C) |
| Speciální funkce | Metal Shielding, 24K Gold-Plated Contacts, Anti-twist Protection |
| Barva | Stříbro |
| Materiál | Kov |
| Doporučené použití | Ethernet Network Connection, Cable Crimping |
| Technologie připojení | Ethernet |
| Max. Objemtage | 2 voltů |
| TIA Specification | Vyhovující |
| Vnitřní/venkovní použití | Krytý |
| Délka položky | 2.1 centimetrů |
| UPC | 754914372325 |
| Množství v balení | 20 Počet |

Figure 6: Dimensions of the GeekerChip Cat 6 Shielded RJ45 Connector (23mm length, 12mm width).
7. Záruka a podpora
7.1 Informace o záruce
GeekerChip products are manufactured to high-quality standards. For specific warranty details regarding your Cat 6 Shielded RJ45 Connectors, please refer to the product packaging or contact the manufacturer directly. Typically, network components are covered against manufacturing defects for a limited period from the date of purchase.
7.2 Zákaznická podpora
If you have any questions, require technical assistance, or need to report an issue with your GeekerChip RJ45 connectors, please contact our customer support team. You can usually find contact information on the product packaging or the official GeekerChip webmísto.
Please have your product model number (NET-ShieldedPlug-CAT6-20Pack) and purchase details ready when contacting support.


