
1. Úvod
The j5create JCD384 USB-C 10-in-1 Multi-Port Docking Station is designed to expand the connectivity of your USB-C enabled laptop, PC, or tablet. This docking station provides a comprehensive solution for connecting multiple displays, USB peripherals, Ethernet, and memory cards, enhancing your productivity and simplifying your workspace. It supports 4K HDMI and VGA outputs for versatile display options, along with USB 3.0 ports for high-speed data transfer and Power Delivery for charging your host device.
2. Klíčové vlastnosti
- Multi-Display Connectivity: Connect your laptop to an additional monitor via HDMI (4K) or VGA (1080p).
- Rozšíření USB: Features two USB 3.1 Gen 1 Type-A ports for peripherals and one USB Type-A port with BC 1.2 for fast-charging mobile devices.
- Vysokorychlostní přenos dat: USB 3.1 Gen 1 ports offer up to 5 Gbps transfer speed, significantly faster than USB 2.0.
- Čtečka paměťových karet: Direct access to SD and MicroSD memory cards for convenient data storage and transfer.
- Ethernetový port: Provides a stable and reliable wired network connection.
- Dodávka energie: USB-C 3.1 port with Power Delivery allows charging of your host device while using the hub.
3. Průvodce nastavením
Follow these steps to set up your j5create JCD384 docking station:
- Připojení k hostitelskému zařízení: Plug the integrated USB-C cable from the docking station into an available USB-C port on your laptop, PC, or tablet. Ensure your host device's USB-C port supports DisplayPort Alternate Mode and Power Delivery for full functionality.
- Připojení napájecího adaptéru (volitelné, ale doporučené): If your host device requires charging or if you are connecting power-intensive peripherals, connect your original USB-C power adapter to the USB-C Power Delivery port on the docking station. This will charge your host device and provide power to connected peripherals.
- Připojení externích displejů:
- For HDMI display: Connect an HDMI cable from your monitor to the HDMI port on the docking station.
- For VGA display: Connect a VGA cable from your monitor to the VGA port on the docking station.
Note: The docking station supports either HDMI or VGA output at one time, not simultaneously for extended desktop. For mirrored display, both can be used.
- Připojení USB periferií: Plug your USB devices (e.g., keyboard, mouse, external hard drive) into the available USB 3.0 Type-A ports. The orange USB Type-A port supports BC 1.2 for faster charging of mobile devices.
- Připojení ethernetového kabelu: For a wired network connection, plug an Ethernet cable into the RJ-45 Gigabit Ethernet port on the docking station.
- Vložení paměťových karet: Insert your SD or MicroSD cards into the corresponding slots for data access.

Obrázek 1: Přesview of the j5create JCD384 docking station with connected peripherals.
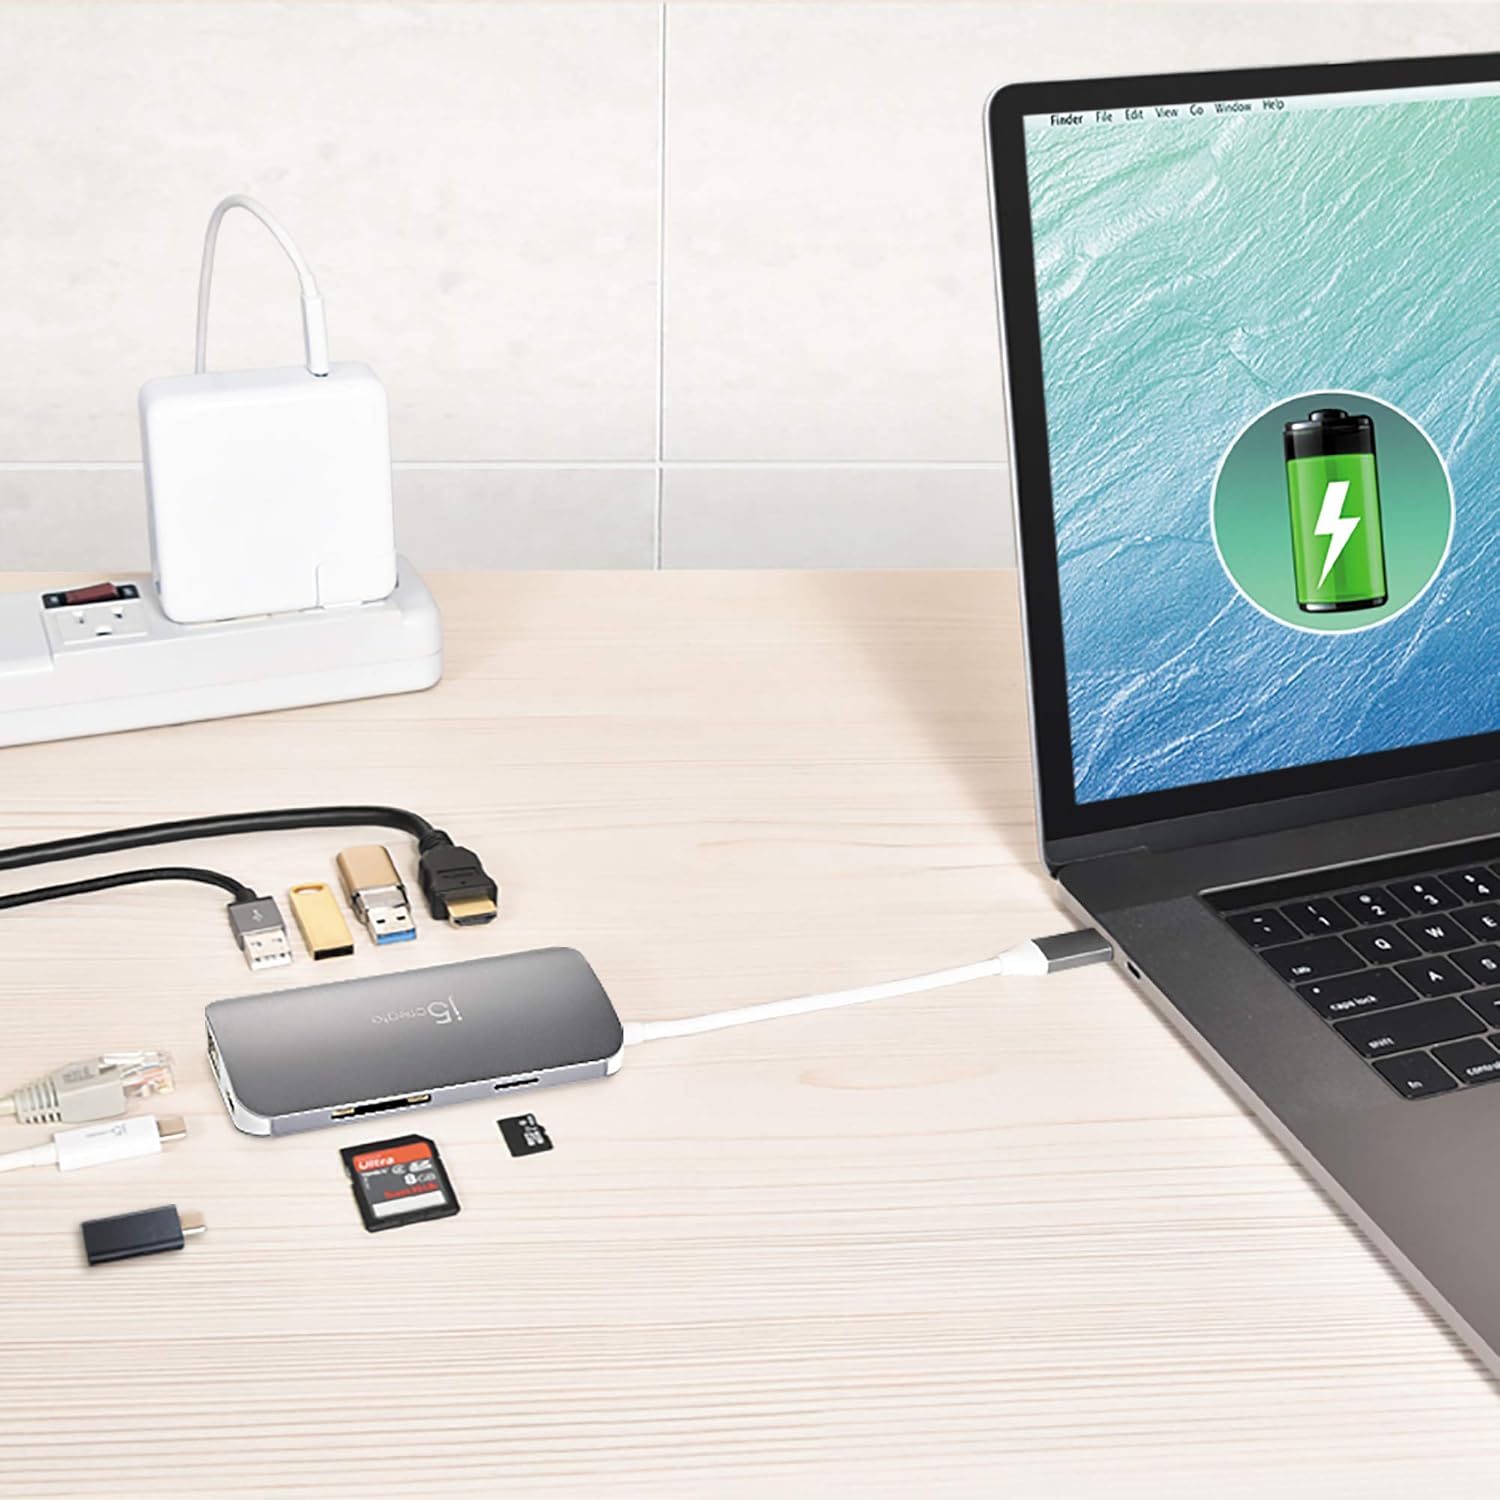
Figure 2: The docking station connected to a laptop, demonstrating power delivery and peripheral connections.
4. Návod k obsluze
Once the docking station is set up, it operates largely plug-and-play. Your operating system should automatically detect and configure most connected devices.
4.1 Konfigurace displeje
After connecting your monitor(s), you may need to adjust display settings in your operating system:
- Windows: Right-click on the desktop, select "Display settings," and configure your displays (extend, duplicate, or second screen only).
- MacOS: Go to "System Preferences" > "Displays" to arrange or mirror your displays.

Obrázek 3: Notebook připojený k externímu monitoru, znázorněnoasing multi-display functionality.

Figure 4: A tablet and projector connected to a 4K UHD monitor, illustrating diverse display connections.
4.2 USB Device Usage
Simply plug your USB devices into the available USB 3.0 ports. For charging mobile devices, use the orange USB Type-A port which supports BC 1.2 for faster charging.
4.3 Memory Card Access
Insert your SD or MicroSD card into the appropriate slot. The card will appear as a removable drive in your file explorer, allowing you to transfer files.
4.4 Ethernetové připojení
Once connected, your host device should automatically detect the wired network. If not, check your network settings.
5. Specifikace
| Funkce | Detail |
|---|---|
| Číslo modelu | JCD384 |
| Značka | j5vytvořit |
| Barva | Šedá |
| Materiál | Hliník |
| Hardwarové rozhraní | MicroSD, Secure Digital Card, USB 3.0, HDMI, VGA, Ethernet, USB-C |
| Kompatibilní zařízení | PC, Laptops, Tablets, Smartphones (with USB-C DisplayPort Alt Mode) |
| Celkový počet portů USB | 3 (2x USB 3.0 Type-A, 1x USB Type-A with BC 1.2) |
| Rychlost přenosu dat | 5 gigabitů za sekundu (USB 3.0) |
| Počet portů | 9 (HDMI, VGA, Ethernet, 3x USB 3.0, SD, MicroSD, USB-C PD) |
| Podpora operačního systému | Více operačních systémů |
| Hmotnost položky | 88 gramů |
| UPC | 847626002458 |

Obrázek 5: Nahoře a dole views of the docking station, showing various ports.

Obrázek 6: Strana view highlighting the VGA port and integrated USB-C cable.

Obrázek 7: Strana view displaying the Ethernet and USB-C Power Delivery ports.
6. Řešení problémů
Pokud narazíte na problémy s dokovací stanicí, podívejte se na následující běžná řešení:
- Žádný výstup na displej:
- Ujistěte se, že port USB-C vašeho hostitelského zařízení podporuje alternativní režim DisplayPort.
- Check all cable connections (USB-C to host, HDMI/VGA to monitor).
- Ověřte, zda je správně vybrán vstupní zdroj monitoru.
- Try connecting only one display at a time to isolate the issue.
- Aktualizujte ovladače grafické karty na hostitelském zařízení.
- USB zařízení nerozpoznána:
- Ujistěte se, že je dokovací stanice bezpečně připojena k hostitelskému zařízení.
- Try connecting the USB device directly to your host device to confirm it's working.
- If using a high-power USB device, ensure the docking station is connected to an external power source via its USB-C PD port.
- Some wireless peripherals (e.g., Logitech adapters) may have compatibility issues with certain hubs.
- Slow Ethernet Connection:
- Check your Ethernet cable for damage and ensure it's securely connected.
- Verify your network drivers are up to date.
- Vyzkoušejte to s jiným ethernetovým kabelem nebo portem na vašem routeru/modemu.
- Hostitelské zařízení se nenabíjí:
- Ujistěte se, že je váš původní napájecí adaptér USB-C připojen k portu USB-C PD dokovací stanice.
- Ověřte, zda port USB-C vašeho hostitelského zařízení podporuje funkci Power Delivery.
- Check the power adapter and cable for any damage.
7. Údržba
To ensure the longevity and optimal performance of your j5create JCD384 docking station, follow these maintenance guidelines:
- Čištění: K čištění vnější strany dokovací stanice používejte měkký, suchý hadřík. Nepoužívejte tekuté čisticí prostředky ani aerosoly, mohly by zařízení poškodit.
- Skladování: Dokovací stanici skladujte na chladném a suchém místě mimo dosah přímého slunečního záření a extrémních teplot.
- Zacházení: Handle the device with care. Avoid dropping it or subjecting it to strong impacts. Do not pull on the integrated USB-C cable forcefully.
- Větrání: Ensure the docking station has adequate ventilation to prevent overheating, especially during prolonged use with multiple connected devices.
8. Záruka a podpora
The j5create JCD384 USB-C 10-in-1 Multi-Port Docking Station comes with a manufacturer's warranty. Please refer to the warranty card included in your product packaging for specific terms and conditions, including warranty duration and coverage details.
For technical support, product registration, or further assistance, please visit the official j5create website or contact their customer service department. Contact information can typically be found on the j5create webwebu nebo v dokumentaci k produktu.