Zavedení
Thank you for choosing the Hoover Freemotion FM18LI 2-in-1 Cordless Stick and Handheld Vacuum Cleaner. This appliance is designed for efficient and convenient cleaning of various surfaces in your home. It combines the versatility of a stick vacuum for floors with the portability of a handheld unit for smaller tasks and hard-to-reach areas. Please read this manual thoroughly before operating the appliance to ensure safe and optimal performance.
Bezpečnostní pokyny
Důležité: Při používání elektrických spotřebičů vždy dodržujte základní bezpečnostní opatření, abyste snížili riziko požáru, úrazu elektrickým proudem nebo zranění.
- Nepoužívejte spotřebič venku nebo na mokrém povrchu.
- Nedovolte dětem obsluhovat vysavač. Při používání v blízkosti dětí je nutný pečlivý dohled.
- Nevysávejte hořlavé nebo vznětlivé materiály, horký popel ani velké, ostré předměty.
- Před použitím se ujistěte, že je filtr správně nainstalován.
- Use only Hoover recommended attachments and replacement parts.
- Neponořujte vysavač do vody nebo jiných kapalin.
- If the charging cable is damaged, it must be replaced by the manufacturer or a qualified service agent.
- Před čištěním nebo údržbou vždy spotřebič vypněte.
Konec produktuview
Familiarize yourself with the components of your Hoover Freemotion vacuum cleaner.

Figure 1: The Hoover Freemotion FM18LI in its full stick vacuum configuration.
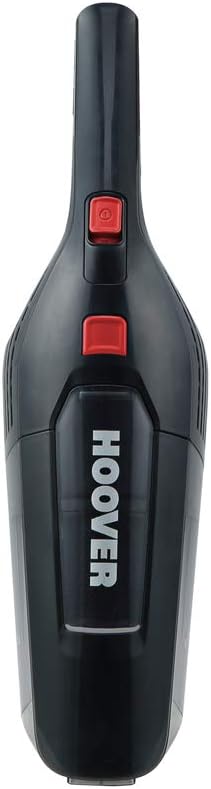
Figure 2: The detachable handheld vacuum unit, showing the dustbin and power button.

Obrázek 3: Přample of an included accessory: a crevice tool with an integrated brush for detailed cleaning.
Hlavní komponenty:
- Ruční jednotka: Obsahuje motor, nádobu na prach a baterii.
- Extension Wand/Stick: Connects the handheld unit to the floor nozzle.
- Podlahová tryska: Equipped with a rotating brush bar and LED lights for effective floor cleaning.
- Nabíječka: Pro dobíjení lithium-iontové baterie.
- Příslušenství: May include crevice tool, dusting brush, etc.
Nastavení
1. Montáž
To assemble your Hoover Freemotion, slide the handheld unit into the top of the extension wand until it clicks securely into place. Then, attach the floor nozzle to the bottom of the extension wand, ensuring it is also firmly connected.

Figure 4: Illustration of connecting the handheld unit to the stick for full assembly.
2. Počáteční nabíjení
Before first use, fully charge the appliance. Connect the charger to the charging port on the handheld unit and plug it into a suitable wall outlet. The charging indicator light will show the charging status. A full charge typically takes approximately 3 hours.
Návod k obsluze
1. Použití jako tyčového vysavače
- Ujistěte se, že je vysavač kompletně sestaven a nabit.
- Press the power button on the handheld unit to turn on the vacuum.
- Guide the floor nozzle over the surface to be cleaned. The rotating brush bar and LED lights will assist in picking up debris and illuminating dark areas.
- The vacuum features a parking position, allowing it to stand upright independently when not in use or during a pause in cleaning.
- The typical runtime on a full charge is approximately 35 minutes.

Figure 5: The vacuum's flexible design allows for easy cleaning under furniture.
2. Použití jako ručního vysavače
- To detach the handheld unit, press the release button located where the handheld unit connects to the extension wand.
- Once detached, you can use the handheld unit for cleaning upholstery, car interiors, stairs, or other small areas.
- Attach appropriate accessories (e.g., crevice tool, dusting brush) directly to the handheld unit's nozzle for specialized cleaning tasks.
- Stiskněte tlačítko napájení.

Figure 6: The handheld unit being used with an attachment for targeted cleaning.
Údržba
Pravidelná údržba zajišťuje optimální výkon a prodlužuje životnost vašeho vysavače.
1. Vyprázdnění popelnice
- Ujistěte se, že je vysavač vypnutý.
- Stiskněte tlačítko pro uvolnění nádoby na prach a vyjměte nádobu z ruční jednotky.
- Hold the dustbin over a waste bin and open the bottom flap to empty the contents.
- Bezpečně znovu připevněte nádobu na prach.

Figure 7: A user demonstrating how to remove and empty the dustbin.
2. Čištění filtrů
The Hoover Freemotion FM18LI uses EPA filters. It is recommended to clean the filters regularly, especially when suction power decreases.
- Vyjměte nádobu na prach, jak je popsáno výše.
- Opatrně vyjměte sestavu filtru z nádoby na prach.
- Tap the filter gently over a waste bin to remove loose dust. For a more thorough clean, rinse the filter under cold running water.
- Allow the filter to air dry completely for at least 24 hours before reinserting it into the dustbin. Do not use the vacuum with a wet filter.
3. Čištění kartáčové lišty
Periodically check the brush bar in the floor nozzle for tangled hair or debris. Use scissors to cut away any tangled hair and remove it. Ensure the brush bar spins freely after cleaning.
Odstraňování problémů
Pokud se s vysavačem setkáte s problémy, podívejte se na následující běžné problémy a jejich řešení:
| Problém | Možná příčina | Řešení |
|---|---|---|
| Vakuum se nezapne. | Baterie je vybitá. | Baterii plně nabijte. |
| Snížený sací výkon. | Nádoba na prach je plná nebo je ucpaný filtr. | Vyprázdněte popelnici a vyčistěte filtr. |
| Kartáčová lišta se neotáčí. | Obstruction in the brush bar or nozzle. | Turn off the vacuum and remove any obstructions from the brush bar or nozzle. |
| Vysávání se během provozu zastaví. | Battery is depleted or motor overheating. | Recharge the battery. If overheating, turn off and allow to cool for 30 minutes before resuming use. |
Specifikace
| Značka | Vysavač |
| Číslo modelu | FM18LI (39400283) |
| Typ baterie | 18V lithium-iontová |
| Doba běhu | Až 35 minut |
| Doba nabíjení | Přibližně 3 hodiny |
| Typ filtru | EPA Cartridge |
| Rozměry produktu (D x Š x V) | 28.5 x 16.5 x 112.3 cm |
| Hmotnost položky | 2.4 kg |
| Úroveň hluku | 76 decibelů |
| Form Factor | Stick (Upright) |
| Doporučení pro povrch | Upholstery (with appropriate attachment) |
Záruka a podpora
For information regarding warranty coverage, technical support, or to purchase replacement parts, please refer to the warranty card included with your product or visit the official Hoover webUschovejte si doklad o koupi pro případ reklamace.