
1. Úvod
Thank you for choosing the Landmann Rexon PTS 4.1 Gas Grill. This manual provides essential information for the safe assembly, operation, maintenance, and troubleshooting of your new gas grill. Please read all instructions carefully before using the appliance to ensure optimal performance and safety.

Image 1: The Landmann Rexon PTS 4.1 Gas Grill, featuring a sleek black design with stainless steel accents and a prominent brand logo.
2. Důležité bezpečnostní informace
Vždy dodržujte tyto bezpečnostní pokyny, abyste předešli zranění nebo poškození majetku:
- Před použitím grilu si přečtěte všechny pokyny.
- Use the grill outdoors only in a well-ventilated area. Never use in an enclosed space.
- Udržujte děti a domácí zvířata vždy mimo dosah grilu.
- Neskladujte ani nepoužívejte benzín nebo jiné hořlavé kapaliny nebo páry v blízkosti tohoto nebo jakéhokoli jiného spotřebiče.
- Ensure the gas hose is not kinked or damaged and is kept away from hot surfaces.
- Před každým použitím vždy zkontrolujte, zda nedochází k úniku plynu. Použijte roztok mýdlové vody; nikdy nepoužívejte otevřený oheň.
- Nepřesouvejte gril, pokud je v provozu nebo je ještě horký.
- Při manipulaci s horkými součástmi používejte ochranné rukavice.
- Turn off the gas supply at the cylinder after each use.
3. Vlastnosti produktu
The Landmann Rexon PTS 4.1 Gas Grill is designed for efficient and enjoyable outdoor cooking, featuring:
- Compact gas grill with four continuously adjustable stainless steel burners (4 x 3 kW).
- Enameled grill grates and warming rack (grill surface: 64 x 40 cm) with burner protection.
- Integrated side burner (1 x 3 kW).
- Temperature indicator in the double-walled lid.
- Enclosed cabinet and four lockable castor wheels for mobility and stability.
Klíčové technologie
PTS (Power Thermal Spreading) System
The patented PTS (Power Thermal Spreading) system ensures even heat distribution across the entire grilling surface, eliminating cold spots for consistent cooking results.

Image 2: Illustration of the PTS (Power Thermal Spreading) system in the Landmann Rexon PTS 4.1 Gas Grill, showing optimal heat distribution with red arrows indicating heat flow.

Obrázek 3: Detailní view of Landmann Rexon PTS 4.1 Gas Grill features, including a lid thermometer, double-walled lid for optimal temperature retention, enameled grill grates for easy cleaning and corrosion resistance, two large side tables for optimal storage space, stainless steel burners with 3.65 kW power each, integrated piezo ignition for safe burner lighting, an integrated cook-zone ideal for preparing entire menus, and a spacious base cabinet with 4 wheels for easy transport and secure standing.
4. Nastavení a montáž
Assembly is required for this product. Please follow the instructions provided in the separate assembly guide for detailed steps. Ensure all components are present and undamaged before beginning assembly.
Vybalování
- Opatrně vyjměte všechny díly z obalu.
- Check the contents against the parts list in your assembly guide.
- Odstraňte všechny ochranné fólie a balicí materiály.
Kroky montáže (obecné)
- Assemble the main cabinet structure, ensuring all screws are tightened securely.
- Attach the castor wheels to the base of the cabinet.
- Mount the side tables and side burner unit.
- Install the main burner assembly and heat diffusers.
- Place the enameled grill grates and warming rack into position.
- Attach the lid and ensure the thermometer is correctly seated.
- Connect the gas hose and regulator to the grill's gas inlet.

Image 4: Landmann Rexon PTS 4.1 Gas Grill dimensions, showing a width of 135 cm, a height of 120 cm, and a depth of 53 cm, with a human silhouette for scale.
5. Návod k obsluze
Připojení plynové láhve
- Ujistěte se, že je ventil plynové lahve uzavřen.
- Connect the regulator to the gas cylinder valve, tightening it firmly.
- Connect the other end of the hose to the grill's gas inlet.
- Perform a leak test: Apply a soapy water solution to all connections. If bubbles appear, there is a leak. Tighten connections or replace parts as necessary. Do not use the grill if a leak is detected.
Zapálení hlavních hořáků
- Pomalu otevřete ventil plynové láhve.
- Otevřete víko grilu.
- Stiskněte a otočte jeden hlavní regulační knoflík hořáku do polohy HIGH (Vysoký výkon).
- Press and hold the integrated piezo ignition button until the burner ignites. You should hear a click and see a flame.
- If the burner does not ignite within 5 seconds, turn the control knob off, wait 5 minutes, and repeat the process.
- Once one burner is lit, you can ignite adjacent burners by simply turning their control knobs to HIGH.
Použití bočního hořáku
- Otevřete víko bočního hořáku.
- Zatlačte a otočte knoflík ovládání bočního hořáku do polohy HIGH (Vysoký výkon).
- Press and hold the integrated piezo ignition button until the burner ignites.
- Plamen upravte dle potřeby.
Regulace teploty
The grill features individual flame regulators for each burner, allowing precise temperature control. The integrated lid thermometer helps monitor the internal temperature of the grill.

Image 5: The Landmann Rexon PTS 4.1 Gas Grill in an outdoor setting, with various foods cooking on the main grill grates and a wok on the side burner.
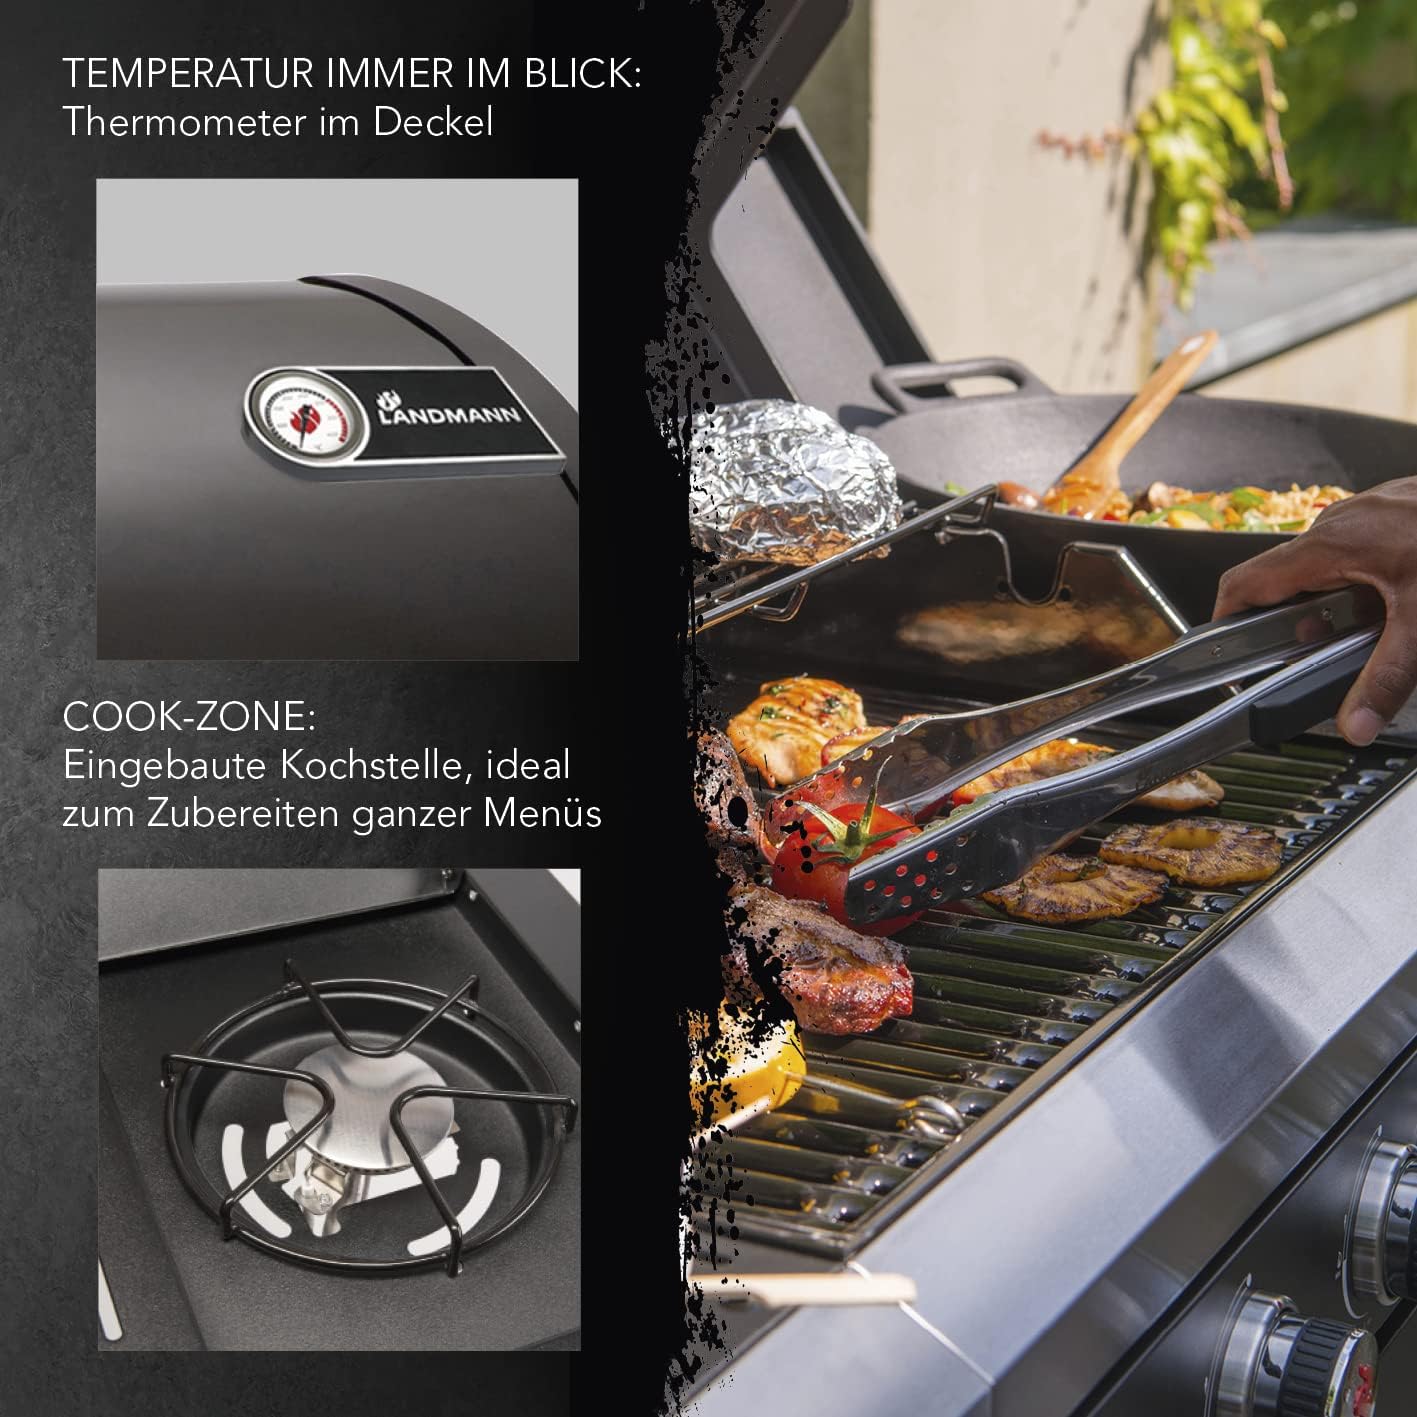
Obrázek 6: Detail view of the Landmann Rexon PTS 4.1 Gas Grill's lid thermometer, displaying the Landmann logo, and the integrated cook-zone on the side table.

Image 7: A wok filled with shrimp and vegetables cooking on the side burner of the Landmann Rexon PTS 4.1 Gas Grill.
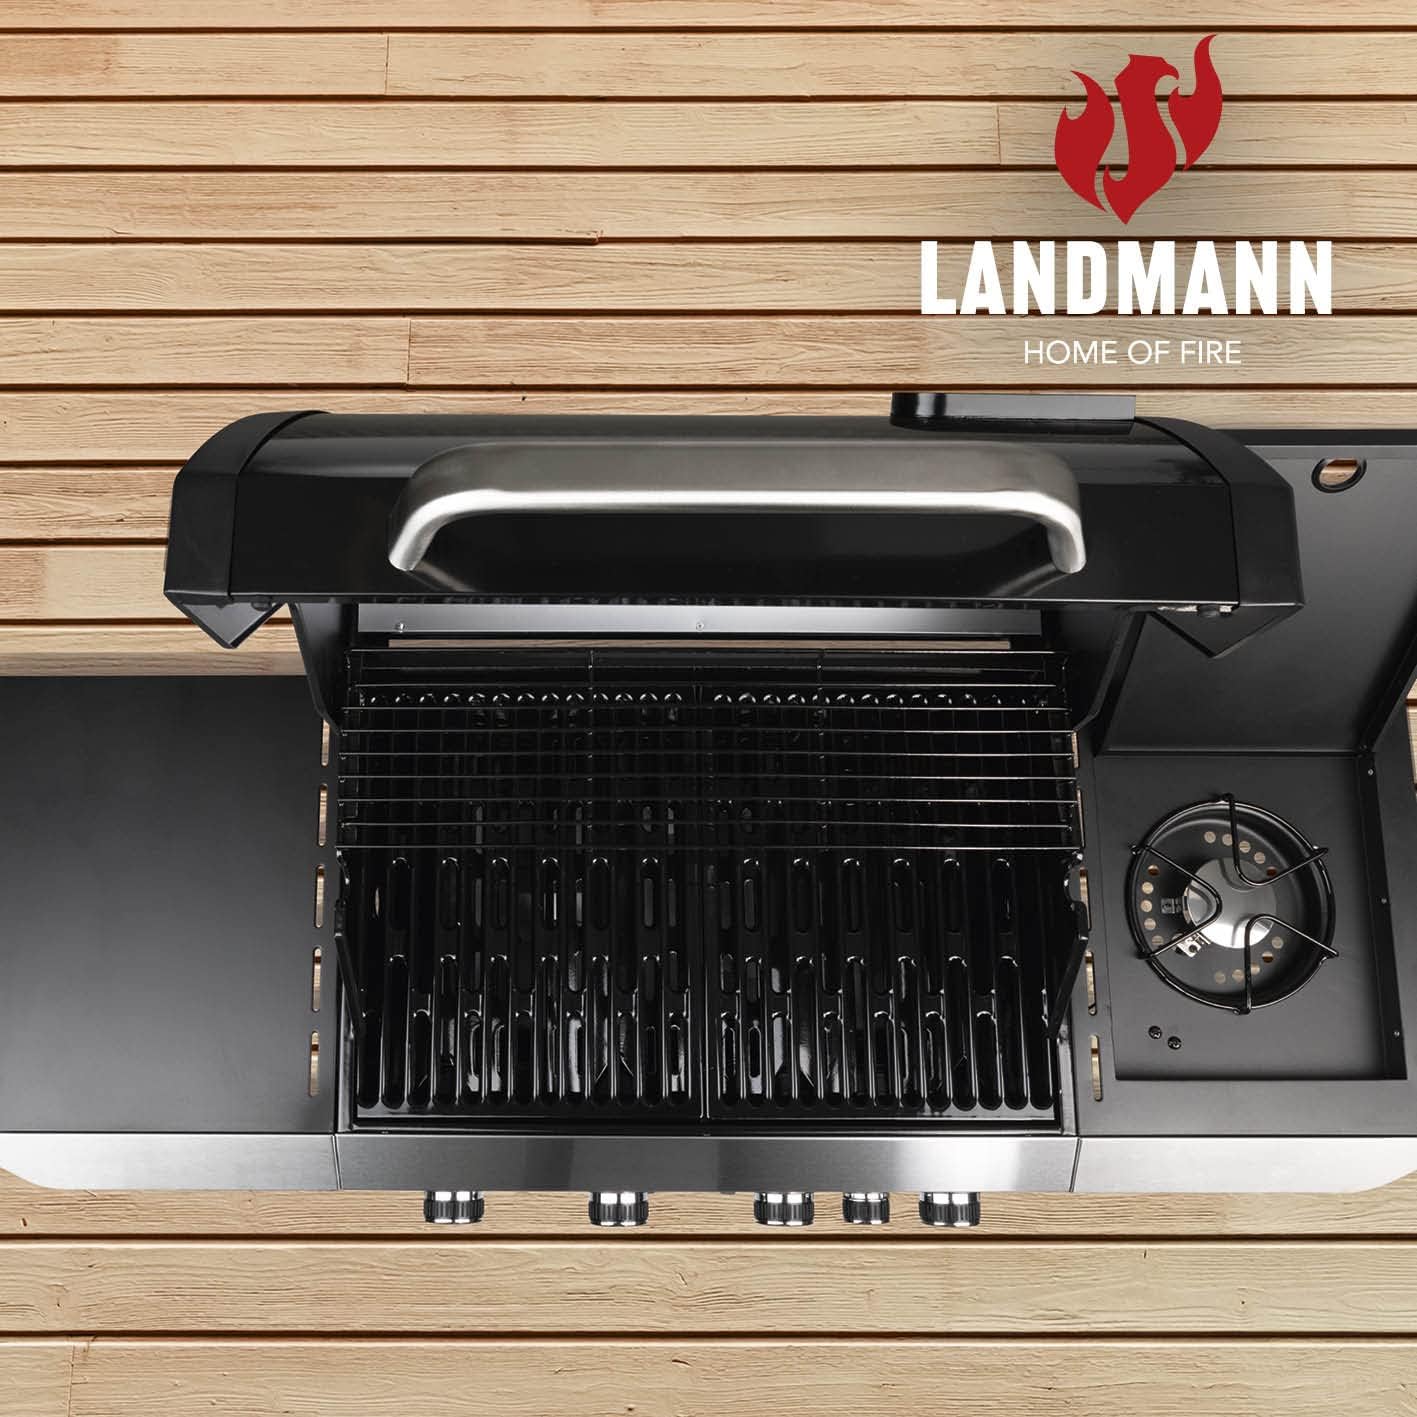
Obrázek 8: Shora dolů view of the Landmann Rexon PTS 4.1 Gas Grill, showcasing the main grill area with enameled grates, the warming rack, and the integrated side burner.
6. Péče a údržba
Pravidelné čištění a údržba prodlouží životnost vašeho grilu a zajistí bezpečný provoz.
Cleaning the Grill Grates
- After each use, while the grates are still warm, brush off any food residue with a grill brush.
- For deeper cleaning, remove the enameled grates and wash them with warm soapy water. They are also suitable for dishwasher cleaning.
Cleaning the Drip Tray and Fat Box
The grill is equipped with a fat box that improves cleaning after grilling. The drip tray, lid, and fat box are suitable for dishwasher cleaning.
- Nechte gril úplně vychladnout.
- Carefully remove the drip tray and fat box.
- Empty any accumulated grease and food particles.
- Wash with warm soapy water or place in the dishwasher.
- Před opětovnou montáží se ujistěte, že jsou všechny díly suché.
Generální úklid
- Otřete vnější povrchy reklamouamp hadříkem a jemným čisticím prostředkem.
- Vyhněte se abrazivním čisticím prostředkům, které mohou poškodit povrch.
- Regularly inspect the gas hose and connections for wear or damage.
- Store the grill in a dry, protected area when not in use, preferably with a grill cover.
7. Řešení problémů
Běžné problémy a jejich řešení naleznete v tabulce níže.
| Problém | Možná příčina | Řešení |
|---|---|---|
| Hořák se nezapaluje | No gas flow, clogged burner port, faulty igniter, low gas in cylinder. | Check gas cylinder valve, ensure regulator is connected correctly, clean burner ports, check igniter electrode, replace gas cylinder. |
| Slabý plamen nebo nerovnoměrné teplo | Nízký tlak plynu, ucpané otvory hořáku, problém s regulátorem. | Check gas level, clean burner ports, inspect regulator for damage or obstruction. |
| Zjištěn únik plynu | Loose connections, damaged hose or regulator. | Immediately turn off gas supply. Tighten all connections. Replace damaged hose or regulator. Do not use until leak is resolved. |
| Požáry tuku | Excessive grease buildup in drip tray. | Clean drip tray and fat box regularly. Trim excess fat from food before grilling. |
8. Technické specifikace
| Specifikace | Hodnota |
|---|---|
| Rozměry produktu (DxŠxV) | 52 x 112 x 134 cm |
| Hmotnost produktu | 38 kg |
| Číslo modelu | 12231 |
| Typ materiálu | Legovaná ocel, nerezová ocel |
| Typ paliva | Plyn |
| Hlavní hořáky | 4 x 3 kW (Total 12 kW) |
| Boční hořák | 1 x 3 kW |
| Grill Surface Area | 64 x 40 cm |
| Speciální funkce | Na kolečkách |
| Montáž Vyžadována | Ano |
9. Záruka a podpora
For warranty information and customer support, please refer to the documentation included with your purchase or visit the official Landmann webUschovejte si doklad o koupi pro případné reklamace.
Výrobce: Landmann