VILTROX JY-610C
Viltrox JY-610C Mini Flash Light User Manual
Model: JY-610C
1. Úvod
The Viltrox JY-610C is a compact and lightweight mini speedlite designed for Canon DSLR cameras. It supports E-TTL, Manual (M), and Multi (Stroboscopic) flash modes, offering versatile lighting control. This manual provides detailed instructions for the proper setup, operation, and maintenance of your JY-610C flash unit.
2. Bezpečnostní informace
- Nerozebírejte ani se nepokoušejte o opravu jednotky sami. Obraťte se na kvalifikovaný servisní personál.
- Keep the unit dry. Do not expose it to rain or moisture.
- Používejte pouze určené AA baterie. Nekombinujte staré a nové baterie ani různé typy baterií.
- Vyhněte se přímému vystavení očí světlu blesku, zejména zblízka, protože může způsobit dočasné zhoršení zraku.
- Uchovávejte mimo dosah dětí.
3. Obsah balení
Ověřte, zda jsou v balení přítomny všechny položky:
- Viltrox JY-610C Mini Speedlite
- Přepravní taška
- User Manual (English and Chinese)
Poznámka: Baterie AA nejsou součástí balení a je nutné je zakoupit samostatně.
4. Konec produktuview
Familiarize yourself with the components and controls of the Viltrox JY-610C Mini Flash Light.
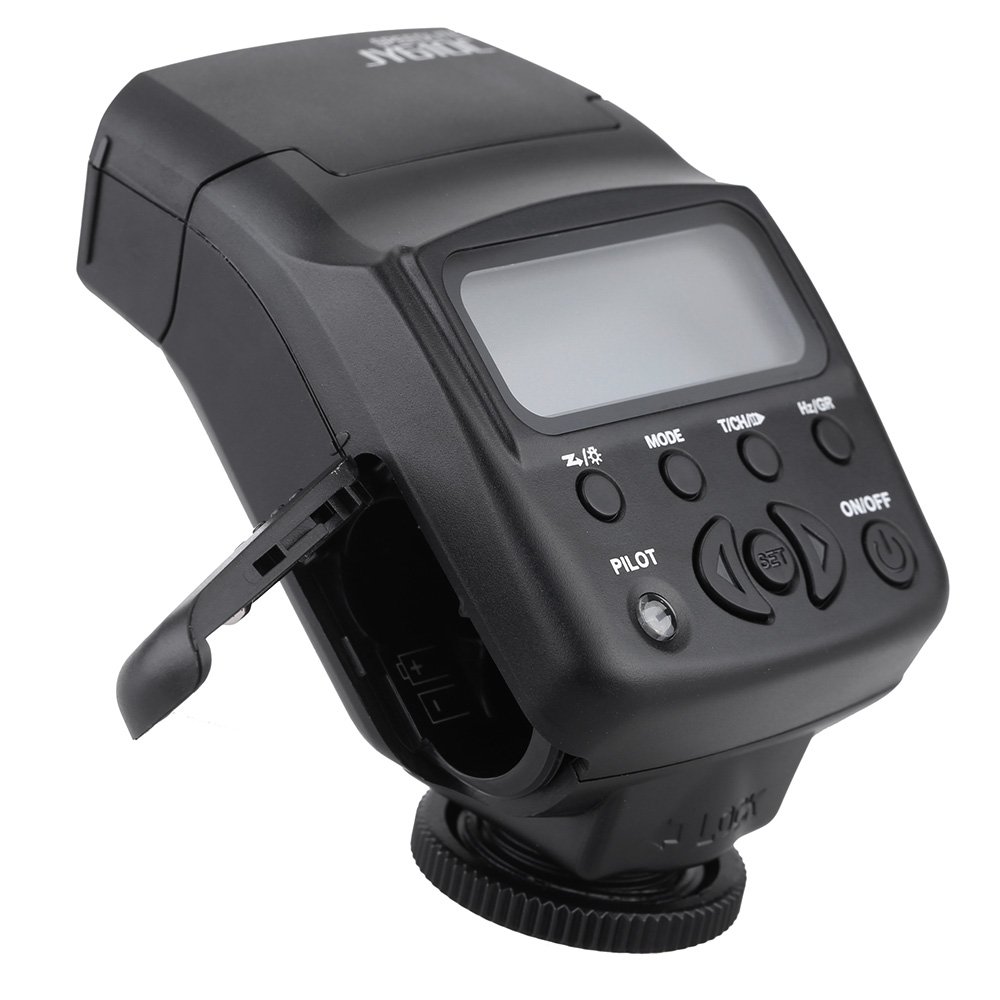
Obrázek 4.1: Přední strana View
This image shows the front of the Viltrox JY-610C flash unit, highlighting the LCD display, control buttons (Pilot, Mode, T/CH/D, Hz/GR, ON/OFF), and the hot shoe mount with its locking mechanism.

Obrázek 4.2: Nahoře View
Vrchol view of the Viltrox JY-610C, displaying the "SPEEDLITE JY610C" branding and the flash head. This perspective shows the compact design of the unit.

Obrázek 4.3: Strana View with Battery Compartment Open
This image illustrates the side of the flash unit with the battery compartment door open, revealing the slots for AA batteries. This is where batteries are inserted or replaced.
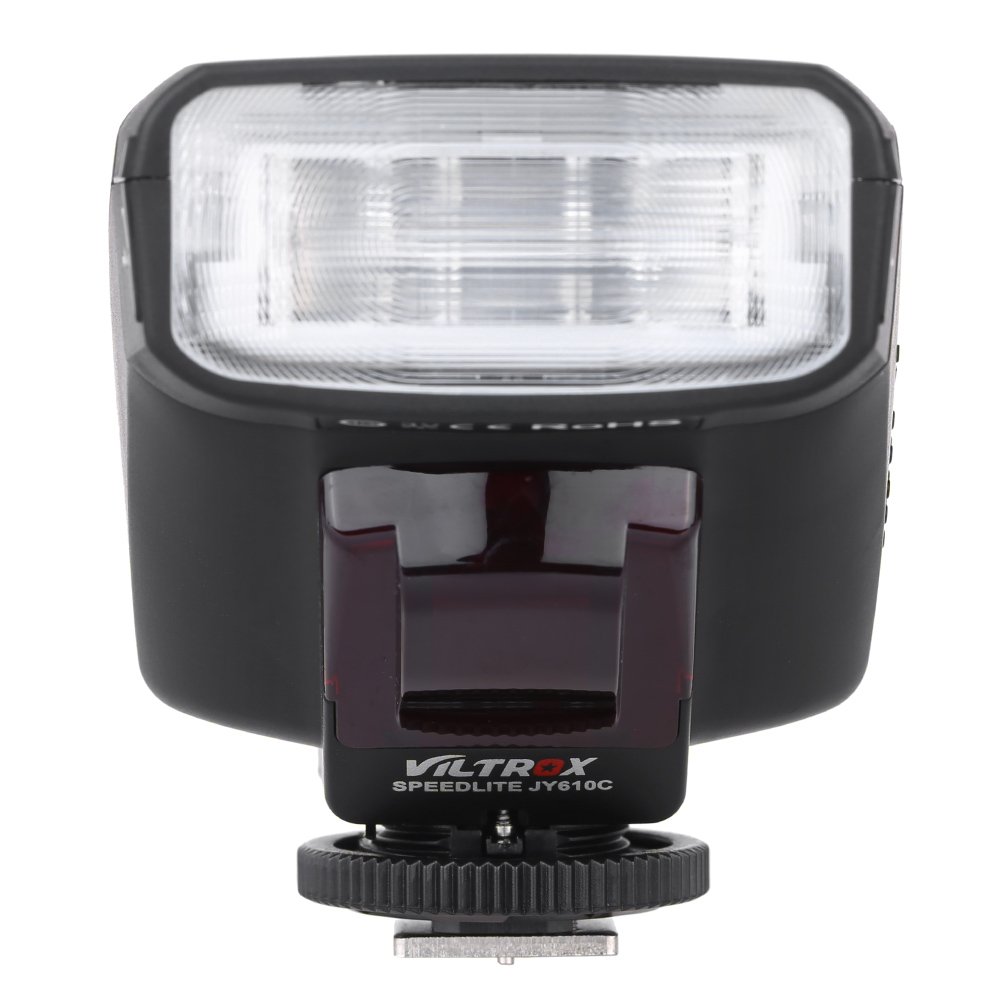
Obrázek 4.4: Zadní View
Zadní část view of the Viltrox JY-610C, showing the hot shoe connection point for mounting on a camera, the slave sensor (red window), and regulatory markings. The locking ring for secure attachment is also visible.

Figure 4.5: LCD Display Modes
This composite image shows the Viltrox JY-610C flash unit alongside close-ups of its LCD screen displaying different operational modes: Manual (M) with power setting, Multi (Stroboscopic) with frequency and flash count, and E-TTL with exposure compensation. This demonstrates the user interface for mode selection and settings adjustment.
4.1. Ovládací panel
- LCD obrazovka: Displays current settings and mode.
- Tlačítko ON/OFF: Zapíná nebo vypíná jednotku.
- Tlačítko MODE: Cycles through E-TTL, M (Manual), and Multi (Stroboscopic) flash modes.
- T/CH/D Button: Used for setting channels/groups in slave mode or other parameters.
- Hz/GR Button: Used for setting frequency in Multi mode or groups.
- PILOT Button: Test flash button. Also serves as a flash-ready indicator (red light).
- Směrová tlačítka (nahoru/dolů/doleva/doprava): Procházení nabídek a úprava nastavení.
- Tlačítko SET: Potvrzuje výběr.
5. Nastavení
5.1. Instalace baterie
- Open the battery compartment cover located on the side of the flash unit (refer to Figure 4.3).
- Insert two (2) AA-size batteries according to the polarity indicators inside the compartment.
- Bezpečně zavřete kryt bateriového prostoru.
Note: Ensure batteries are inserted correctly to prevent damage to the unit.
5.2. Montáž na kameru
- Slide the hot shoe mount of the JY-610C into the hot shoe of your Canon DSLR camera.
- Rotate the locking ring clockwise until the flash unit is securely fastened to the camera's hot shoe. Do not overtighten.
- To remove, rotate the locking ring counter-clockwise and slide the flash unit off the hot shoe.
6. Provozní režimy
Stiskněte tlačítko MODE button to cycle through the available flash modes: E-TTL, M (Manual), and Multi (Stroboscopic).
6.1. E-TTL Mode (Automatic Flash)
In E-TTL mode, the flash output is automatically controlled by the camera to achieve optimal exposure. This mode is ideal for general photography.
- Stiskněte MODE until "E-TTL" appears on the LCD screen (refer to Figure 4.5).
- You can adjust Flash Exposure Compensation (FEC) using the directional buttons (e.g., +1/3, +2/3, etc.) if needed. Press SOUBOR potvrdit.
- The flash will fire automatically based on the camera's metering.
6.2. Manual (M) Mode
Manual mode allows you to set the flash output power manually, providing precise control over lighting.
- Stiskněte MODE until "M" appears on the LCD screen (refer to Figure 4.5).
- Use the directional buttons to adjust the flash output from 1/1 (full power) to 1/128, with 22 levels of fine tuning.
- Stiskněte SOUBOR to confirm the power setting.
6.3. Multi (Stroboscopic) Mode
Multi mode fires the flash multiple times during a single exposure, creating stroboscopic effects for capturing motion.
- Stiskněte MODE until "Multi" appears on the LCD screen (refer to Figure 4.5).
- Use the directional buttons to set the flash frequency (Hz) and the number of flashes.
- Stiskněte SOUBOR potvrdit.
6.4. Slave Modes (S1/S2)
The JY-610C can function as an optical slave unit, triggered by another flash.
- Režim S1: The flash will fire in response to the first flash it detects. Suitable for manual flash triggers.
- Režim S2: The flash will ignore the pre-flash from a master E-TTL flash and fire on the main flash. Suitable for E-TTL master flashes.
- To activate slave mode, press and hold the T/CH/D button until "SLAVE" appears, then use directional buttons to select S1 or S2.
- The unit supports 4 channels in 3 groups for more complex multi-flash setups.
7. Pokročilé funkce
7.1. Exposure Compensation
In E-TTL mode, you can adjust the flash exposure compensation to fine-tune the brightness of your subject. Use the directional buttons to increase or decrease the exposure value.
7.2. Front-Curtain Sync / Rear-Curtain Sync
The JY-610C supports both front-curtain and rear-curtain sync. This setting is typically controlled via your camera's flash menu. Consult your camera's manual for specific instructions on how to enable these features.
- Front-Curtain Sync: Blesk se aktivuje ihned po otevření závěrky.
- Synchronizace na druhou lamelu: The flash fires just before the shutter closes. Useful for creating motion blur effects with the flash freezing the subject at the end of the exposure.
7.3. Adjustable Vertical Angle
The flash head can be tilted vertically to angles of 60, 75, and 90 degrees. This allows for bounce flash photography, directing the light off a ceiling or wall for softer, more natural illumination.
8. Údržba
- Čištění: K čištění blesku použijte měkký, suchý hadřík. V případě odolných nečistot použijte lehceamp Lze použít hadřík a poté suchý hadřík. Nepoužívejte silné čisticí prostředky ani rozpouštědla.
- Skladování: When not in use for extended periods, remove the batteries to prevent leakage and store the unit in its carrying bag in a cool, dry place.
- Péče o baterie: Replace batteries when the recycle time becomes excessively long or the flash-ready indicator does not light up.
9. Řešení problémů
| Problém | Možná příčina | Řešení |
|---|---|---|
| Blesk se nespouští. |
|
|
| Dlouhá doba recyklace. |
|
|
| Výkon blesku je příliš jasný/tmavý. |
|
|
| Slave mode not triggering. |
|
|
10. Specifikace
| Funkce | Detail |
|---|---|
| Směrné číslo | GN27 (ISO 100/m) |
| Režim Flash | E-TTL / M / Multi |
| Režim Slave | Slave / S1 / S2 (4 channels in 3 groups) |
| Ovládání blesku | 8 levels of output control (1/128 - 1/1), 22 levels of fine tuning |
| Indikátor připravenosti blesku | Červené pilotní světlo |
| Efektivní dosah blesku | 0.7 - 19.3m (Quick flash: 0.7 - 11.1m) |
| Recyklovat čas | 0.1 - 4 s |
| Flash Times | 100 - 680 times (with fresh AA batteries) |
| Napájení | 2 x AA baterie (nejsou součástí balení) |
| Velikost položky | 8.5 x 6 x 4.5 cm / 3.3 x 2.4 x 1.8 palců |
| Hmotnost položky | 145 g / 5.1 oz |
| Nastavitelný vertikální úhel | 60 / 75 / 90 degrees |
| Sync Support | Front-curtain sync / Rear-curtain sync |
| Kompenzace expozice | Podporováno |
11. Záruka a podpora
For warranty information and technical support, please refer to the warranty card included with your product or visit the official Viltrox webUschovejte si účtenku jako doklad o koupi pro případ reklamace.
Ask a question about this manual
Ask about setup, troubleshooting, compatibility, parts, safety, or missing instructions. Manuals+ will review the question and use this page’s manual context to help answer it.