1. Bezpečnostní informace
Vždy si přečtěte a pochopte všechna bezpečnostní varování, pokyny, ilustrace a specifikace dodané s tímto elektrickým nářadím. Nedodržení všech níže uvedených pokynů může vést k úrazu elektrickým proudem, požáru a/nebo vážnému zranění.
- Bezpečnost pracovního prostoru: Udržujte pracovní prostor čistý a dobře osvětlený. Nepořádek nebo tmavé prostory vedou k nehodám.
- Osobní bezpečnost: Always wear eye protection, hearing protection, and appropriate gloves. Do not overreach. Maintain proper footing and balance at all times.
- Použití a péče o nářadí: Netlačte na elektrické nářadí silou. Používejte správné elektrické nářadí pro danou aplikaci. Před prováděním jakýchkoli úprav, výměnou příslušenství nebo uložením elektrického nářadí odpojte zástrčku od zdroje napájení a/nebo vyjměte z elektrického nářadí baterii, pokud je odnímatelná.
- Bezpečnost přívodu vzduchu: Ensure the air supply is clean, dry, and regulated to the specified pressure. Never exceed the maximum operating pressure.
- Vystavení hluku: Prolonged exposure to high noise levels can cause hearing damage. Use hearing protection.
- Vystavení vibracím: Excessive vibration can cause hand-arm vibration syndrome. Take breaks and use anti-vibration gloves if necessary.
2. Konec produktuview
The Bahco BPM914L is a compact and powerful 1/2-inch mini impact wrench designed for various fastening and loosening applications. Its long anvil design provides extended reach for difficult-to-access fasteners.
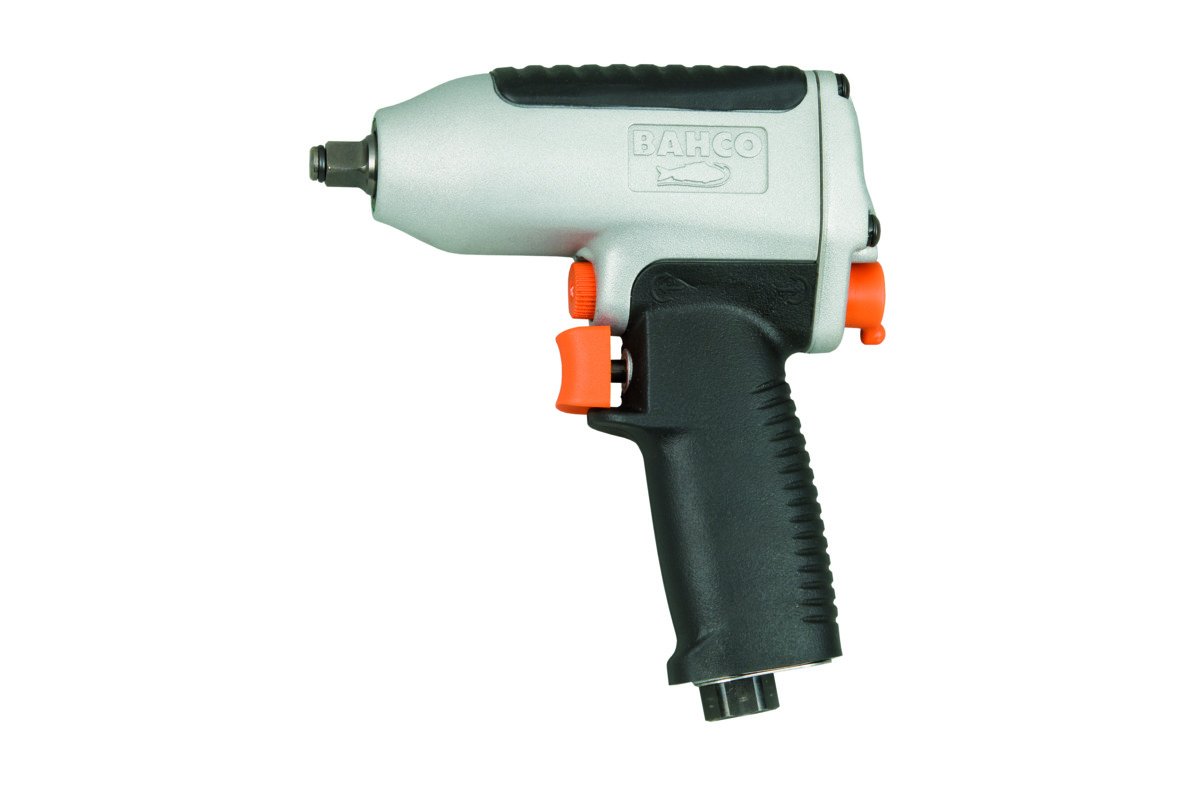
Obrázek 1: Bahco BPM914L 1/2" Mini Impact Wrench. This image shows the compact body, the 1/2-inch square drive with a long anvil, and the ergonomic handle of the impact wrench.
Komponenty:
- 1/2" čtyřhranný pohon: Pro upevnění rázových objímek.
- Long Anvil: Poskytuje prodloužený dosah.
- Spoušť: Aktivuje nástroj.
- Volič otáčení vpřed/vzad: Mění směr otáčení.
- Vstup vzduchu: Connection point for air hose.
- Výfukový port: Directs air away from the user.
3. Nastavení
- Připojení přívodu vzduchu:
- Ujistěte se, že váš vzduchový kompresor je schopen poskytnout požadovaný tlak a objem vzduchu (viz specifikace).
- Connect a suitable air hose (minimum 3/8" I.D.) to the tool's air inlet. Use thread sealant on fittings.
- Install an in-line air filter/lubricator as close to the tool as possible to ensure clean, lubricated air.
- Set the air pressure regulator on your compressor to the recommended operating pressure (typically 90 PSI / 6.2 bar).
- Nástavec zásuvky:
- Select the appropriate 1/2" drive impact-grade socket for your fastener.
- Push the socket firmly onto the square drive anvil until it locks securely.
- Always use impact-grade sockets; standard chrome sockets can shatter.
- Počáteční kontrola: Before use, ensure all connections are secure and there are no air leaks.
4. Návod k obsluze
- Výběr směru:
- Locate the forward/reverse selector switch.
- Move the switch to the "F" position for tightening (forward rotation) or "R" for loosening (reverse rotation).
- Ensure the selector is fully engaged in the desired position before operating.
- Applying the Tool:
- Umístěte objímku přímo na upevňovací prvek.
- Hold the tool firmly with both hands if possible, maintaining good balance.
- Aktivace nástroje:
- Press the trigger to start the tool. The impact mechanism will engage automatically.
- Apply steady pressure to the tool, keeping it aligned with the fastener.
- Pro zastavení nástroje uvolněte spoušť.
- Torque Control (if applicable): This model may have limited or no external torque adjustment. For critical torque applications, always use a calibrated torque wrench for final tightening.
5. Údržba
Regular maintenance ensures optimal performance and extends the life of your impact wrench.
- Mazání: Ensure the in-line lubricator is filled with appropriate pneumatic tool oil. If no lubricator is used, add a few drops of pneumatic tool oil into the air inlet before each use.
- Čištění: Udržujte nářadí čisté a bez nečistot. Otřete vnější povrch čistým hadříkem. Nepoužívejte agresivní rozpouštědla.
- Vzduchový filtr: Pravidelně kontrolujte a čistěte nebo vyměňujte vzduchový filtr v systému přívodu vzduchu, abyste zabránili vniknutí nečistot do nástroje.
- Anvil and Retainer: Inspect the anvil and socket retainer for wear or damage. Replace if necessary.
- Skladování: Store the tool in a dry, clean environment when not in use. Disconnect from the air supply.
6. Řešení problémů
| Problém | Možná příčina | Řešení |
|---|---|---|
| Nástroj nefunguje nebo má nízký výkon. |
|
|
| Air leaking from tool. |
|
|
| Tool not impacting. |
|
|
7. Specifikace
| Specifikace | Hodnota |
|---|---|
| Výrobce | Bahco |
| Číslo dílu | BPM914L |
| Číslo modelu položky | BPM914L |
| Hmotnost položky | 3.43 libry |
| Rozměry produktu | 7.87 x 2.36 x 6.69 palce |
| Položka Množství v balení | 1 |
| Baterie jsou součástí dodávky | Žádný |
| Jsou vyžadovány baterie | Žádný |
| ASIN | B00TT1MFCM |
| Datum první dostupnosti | 16. prosince 2023 |
8. Záruka a podpora
For warranty information or technical support, please refer to the documentation included with your purchase or visit the official Bahco webUschovejte si doklad o koupi pro případ reklamace.
Bahco Official Webmísto: www.bahco.com