
BoomToneDJ LT1 Lights Trust One
Boomtone DJ LT1 Lighting Stand Instruction Manual
Model: LT1 Lights Trust One | Brand: BoomToneDJ
1. Úvod
This manual provides detailed instructions for the safe and effective use of your Boomtone DJ LT1 Lighting Stand. Please read this manual thoroughly before assembly and operation to ensure proper functionality and to prevent damage or injury. The LT1 is a robust, metallic tripod lighting stand designed for suspending lighting effects, spotlights, and PAR LEDs, offering a maximum height of 3 meters and a maximum load capacity of 30 kg.
2. Bezpečnostní informace
VAROVÁNÍ: Nedodržení těchto bezpečnostních pokynů může vést ke zranění nebo poškození zařízení.
- Always ensure the stand is placed on a stable, level surface before extending or loading.
- Nepřekračujte maximální nosnost 30 kg.
- Ensure all locking mechanisms, including the tightening knob and safety pin, are securely engaged before use.
- Distribute the load evenly across the T-bar.
- Keep hands and fingers clear of moving parts during assembly and adjustment.
- Do not attempt to modify the stand in any way.
- Regularly inspect the stand for any signs of wear, damage, or loose components. Do not use if damaged.
3. Obsah balení
Ověřte, zda jsou v balení přítomny všechny komponenty:
- 1 x Boomtone DJ LT1 Tripod Stand Base
- 1 x Telescopic Center Pole
- 1 x 1-meter T-bar
- Mounting hardware (screws, bolts, washers)
- 1 x Safety Pin
4. Nastavení
Follow these steps to assemble your LT1 Lighting Stand:
- Rozložte základnu stativu: Place the stand on a flat surface. Gently pull the legs outwards until they are fully extended and the spring-loaded knurled locks secure them in the open position. Ensure the legs are spread wide for maximum stability.
- Insert the Telescopic Pole: Insert the lower section of the telescopic center pole into the top of the tripod base. Secure it by tightening the knob on the tripod base.
- Attach the T-bar: Place the 1-meter T-bar onto the top of the telescopic pole. Secure it using the provided mounting hardware (screws and bolts). Ensure it is firmly attached and does not wobble.
- Upravit výšku: Loosen the tightening knob on the telescopic pole. Carefully extend the upper section of the pole to the desired height (up to 3 meters). Once the desired height is reached, insert the safety pin through the designated hole in the pole and then securely tighten the knob. The safety pin provides an additional layer of security, preventing the pole from collapsing even if the knob loosens.

Figure 1: Fully assembled Boomtone DJ LT1 Lighting Stand with T-bar.
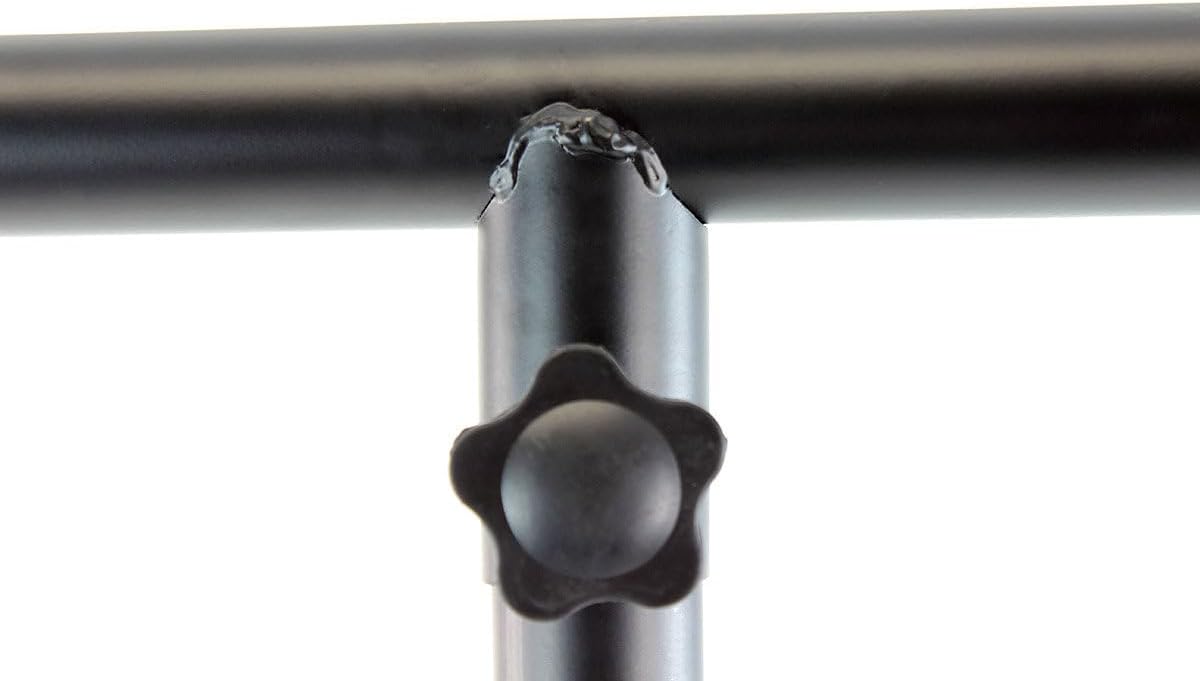
Figure 2: Detail of the T-bar connection to the main pole, showing the secure attachment point.
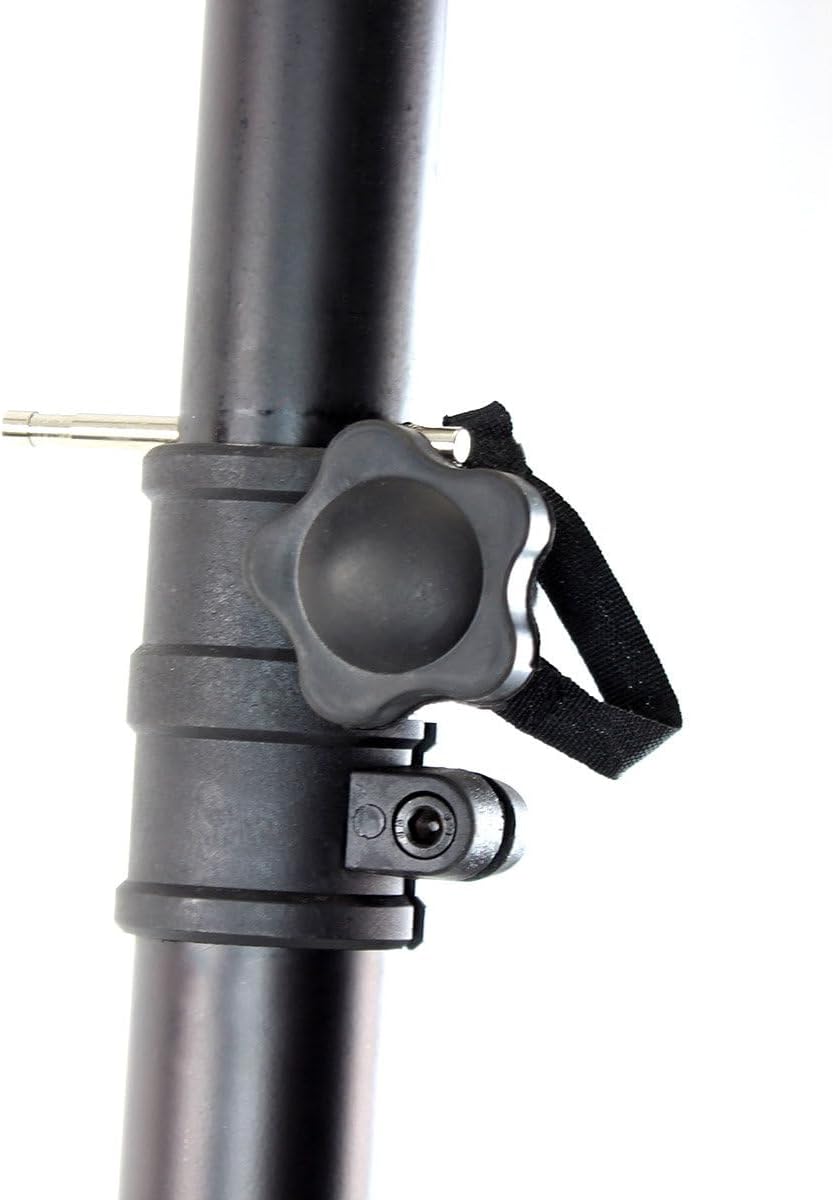
Obrázek 3: View of the height adjustment knob and the grooved safety pin, crucial for securing the pole at the desired height.

Figure 4: Detail of the robust tripod base and how the legs attach, ensuring stability.
5. Provoz
Once assembled, the LT1 stand is ready for use:
- Montážní vybavení: Attach your lighting fixtures (PAR LEDs, spotlights, effects) to the 1-meter T-bar using appropriate clamps or mounting hardware (not included). Ensure all fixtures are securely fastened.
- Rozložení zatížení: Distribute the weight of your equipment as evenly as possible across the T-bar to maintain balance and stability.
- Kontrola stability: Before leaving the stand unattended, gently shake it to confirm its stability. The non-slip rubber feet provide additional grip and protect floor surfaces.
- Adjusting Height During Use: If you need to adjust the height while equipment is mounted, ensure the load is light and always have another person support the T-bar to prevent sudden drops. Always re-engage the safety pin and tighten the knob after adjustment.
6. Údržba
Proper maintenance will extend the life of your lighting stand:
- Čištění: Wipe down the stand with a soft, dry cloth after each use to remove dust and debris. For stubborn dirt, use a slightly damp hadříkem a důkladně osušte. Nepoužívejte abrazivní čisticí prostředky ani rozpouštědla.
- Mazání: Periodically apply a small amount of silicone-based lubricant to the telescopic pole sections to ensure smooth height adjustment.
- Inspekce: Regularly check all bolts, screws, and locking mechanisms for tightness. Ensure the rubber feet are intact and not worn. Inspect the metal frame for any bends, cracks, or corrosion.
- Skladování: When not in use, fold the stand for compact storage. The folding design allows it to be stored in confined spaces. Ensure the spring-loaded knurled locks secure the legs in the folded position for transport.
7. Řešení problémů
Zde jsou některé běžné problémy a jejich řešení:
| Problém | Možná příčina | Řešení |
|---|---|---|
| Stojan je nestabilní nebo se kymácí. | Legs not fully extended; uneven surface; load not balanced; locking mechanisms loose. | Ensure legs are fully spread and locked. Move to a level surface. Redistribute load evenly. Tighten all knobs and ensure safety pin is engaged. |
| Telescopic pole difficult to adjust. | Dirt or friction in pole sections; knob too tight. | Clean pole sections. Apply silicone lubricant. Loosen knob sufficiently before adjusting. |
| T-bar is loose. | Mounting hardware not tightened. | Tighten all screws and bolts securing the T-bar to the pole. |
8. Specifikace
| Funkce | Detail |
|---|---|
| Číslo modelu | LT1 Lights Trust One |
| Výrobce | BoomToneDJ |
| Barva | Černý |
| Maximální výška | 3 metrů (9.8 stop) |
| Maximální nosnost | 30 kg (66 lb) |
| T-bar Length | 1 metrů (3.3 stop) |
| Central Tube Diameter | 38 mm (1.5 palce) |
| Hmotnost položky | 7.6 kilogramů (16.75 liber) |
| Rozměry balení | 152.5 x 19.5 x 15.5 cm (60 x 7.7 x 6.1 palce) |
| ASIN | B00H0DQJSC |
| Dostupnost náhradních dílů | Informace nejsou k dispozici |
9. Záruka a podpora
For warranty information and customer support, please refer to the documentation provided at the time of purchase or visit the official BoomToneDJ webUschovejte si doklad o koupi pro případné reklamace.
For further assistance or technical inquiries, please contact your retailer or the manufacturer's customer service department.
Ask a question about this manual
Ask about setup, troubleshooting, compatibility, parts, safety, or missing instructions. Manuals+ will review the question and use this page’s manual context to help answer it.