
Zavedení
This manual provides essential information for the safe and efficient operation of your Mitsubishi HC4000 1080p Front Projector. Please read these instructions thoroughly before using the projector and retain them for future reference. The HC4000 is designed to deliver high-definition images for home entertainment, utilizing DLP DarkChip3™ technology for detailed and color-accurate projection.
Důležité bezpečnostní informace
- Zdroj napájení: Connect the projector only to the type of power source indicated on the marking label.
- Větrání: Neblokujte větrací otvory. Zajistěte dostatečný prostor kolem projektoru pro správné proudění vzduchu.
- Teplo: Do not place the projector near heat sources such as radiators, heat registers, stoves, or other apparatus that produce heat.
- vlhkost: Nevystavujte projektor dešti nebo vlhkosti, aby nedošlo k požáru nebo úrazu elektrickým proudem.
- Lamp: Jáamp inside is under high pressure and may explode if improperly handled. Allow the lamp před výměnou vychladnout.
- Servis: Veškerý servis svěřte kvalifikovanému servisnímu personálu. Nepokoušejte se tento výrobek opravovat sami.
Obsah balení
Ověřte, zda jsou v balení přítomny všechny položky:
- Mitsubishi HC4000 Projector
- Napájecí kabel
- Dálkové ovládání s bateriemi
- Krytka objektivu
- Uživatelská příručka (tento dokument)
Nastavení
1. Projector Placement
The HC4000 can be placed on a tabletop or ceiling-mounted. Ensure the projector is positioned to achieve the desired screen size and aspect ratio. The 1.5x short-throw zoom lens allows for flexibility in placement distance. For optimal image quality, position the projector as perpendicular to the screen as possible.
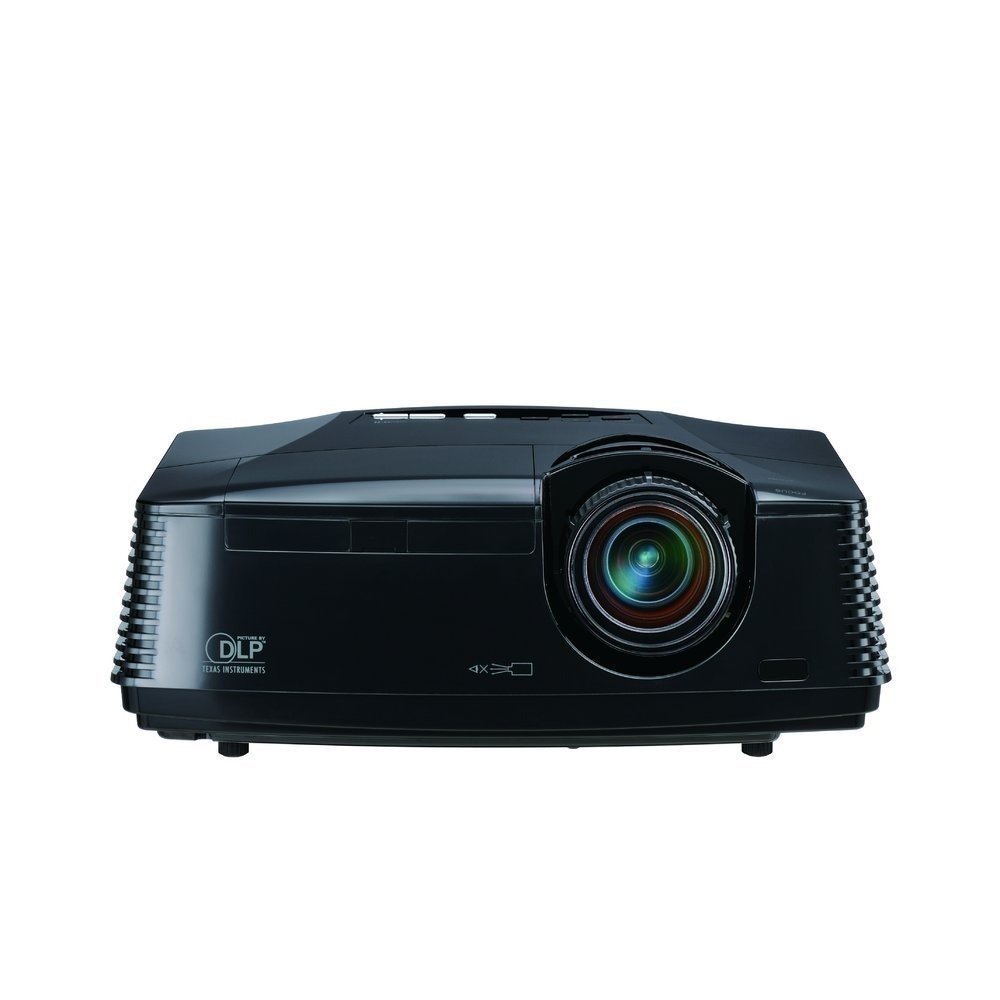
Obrázek 1: Přední strana view of the Mitsubishi HC4000 projector. This image shows the lens and front ventilation.
2. Připojení zařízení
Connect your video sources (e.g., Blu-ray player, gaming console, computer) to the projector using appropriate cables. The HC4000 features HDMI connectivity for high-definition digital signals.
- HDMI: For digital video and audio. Connect an HDMI cable from your source device to the HDMI input on the projector.
- Další vstupy: Refer to the projector's rear panel for additional input options (e.g., Component, VGA).

Figure 2: Rear panel of the Mitsubishi HC4000, illustrating various input ports including HDMI, component, and power input.
3. Připojení napájení
Plug the power cord into the projector's power inlet, then connect the other end to a grounded electrical outlet.
4. Počáteční zapnutí a nastavení obrazu
- Stiskněte tlačítko Napájení na projektoru nebo dálkovém ovladači.
- Soustředit: Otáčejte ostřícím kroužkem na objektivu, dokud nebude obraz ostrý.
- Lupa: Adjust the zoom ring to achieve the desired image size. The HC4000 features a manual zoom lens with a 1.5:1 ratio.
- Korekce lichoběžníkového zkreslení: If the image appears trapezoidal, use the keystone correction function in the projector's menu to square the image. While convenient, optical keystone correction is always preferred for best image quality.
Návod k obsluze
1. Zapnutí/vypnutí
- Zapnutí: Stiskněte tlačítko MOC button once. The indicator light will turn blue.
- Vypnutí: Stiskněte tlačítko MOC button twice. The projector will enter a cooling cycle before shutting down completely. Do not unplug the projector during the cooling cycle.
2. Výběr zdroje vstupu
Použijte VSTUP button on the remote control or projector panel to cycle through available input sources (HDMI, Component, etc.) until your desired source is displayed.
3. Nastavení obrazu
Access the projector's On-Screen Display (OSD) menu using the MENU button on the remote. Navigate using the arrow keys and confirm selections with the ENTER tlačítko.
- Jas: Adjust to control the overall lightness or darkness of the image.
- Kontrast: Adjust the difference between the lightest and darkest parts of the image. Note: Some users find that reducing the contrast from its default setting (e.g., to -18) can improve image quality by preventing whites from blooming and reducing pixelation.
- Barva/Odstín: Jemné doladění sytosti a odstínu barev.
- Ostrost: Adjust for image detail.
- Poměr stran: Select the appropriate aspect ratio (e.g., 16:9 for widescreen content, 4:3). The HC4000 supports Blu-ray 24P direct output for smooth cinema film playback.
- Anamorphic Lens Mode: If using an anamorphic lens, enable this mode for proper image scaling.
4. Lamp Režimy
The projector offers different lamp modes to balance brightness and lamp život.
- Standardní režim: Poskytuje maximální jas.
- Low Mode (Eco Mode): Reduces brightness slightly but significantly extends lamp life up to 5000 hours and lowers fan noise.
Údržba
1. Lamp Nahrazení
Projektor lamp has an estimated life of up to 5000 hours in low mode. When the lamp dosáhne konce své životnosti, zobrazí se varovná zpráva a lamp indicator light may flash. Always use a genuine Mitsubishi replacement lamp (Model: VLT-HC3800LP).
- Vypněte projektor a odpojte napájecí kabel.
- Allow the projector to cool down for at least 60 minutes. The lamp operates at high temperatures.
- Najděte lamp cover (refer to the diagram in the full service manual).
- Remove the screw(s) securing the lamp cover and gently remove the cover.
- Odšroubujte lamp modul a opatrně jej vytáhněte.
- Insert the new VLT-HC3800LP lamp modul a ujistěte se, že je správně usazen.
- Zajistěte nový lamp with its screw(s) and replace the lamp pokrýt.
- Zapojte napájecí kabel a resetujte lamp časovač v nabídce OSD projektoru.

Obrázek 3: Ilustrace lamp compartment and replacement procedure for the Mitsubishi HC4000.
2. Čištění
- Čočka: Používejte měkký hadřík bez žmolků, speciálně určený pro optické čočky. Nepoužívejte abrazivní čisticí prostředky.
- Projektor Casing: Otřete měkkým, suchým hadříkem. Na odolnou špínu použijte lehceamp hadříkem a jemným čisticím prostředkem, poté otřete dosucha.
- Větrací otvory: Periodically clean dust from the ventilation grilles using a soft brush or a low-power vacuum cleaner.
Odstraňování problémů
| Problém | Možná příčina | Řešení |
|---|---|---|
| Není zobrazen žádný obrázek |
|
|
| Obraz je rozmazaný |
|
|
| Obrázek je lichoběžníkový |
|
|
| Whites appear "blooming" or image pixelated |
|
|
| "Rainbow Effect" (brief color flashes) |
|
|
Specifikace
| Název modelu | HC4000 |
| Technologie displeje | DLP |
| Nativní rozlišení | 1920 x 1080 (1080p) |
| Jas | 1300 ANSI Lumens |
| Kontrastní poměr | 4,000:1 (on/off) |
| Lamp Život | Až 5000 hodin (nízký režim) |
| Náhrada Lamp | VLT-HC3800LP |
| Přibližovací skla | Manual Focus & Zoom (1.5:1 ratio) |
| Konektivita | HDMI |
| Hluk ventilátoru | 31dBA (standard mode) |
| Hmotnost | 3500 gramů |
| Maximální velikost obrázku | 300 palce |
| Minimální velikost obrázku | 50 palce |
Záruka a podpora
Your Mitsubishi HC4000 projector comes with the following warranty:
- Projektor: 2-Years Limited Parts and Labor Warranty.
- Lamp: 1-Year or 500-Hours lamp warranty, whichever comes first.
Please note that this item is non-returnable. Warranty claims are valid through the manufacturer. For technical support or warranty service, please contact Mitsubishi customer service directly. Contact information can typically be found on the official Mitsubishi webna webu nebo v záručním listu dodaném s vaším produktem.