
Peltor M2RX7A
Peltor Alert M2RX7A Hearing Protector User Manual
Model: M2RX7A
Zavedení
The Peltor Alert M2RX7A hearing protector is designed to provide reliable hearing protection while allowing for simultaneous radio enjoyment with high-quality stereo sound. Its advanced level-dependent function amplifies ambient sounds, ensuring you remain aware of your surroundings, and automatically attenuates harmful noise levels above 82 dB. This dual functionality protects your hearing from damage while facilitating clear communication with colleagues and the recognition of important warning signals.
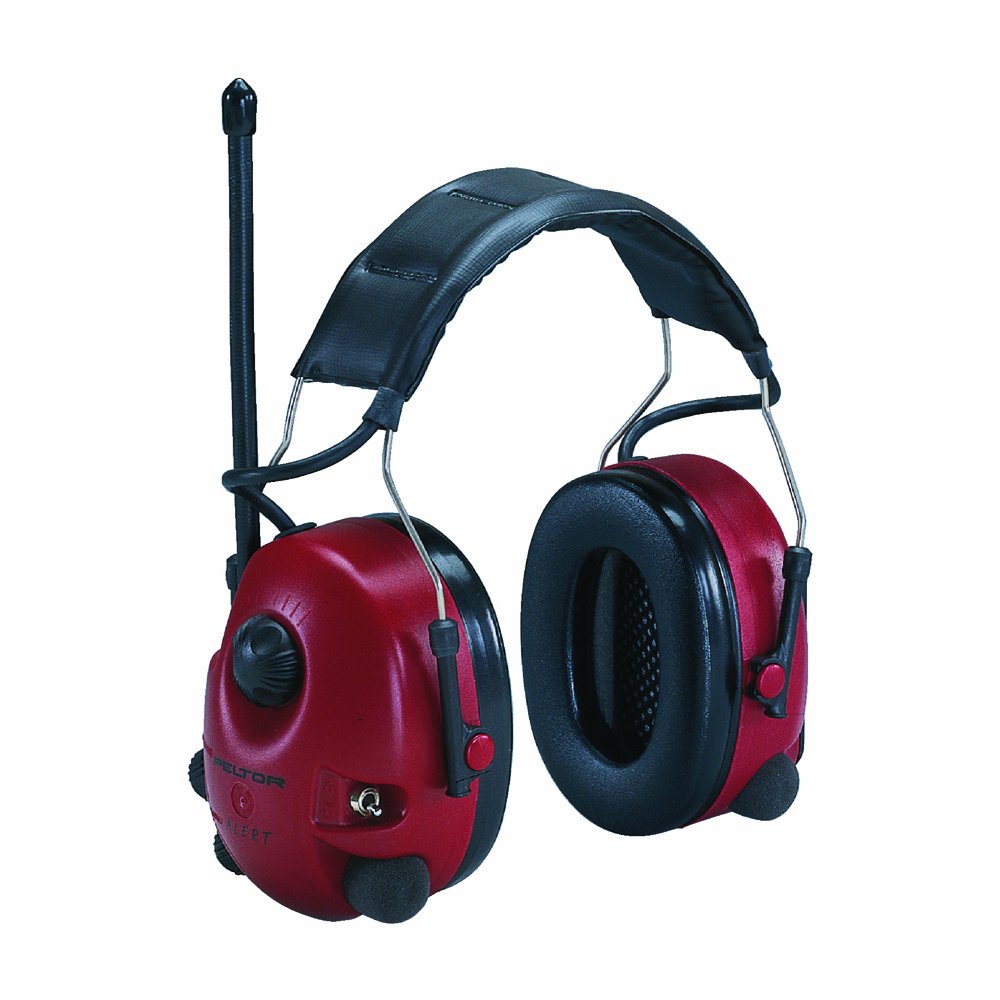
Obrázek 1: Peltor Alert M2RX7A Hearing Protector. This image shows the red earmuffs with a black padded headband and an antenna extending from the left earcup, indicating its radio functionality.
Bezpečnostní informace
Always read and understand all safety instructions before using the Peltor Alert M2RX7A. Failure to follow these instructions may result in hearing damage or other injuries.
- Ensure the hearing protector is properly fitted to achieve optimal noise attenuation.
- The level-dependent function is designed to amplify low-level sounds and attenuate high-level sounds. Do not rely solely on this function for protection in extremely high noise environments without additional precautions.
- Replace ear cushions and foam inserts regularly as per maintenance instructions to maintain hygiene and acoustic performance.
- Do not modify the hearing protector. Any modifications may compromise its protective capabilities.
- Store the device in a clean, dry place away from extreme temperatures.
Nastavení
Instalace baterie
The Peltor Alert M2RX7A requires two (2) AA batteries for operation. These are typically included with the product.
- Vyhledejte přihrádku na baterie na jednom z náušníků.
- Otevřete kryt bateriového prostoru.
- Vložte dvě baterie typu AA a dbejte na správnou polaritu (+/-) vyznačenou uvnitř přihrádky.
- Bezpečně zavřete kryt bateriového prostoru.
Nastavení čelenky
For optimal comfort and protection, adjust the headband to fit snugly over your head, ensuring the earcups fully enclose your ears.
- Slide the earcups up or down along the headband wires until the headband rests comfortably on the top of your head.
- Ensure the sealing cushions form a tight seal around your ears without excessive pressure.
Návod k obsluze
Zapnutí / vypnutí a ovládání hlasitosti
The main control knob on the earcup manages both power and volume for the radio and level-dependent function.
- To turn on, rotate the knob clockwise until you hear a click.
- Pokračujte v otáčení ve směru hodinových ručiček pro zvýšení hlasitosti.
- Otočením proti směru hodinových ručiček snížíte hlasitost.
- To turn off, rotate the knob counter-clockwise until you hear a click.
Funkce rádia
The integrated FM radio module provides entertainment while you work.
- tuning: Use the dedicated tuning knob (often located near the volume knob) to select your desired radio station.
- AM/FM Toggle: A switch is provided to select between AM and FM bands.
- Recepce: For optimal reception, ensure the antenna is extended. Reception quality may vary based on location and movement.
Level-Dependent Function (Tactical Function)
This feature allows for natural, spatial hearing by amplifying low-level ambient sounds and automatically attenuating impulse noise above 82 dB.
- Activate this function using the designated switch, typically located on the earcup.
- This allows you to hear conversations, warning signals, and machine sounds at a safe level, preventing a feeling of isolation.
Údržba
Regular maintenance ensures the longevity and effectiveness of your Peltor Alert M2RX7A hearing protector.
Čištění
- Wipe the exterior of the earcups and headband with a damp hadříkem a jemným mýdlem.
- Chránič sluchu neponořujte do vody.
- Vyhněte se používání agresivních chemikálií nebo abrazivních čisticích prostředků.
Hygiene Kits
For optimal hygiene and acoustic performance, it is recommended to replace the ear cushions and foam inserts periodically, typically every 6 months or more frequently with heavy use. Hygiene kits are available for purchase.
- Gently remove the old ear cushions and foam inserts.
- Clean the earcup surface before installing new components.
- Press the new ear cushions firmly into place, ensuring a secure fit.
- Insert the new foam inserts into the earcups.
Skladování
Store the hearing protector in a clean, dry environment, away from direct sunlight and extreme temperatures, to prevent material degradation.
Odstraňování problémů
| Problém | Možná příčina | Řešení |
|---|---|---|
| No sound from radio/device |
|
|
| Poor noise attenuation |
|
|
| Static or poor radio reception |
|
|
Specifikace
| Číslo modelu | M2RX7A |
| Značka | Peltor (3M) |
| Typ | Hearing Protector with FM Radio |
| Útlum hluku | Level-dependent function attenuates noise above 82 dB |
| Zdroj napájení | 2 x AA baterie (součástí balení) |
| Hmotnost | Cca. 363 g (0.8 lb) |
| Rozměry (D x Š x V) | 19.05 x 13.97 x 10.16 cm (7.5 x 5.5 x 4 palce) |
| Materiál | Foam (sealing cushions), Plastic (earcups), Steel (headband) |
| Barva | Víno červené |
Záruka a podpora
For warranty information, technical support, or to purchase replacement parts and hygiene kits, please contact 3M Peltor customer service or visit their official webstránky. Uschovejte si doklad o koupi pro případ reklamace.
- Výrobce: 3M
- Webmísto: www.3m.com/peltor (Please check the official 3M website for the most current contact and support information.)
Ask a question about this manual
Ask about setup, troubleshooting, compatibility, parts, safety, or missing instructions. Manuals+ will review the question and use this page’s manual context to help answer it.