
Zavedení
This manual provides detailed instructions for the installation, operation, and maintenance of your DB DRIVE A3 2250.5 Okur Series A3 Class AB 1000 Watt 5-Channel Ampzáchranář. Před instalací nebo provozem si prosím pečlivě přečtěte tento návod k obsluze, abyste zajistili správné používání a předešli poškození jednotky nebo audiosystému vašeho vozidla.
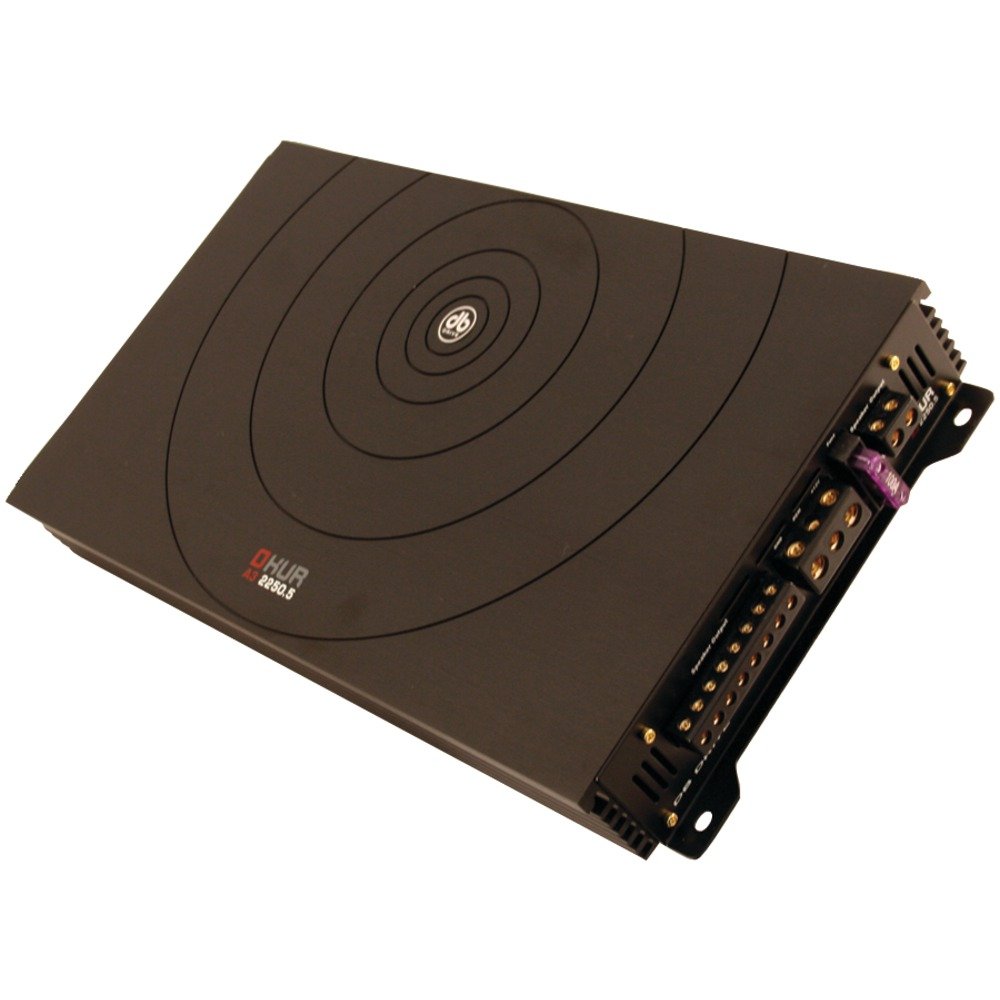
Image: DB DRIVE A3 2250.5 Okur Series A3 Class AB 1000 Watt 5-Channel Ampzáchranář. Tento obrázek ukazuje amplifier's top view, což zdůrazňuje jeho kompaktní design a branding.
Bezpečnostní informace
Vždy dodržujte následující bezpečnostní opatření, abyste předešli zranění nebo poškození:
- Disconnect the vehicle's battery negative terminal before making any power connections.
- Ensure all wiring is properly routed and secured to prevent pinching or short circuits.
- Pro připojení napájení a uzemnění použijte kabeláž vhodného průřezu, jak je uvedeno v části o instalaci.
- Nainstalujte ampUmístěte ohřívač na místo s dostatečným větráním, aby se zabránilo přehřátí.
- Vyhněte se instalaci ampzvedák v oblastech vystavených vlhkosti nebo nadměrným vibracím.
- Pokud si nejste jisti některou částí procesu instalace, poraďte se s profesionálním instalatérem autorádií.
Nastavení a instalace
1. Vybalení a kontrola
Opatrně vyjměte amplifier from its packaging. Inspect the unit for any signs of damage that may have occurred during shipping. Contact your dealer immediately if any damage is found.
2. Montáž Ampdoživotní
Choose a mounting location that is dry, well-ventilated, and secure. Common locations include under a seat, in the trunk, or behind a panel. Ensure there is sufficient airflow around the ampchladič zařízení Liferier.
- Označte si montážní otvory pomocí amppoužijte jako šablonu.
- Drill pilot holes if necessary, being careful not to damage any vehicle components.
- Zajistěte ampzvedák pomocí dodaných montážních šroubů.
3. Připojení vodičů
Proper wiring is crucial for performance and safety. Refer to the following guidelines:
- Napájení (BATT+): Connect a heavy-gauge wire (e.g., 4 AWG or 8 AWG depending on total power) directly from the positive terminal of the vehicle's battery. Install an inline fuse holder within 18 inches (45 cm) of the battery.
- Země (GND): Connect a heavy-gauge wire of the same size as the power wire to a clean, unpainted metal surface of the vehicle's chassis. Ensure a solid, low-resistance connection.
- Dálkové ovládání (REM): Connect a smaller gauge wire (e.g., 18 AWG) from the amplifier's remote terminal to the remote output of your head unit. This turns the ampzapínání a vypínání záchranáře pomocí hlavní jednotky.
- RCA vstupyPřipojte kabely RCA z předzesilovače hlavní jednotky.amp výstupy do amplifier's RCA input jacks. Ensure correct channel matching (Front L/R, Rear L/R, Sub).
- Výstupy pro reproduktory: Connect speaker wires from the amplifier's speaker terminals to your speakers. Observe correct polarity (+ to + and - to -). This is a 5-channel amplifier, typically 4 channels for full-range speakers and 1 channel for a subwoofer.
4. Gain, Crossover, and Bass Boost Settings
These settings allow you to fine-tune the amplifier's output to match your audio system and preferences.
- Gain Control: Adjust the gain to match the output voltage of your head unit. Start with the gain at minimum, then slowly increase it until you hear distortion, then back off slightly. This is not a volume control.
- Crossover (LPF/HPF):
- Nízkoprůchodový filtr (LPF): For the subwoofer channel, set the LPF to allow only low frequencies to pass (e.g., 80-120 Hz).
- High Pass Filter (HPF): For the full-range channels, set the HPF to block low frequencies from reaching your main speakers (e.g., 80-100 Hz) to prevent distortion and improve sound clarity.
- Bass Boost: Use the bass boost sparingly. Excessive bass boost can lead to distortion and speaker damage. Adjust to taste, ensuring sound remains clear.
Návod k obsluze
Po instalaci a konfiguraci amplifier will power on automatically with your head unit via the remote turn-on wire. Adjust volume and tone controls primarily from your head unit. The amplifier's settings (gain, crossover) are set during installation and generally do not require frequent adjustment.
Údržba
The DB DRIVE A3 2250.5 ampZáchranný ventil vyžaduje minimální údržbu.
- ČištěníPravidelně otírejte ampVnější povrch vysavače otírejte měkkým, suchým hadříkem, abyste odstranili prach. Nepoužívejte agresivní chemikálie ani abrazivní čisticí prostředky.
- Inspekce: Occasionally check all wiring connections to ensure they are secure and free from corrosion. Ensure the amplifier's ventilation fins are not obstructed.
Odstraňování problémů
Pokud máte problémy s vaším amplifier, viz následující běžné problémy a jejich řešení:
| Problém | Možná příčina | Řešení |
|---|---|---|
| Bez napájení / Ampzvlhčovač se nezapne |
|
|
| Žádný zvukový výstup |
|
|
| Zkreslený zvuk |
|
|
| AmpPřehřátí zařízení Liferier (ochranný režim) |
|
|
Specifikace
| Funkce | Detail |
|---|---|
| Číslo modelu | A3 2250.5 |
| Maximální výstupní výkon | 1000 wattů |
| Kanály | 5-Channel (4 stereo, 1 mono for subwoofer) |
| Ampnadživotní třída | Třída AB |
| Komponenty | Audiophile Grade |
| Rozměry (D x Š x V) | 53.59 x 30.48 x 10.92 cm |
| Hmotnost | 6.53 kg |
| Tepelné hospodářství | DRIVESINK (Okur Series A3 feature) |
Záruka a podpora
DB Drive products are designed for reliability and performance. This product is covered by a limited warranty. Please refer to the warranty card included with your product or visit the official DB Drive webpodrobné záruční podmínky naleznete na webu.
For technical support, service, or warranty claims, please contact your authorized DB Drive dealer or visit the DB Drive official webweb s kontaktními informacemi a zdroji podpory.